# Tài liệu AntBuddy - Hướng dẫn sử dụng (AntBuddy Docs - User Guide)
## Về AntBuddy
### Khách đâu chăm đó - Bán thêm không khó[](https://developers.antbuddy.com/#kh%C3%A1ch-%C4%91%C3%A2u-ch%C4%83m-%C4%91%C3%B3---b%C3%A1n-th%C3%AAm-kh%C3%B4ng-kh%C3%B3)
AntBuddy giúp nhân viên sales và đội chăm sóc khách hàng tối ưu hóa mỗi cuộc gọi với hệ thống điện thoại được xây dựng dành riêng cho công cụ kinh doanh của bạn.
#### Nhận và thực hiện cuộc gọi ở bất cứ đâu[](https://developers.antbuddy.com/#nh%E1%BA%ADn-v%C3%A0-th%E1%BB%B1c-hi%E1%BB%87n-cu%E1%BB%99c-g%E1%BB%8Di-%E1%BB%9F-b%E1%BA%A5t-c%E1%BB%A9-%C4%91%C3%A2u)
Nhanh chóng có số điện thoại mới hoặc dùng lại số cũ. Xử lý cuộc gọi khi di chuyển với ứng dụng trên desktop và di động. Tường tận mọi hoạt động với bảng quan sát.
#### Giúp phát triển đội ngũ[](https://developers.antbuddy.com/#gi%C3%BAp-ph%C3%A1t-tri%E1%BB%83n-%C4%91%E1%BB%99i-ng%C5%A9)
Dễ dàng thêm và xóa người dùng tùy thuộc vào nhu cầu của bạn. Điều hướng cuộc gọi một cách tự động và hiệu quả dựa theo lựa chọn IVR, kỹ năng của agent, múi giờ,…
#### Theo dõi hiệu quả làm việc của Agent[](https://developers.antbuddy.com/#theo-d%C3%B5i-hi%E1%BB%87u-qu%E1%BA%A3-l%C3%A0m-vi%E1%BB%87c-c%E1%BB%A7a-agent)
Nhận các phân tích nâng cao về năng suất của Agent và nhóm. Giám sát hoạt động của nhóm một cách liên tục dựa trên dữ liệu thời gian thực, tham khảo chéo dữ liệu của bạn với CRM và Helpdesk để hiểu sâu hơn về các quy trình doanh nghiệp.
# Hướng dẫn đăng ký và thanh toán (Guide to Register and Payment)
# Đăng ký và Đăng nhập (Register and Login)
# 1. Đăng ký (Register)
Làm thế nào để đăng ký tài khoản dùng thử
*(How to register for a trial account?)*
Bước 1: Vào link:
*(Step 1: Open link:* [*https://www.antbuddy.com/*](https://www.antbuddy.com/)*)*
Bước 2: Bấm vào thử ngay
*(Step 2: Click on Try it now)*
Bước 3: Màn hình đi đến trang đăng ký, có 2 cách đằng ký
*(Step 3: The screen navigates to the registration page, offering two ways to register.)*
* Đăng ký bằng Số điện thoại
(Register by phone number)
⇒ Nhập SDT tại trường SDT, sau đó bấm "tiếp tục"
*(Enter Phone number at phone number field, then click on "continue")*
* Đăng ký bằng Email
*(Register by Email)*
*⇒ Sau khi nhập Email, cần bước xác minh qua số điện thoại, sau đó bấm tiếp tục*
*(After enter Email, a phone number verification step is required. Then, click Continue.)*
Bước 4: Chọn phương thức nhận mã OTP, sau khi nhập mã OTP, bấm tiếp tục
*(Step 4: Choose the method to receive the OTP code. After entering the OTP, click Continue.)*
Bước 5: Nhập mã OTP, sau đó bấm xác nhận
*(Step 5: Entering OTP Code, then click on confirm*)
Bước 6: Nhập tên công ty
*(Step 6: Enter company name)*
Bước 7: Nhập domain công ty, sau đó bấm tiếp tục
*(Step 7: Enter company domain, then click on continue)*
Bước 8: Nhập Họ và Tên
*(Step 8: Enter Full Name)*
Bước 9: Nhập Email
*(Step 9: Enter Email)*
Bước 10: Nhập mật khẩu
*(Step 10: Enter password)*
Bước 11: Nhập xác nhận mật khẩu
*(Step 11: Enter Confirm password)*
Bước 12: Tích vào ô "tôi đã đọc và đồng ý"
*(Step 12: Check box "I have read and agree")*
Bước 13: Bấm "đăng ký"
*(Step 13: Click on "Register")*
Đây là màn hình sau khi đăng ký thành công
*(Here is a screen when successful registration)*
Sau khi đăng ký tài khoản thành công xong được đưa vào trang tích hợp kênh -> mời nhân viên -> thanh toán
*(After successfully registering an account, you will be directed to the channel integration page -> invite employees -> make a payment.)*
Để tích hợp kênh, có thể xem chi tiết tích hợp từng kênh tại mục [quản trị khách hàng Antcrm (tin nhắn đa kênh)](/tai-lieu-antbuddy-huong-dan-su-dung-antbuddy-docs-user-guide/quan-tri-khach-hang-antcrm-antcrm-customer-management/chat-da-kenh-conversation)
*(To integrate channels, you can see the details of integrating each channel in the* [*Antcrm customer management section (multi-channel messaging)*](/tai-lieu-antbuddy-huong-dan-su-dung-antbuddy-docs-user-guide/quan-tri-khach-hang-antcrm-antcrm-customer-management/chat-da-kenh-conversation)*)*
# 2. Đăng nhập (Log in)
Truy cập vào link:
*(Access this link:* [*https://www.antbuddy.com/*](https://www.antbuddy.com/)*)*
Tại đây, bạn có thể bấm vào "Đăng nhập" để đi đến trang đăng nhập
*(Here, you can click on "Đăng nhập" button to move into log in page)*
Có 2 cách đăng nhập vào tài khoản
*(There are 2 methods to log in)*
Cách 1: Đăng nhập bằng Số điện thoại
*(Method 1: Log in via phone number)*
* Nhập Số điện thoại -> Bấm tiếp tục -> Nhập mật khẩu -> Bấm "đăng nhập"
*(Enter phone number -> Click on "continue" -> Enter Password -> Click on "Login")*
Cách 2: Đăng nhập bằng Username/Email
*(Method 2: Log in via Username/Email)*
Sau khi đăng nhập thành công, màn hình sẽ đi đến trang AntCRM
*(After log in successfully, the screen will move to Antcrm page)*
# Thanh toán (Payment)
Người dùng có thể thanh toán bằng cách chọn \[Truy cập nhanh] của Thanh toán trên thanh thông báo hoặc chọn toggle tắt Chế độ dùng thử ở top menu
*(Users can make a payment by selecting \[Quick Access] for Payment on the notification bar or toggling off the Trial Mode in the top menu)*
Hoặc sau khi hết hạn dùng thử, hệ thống sẽ hiện thị thông báo “Thời gian dùng thử của bạn đã kết thúc!” và người dùng bấm vào nút “Nâng cấp ngay” để tiến hành thanh toán gói dùng thử LUCKY OMNI+
*(Alternatively, after the trial period ends, the system will display a notification: 'Your trial period has ended!' and users can click the 'Upgrade Now' button to proceed with payment for the LUCKY OMNI+ trial package.)*
Sau khi bấm Nâng cấp ngay, hệ thống dẫn tới màn hình này:
*(After clicking "Upgrade Now", the system redirects to this screen:)*
Tại màn hình thanh toán, có 2 cột thông tin:
*(On the payment screen, there are two columns of information:)*
|
(Unit price per employee / Unit price per messaging page)
|
Chu kỳ thanh toán
(Payment cycle)
|
|
Có thêm 3 gói LUCKY CAMPAIGN+, LUCKY CARE+, LUCKY GROWTH PRO+ nhưng khi chọn chỉ hiển thị thông tin chứ không thanh toán được
(Three additional packages are displayed (LUCKY CAMPAIGN+, LUCKY CARE+, LUCKY GROWTH PRO+), but selecting these packages only shows their information without the option to pay)
|
Số lượng nhân viên + Số lượng trang nhắn tin sẽ tự động điền số lượng khi người dùng đã active số lượng nhân viên/số lượng trang để sử dụng. Nếu người dùng chọn thanh toán số lượng thấp hơn với số lượng đã active thì khi bấm tiếp tục sẽ hiển thị thông báo “Thông tin không hợp lệ”
(The number of employees and messaging pages will be automatically filled based on the number already activated. If users select a quantity lower than the activated number and click Continue, a notification will appear: Invalid information)
|
| |
Số tiền tạm tính/chiết khấu/thành tiền sẽ tự động thay đổi khi người dùng thay đổi số lượng nhân viên/trang nhắn tin/chu kỳ
(The provisional amount, discount, and total amount will automatically update as users adjust the number of employees, messaging pages, or payment cycle)
|
Sau khi bấm Tiếp tục, hệ thống dẫn tới màn hình này:
*(After clicking Continue, the system redirects to this screen:)*
Tại màn hình thanh toán có 2 cột thông tin:
*(On the payment screen, there are two columns of information:)*
|
Vui lòng chọn phương thức thanh toán phù hợp và bấm Thanh toán để hoàn thành nâng cấp gói
(Please select a suitable payment method and click Pay to complete the package upgrade)
|
Tên gói
(Package name)
|
|
AntBuddy luôn đảm bảo mọi giao dịch của bạn đều được bảo mật!
(AntBuddy always ensures that all your transactions are secure!)
|
Số nhân viên
(Number of employees)
|
|
Chọn phương thức thanh toán: Quét mã VietQR hoặc Thẻ quốc tế. Hiện tại chỉ thanh toán được Quét mã VietQR. Khi vào màn hình này thì tự động chọn VietQR + không xuất hóa đơn đầu tiên, nếu người dùng muốn chọn Xuất hóa đơn thì click chọn vào đó
(Scan VietQR. When accessing this screen, VietQR is automatically selected, and 'Do not issue an invoice' is the default option. If users want to select 'Issue an invoice,' they can click to enable it)
|
Số trang nhắn tin
(Number of messaging pages)
|
| |
Thời hạn
(Duration)
|
| |
Ngày bắt đầu
(Start date)
|
| |
Ngày kết thúc
(End date)
|
| |
Tạm tính
(Provisional)
|
| |
Chiết khấu
(Discount)
|
| |
Thành tiền
(Total amount)
|
Sau khi bấm Xuất hóa đơn, hệ thống dẫn tới màn hình này:
*(After clicking Export Invoice, the system leads to this screen:)*
* Sau khi điền thông tin xong, nút “Thanh toán” sẽ cho mình chọn
*(After filling in the information, the 'Pay' button will become selectable.)*
Sau khi bấm Thanh toán, hệ thống dẫn tới màn hình này:
*(After clicking Pay, the system leads to this screen:)*
Khi bấm vào “Hướng dẫn thanh toán” sẽ hiện thị popup hướng dẫn:
*(When you click on “Payment Instructions”, a popup will appear with instructions:)*
Khi mã QR hết hạn:
*(when the QR code expires:)*
Sau khi quét mã QR xong, hệ thống dẫn tới màn hình kết quả:
*(After scan QR code done, the system redirects to the result screen:)*
* Thanh toán thành công:
* Thanh toán thất bại:
*(Payment failed:)*
# Quản trị khách hàng AntCrm (AntCrm Customer Management)
Hướng dẫn sử dụng quản trị khách hàng (AntCrm Customer Management Guide)
* Chat đa kênh(Omni channel)
* Quản trị chiến dịch xuyên kênh (Omni-channel Campaign Management)
* Chăm sóc khách hàng đa kênh hợp nhất (Unified Multi-channel Customer Care)
* etc
# Tổng quan (Dashboard)
Bảng tổng quan cung cấp cái nhìn tổng quan về hoạt động bán hàng và chăm sóc khách hàng theo thời gian thực. Doanh nghiệp dễ dàng theo dõi các chỉ số trọng yếu như:\
\&#xNAN;*Dashboard provides a real-time overview of sales and customer service activities. Businesses can easily monitor key performance indicators such as:*
* Tổng số phiên tư vấn, số đơn hàng, trạng thái chăm sóc\
\&#xNAN;*Total consultation sessions, number of orders, and customer care status*
* Hiệu suất nhân viên (thời gian phản hồi, thời gian xử lý, số phiên)\
\&#xNAN;*Staff performance (response time, handling time, number of sessions)*
* Thống kê đa kênh: Zalo, Facebook, Hotline, Website, v.v.\
\&#xNAN;*Multi-channel statistics: Zalo, Facebook, Hotline, Website, etc.*
# Chat đa kênh
Tổng quan Chat đa kênh là nơi thống kê, thu thập số liệu và cũng là nơi theo dõi tình trạng và trạng thái của đội ngũ Tư vấn viên thuộc tổ chức
*The Agent Workspace is a module for tracking, collecting, and reporting data, as well as monitoring the status and activity of the organization's support team.*
* **Tổng quan:** Cung cấp thông tin về trạng thái hoạt động, bao gồm số lượng nhân viên trực tuyến, sẵn sàng, và đang nghỉ, cũng như các chỉ số về số phiên hỗ trợ đã xử lý, thời gian phản hồi trung bình, thời gian xử lý trung bình, và trạng thái của các phiên chat theo từng (đã đóng, chưa đóng, hoặc đang chờ).\
\&#xNAN;***Overview:** Provides information on agent activity status, including the number of agents online, available, or on break. It also shows key metrics such as the number of sessions handled, average response time, average handling time, and the status of sessions (closed, open, or pending).*
* The data dashboard includes the following key sections:\
\&#xNAN;*Phần dữ liệu thống kế số liệu với các phần chính sau:*
* **Chi tiết:** Cung cấp bảng thống kê chi tiết theo kênh và từng nhân viên, hiển thị các chỉ số như:
\
\&#xNAN;***Details:** Provides a detailed report by channel and by individual agent, displaying key metrics such as:*
* Số nhân viên trực tuyến\
Online agents
* Số nhân viên sẵn sàng\
Ready agents
* Số nhân viên tạm dừng\
Break agents
* TG phản hồi đầu TB\
Average first response time
* TG xử lý TB\
Assigned sessions
* Chat đã phân công\
Number of open sessions
* Chat đã đóng\
Close sessions
* Chat chưa đóng\
Not close sessions
* Chat trong hàng đợi\
Sessions in queue
1. #### Tổng quan (Overview)
Trường thông tin (Field)
Ý nghĩa (Mean)
Số nhân viên trực tuyến Online agents
Số lượng nhân viên đang đăng nhập và hoạt động trên hệ thống Number of agents currently logged in and active on the system
Số nhân viên sẵn sàng Ready agents
Số lượng nhân viên đang đăng nhập và sẵn sàng nhận chat Number of agents currently logged in and ready to receive sessions
Số nhân viên tạm dừng Break agents
Nhân viên đang ở trạng thái nghỉ giải lao hoặc tạm dừng tiếp nhận chat Agents who are on break or temporarily paused from receiving sessions
TG phản hồi đầu TB Average first response time
Thời gian trung bình từ khi khách hàng gửi tin cuối cùng đến khi nhận phản hồi đầu tiên từ nhân viên The average time from when the customer sends the last message to when they receive the first response from an agent
TG xử lý TB Assigned sessions
Thời gian trung bình để xử lý và hoàn tất một phiên chat The average time taken to handle and complete a session
Chat đã phân công Number of open sessions
Số lượng phiên đã được phân công cho nhân viên để xử lý Number of sessions assigned to agents for handling
Chat đã đóng Close sessions
Số phiên đã xử lý xong và được kết thúc Number of sessions that have been handled and closed
Chat chưa đóng Not close sessions
Số phiên chat đang mở hoặc chưa được xử lý xong Number of sessions that are still open or unresolved
Chat trong hàng đợi Sessions in queue
Những phiên trong hàng đợi, chờ nhân viên tiếp nhận. Sessions in queue, waiting to be picked up by an agent
#### 2. Kênh (Channel)
Trường thông tin (Field)
Ý nghĩa (Mean)
Kênh
Channel
Nguồn chat của khách hàng, ví dụ như Zalo, Facebook, Live Chat, WhatsApp… The source of the customer’s session, such as Zalo, Facebook, Live Chat, WhatsApp...
Nhân viên
Agent
Tên nhân viên phụ trách xử lý phiên chat. The name of the agent responsible for handling the session
Trạng thái
Status
Trạng thái làm việc hiện tại của nhân viên: Trực tuyến (online), Sẵn sàng (ready), Tạm dừng (break) The agent’s current working status: Online, Ready, or on Break
Đã phân công
Average handling time (AHT)
Số phiên chat đã phân công cho nhân viên để xử lý The number of sessions assigned to the agent for handling
TG xử lý TB (AHT)
Average first response time
Thời gian trung bình nhân viên cần để xử lý và hoàn tất một phiên chat The average time the agent takes to handle and complete a session
TG phản hồi đầu TB (AFRT)
Assigned
Thời gian trung bình từ khi khách hàng gửi tin nhắn cuối cùng đến khi nhận được phản hồi đầu tiên từ nhân viên. The average time from when the customer sends the last message to when the agent sends the first response in the session
Đóng
Close
Số phiên chat đã được xử lý xong và đóng lại The number of sessions that have been handled and closed
Chưa đóng
Not close
Số chat thoại vẫn đang mở hoặc chưa được xử lý xong The number of sessions that are still open or not yet resolved
# Cài đặt (Settings)
# Tạo nhân viên (Create users)
### 
Bước 1. Mở trang **Thiết lập** - **Quản lý người dùng, nhóm và công ty** - **Nhân viên**
(Step 1. Open **Settings page** - **User management** - **Users)**
Bước 2. Nhấn nút **Tạo mới nhân viên**
(Step 2.Press **Create user)**
Bước 3. Nhập các thông tin yêu cầu vào popup **Tạo mới nhân viên**
(Step 3. Enter the required information into the Create a new user popup)
* Họ (Surname)
* Tên (Name)
* Email (Email)
* Username (Username)
* Mật khẩu (Password)
* Tick vào ô “Gửi email thông báo cho người dùng vừa tạo” để gửi email kèm thông tin tài khoản cho nhân viên
(Tick the box "Send notification email to newly created user" to send an email with account information to the employee)
* Tick vào ô “Đổi mật khẩu sau khi đăng nhập” để kích hoạt đổi mật khẩu khi nhân viên lần đầu đăng nhập
(Tick the box "Change password after logging in" to enable changing the password when the employee logs in for the first time).

Bước 4. Nhấn nút **Tạo mới** để hoàn tất công việc
(Step 4. Press **Create** to complete)
**Lưu ý**: Khi tạo mới user với email đã tồn tại trên hệ thống:
**(Note:** When creating a new user with email already exist:)
* Đối với trường hợp đã có tài khoản ở AntCRM và là thành viên của công ty khác thì sau khi tạo tài khoản đó sẽ được thêm vào công ty hiện tại và lấy thông tin cũ trước đó
* (In case you already have an account at AntCRM and are a member of another company, after creating that account, it will be added to the current company and the previous information will be retrieved.)
* Đối với trường hợp chưa có tài khoản AntCRM thì sau khi tạo tài khoản đó sẽ được active AntCRM, thêm vào công ty với thông tin user là thông tin nhập vào lúc tạo user trên AntCRM
* (In case you do not have an AntCRM account, after creating that account, AntCRM will be activated, and the company will be added with user information that is entered when creating a user on AntCRM.)
# Tạo nhóm (Create group)
Bước 1. Mở trang Thiết lập - Quản lý người dùng - Nhóm
(Step 1. Open settings page - User management - Group)

Bước 2. Nhấn nút **Thêm nhóm**
(Step 2.Press **Add group)**
Bước 3. Nhập tên nhóm
(Step 3. Enter group name)
Bước 4. Nhập tên/ email nhân viên để tìm kiếm và chọn nhân viên cần thêm vào nhóm
(Step 4. Enter the name/email of employee to search and choose to add the group)

Bước 5. Nhấn **Lưu**
(Step 5. Press **Save**)
Để xóa khách hàng ra khỏi danh sách, nhấn vào nút xóa và xác nhận
(To remove a customer from the list, click the remove button and confirm)

# Mời nhân viên vào công ty (Invite users to the company)
**Mời nhân viên vào công ty**
**Invite employees to the company**
Bước 1. Mở trang **Thiết lập** - **Quản lý người dùng** - **Nhân viên**
(Step 1. Open **Settings** page - **User management** - **Users**)
Bước 2. Nhấn nút **Tạo mới nhân viên**
(Step 2. Press **Create user** button)
Bước 3. Nhập email muốn mời, bấm nút **Mời nhân viên**
(Step 3. Enter the email that you want to invite and press  button)
# Quyền xem (View permissions)
Cấu hình quyền xem
**(Configure view permissions)**
#### **1.1 .** Cấu hình quyền xem cho nhân viên.
#### **(Configure viewing permissions for employees)**
Bước 1. Mở trang **Thiết lập - Quản lý người dùng, nhóm và công ty - Nhân viên**
(Step 1. Open **Settings** - **User management** - **Users)**
Bước 2. Tại danh sách nhân viên, nhấn vào tên của nhân viên cần cấu hình
(Step 2. At the user list, press the user name that you need to configure)

Trang sẽ chuyển đến trang xem thông tin và thiết lập quyền cho user đó
(The page will move to the information viewing page and set permissions for that user)
Lưu ý: Chỉ Owner và admin được cấp quyền thiết lập mới có thể nhìn thấy và truy cập tab Quyền hiển thị/Quyền hoạt động
**(Note: Only Owners and admins who are granted setup rights can see and access the display permissions/Activity permissions tab)**
**Bước 3.** Mở qua tab **Quyền hiển thị**
**(Step 3.** Open **Display permissions tab)**
Tab này sẽ hiển thị toàn bộ các trang mà bạn có thể thiết lập quyền xem, bạn có thể cấp quyền xem cho user bằng cách tick vào checkbox, và hủy quyền bằng cách bỏ tick.
(This tab will display all the pages that you can set viewing permissions for. You can grant viewing permissions to users by ticking the checkbox, and cancel permissions by unchecking them.)

Trong quá trình tick chọn các option nếu muốn trở lại như ban đầu có thể bấm Làm lại để reset lại trang cấu hình như lúc mới mở
(During the process of ticking the options, if you want to return to the original state, you can click **Reset** to reset the configuration page to the way it was when it first opened.)
**Bước 4:** Nhấn **Lưu** sau bất kỳ thay đổi
(**Step 4**: Press **Save** after any changes.)
Dưới đây là màn hình CRM mà user vừa được thiết lập ở trên có thể nhìn thấy:
(Below is the CRM screen that the user just set up above can see:)
Đối với những trang mà Owner không cấp quyền, khi user này cố truy cập vào sẽ bị cấm và có dòng cảnh báo tương tự như sau:
(For pages where the Owner does not grant permissions, when this user tries to access them, they will be banned.)
#### **1.2.** Cấu hình quyền xem dữ liệu cho nhóm
**(Configure permissions to view data for the group)**
**Bước 1**. Đăng nhập vào AntCRM bằng tài khoản Owner→ Mở trang **Thiết lập** → Mục Quản lý người dùng, nhóm và công ty → Chọn **Nhóm**
**(Step 1.** Login AntCRM by owner account→ Open **Settings** page → User management → Choose **Group)**
**Bước 2**: Click Sửa đổi tại nhóm cần cấu hình
**(Step 2:** Click Edit in the group that needs to configure)

Trang sẽ chuyển đến trang **Cập nhật nhóm** và thiết lập các quyền cho nhóm đó: Quyền hiển thị và Quyền hoạt động
(The page will go to the **Update group** page and set the permissions for that group: Display permissions and Activity permissions)

**Bước 3**. Mở qua tab Quyền hiển thị
(**Step 3.** Open Display permissions tab)

Việc thiết lập quyền xem dữ liệu cho nhóm cũng giống như thiết lập quyền xem của User ở phần [ 4.1. Cấu hình quyền xem cho nhân viên.](https://docs.google.com/document/d/1obRvIfQ2OnxchMDqqAncG9wlPILiW4We6mJchoFI9pU/edit#heading=h.8ahgnj0nf7v)
(Setting data viewing permissions for a group is the same as setting viewing permissions for Users in section[ 4.1. Configure viewing permissions for employees](https://docs.google.com/document/d/1obRvIfQ2OnxchMDqqAncG9wlPILiW4We6mJchoFI9pU/edit#heading=h.8ahgnj0nf7v))
**Bước 4.** Sau khi tick xong các ô tương ứng với quyền xem, click Lưu
(**Step 4.** After ticking the boxes corresponding to viewing permissions, click Save)
**Bước 5**. Click Áp dụng
(**Step 5.** Click on Apply)

Bước này để tùy chọn các đối tượng trong nhóm sẽ được áp dụng thiết lập. Có 2 tùy chọn là:
(This step allows you to choose which objects in the group will have the settings applied. There are 2 options:)
* **Tất cả**: Áp dụng thiết lập này cho tất cả các thành viên của nhóm
**(All**: Apply this setting to all members of the group)

* Tùy chỉnh nhân viên: Chọn nhân viên để áp dụng thiết lập
**(Some users:** Select the employee to apply the settings)

Bước 6. Click Áp dụng trên popup tùy chọn đối tượng áp dụng
**(Step 6.** Click Apply on the application object options popup)

# Quyền hoạt động (Activity permissions)
Cấu hình quyền hoạt động
**(Configure activity permissions)**
#### **1.1.** Cấu hình quyền hoạt động cho user
#### **(Configure activity permissions for user)**
**Bước 1**. Đăng nhập vào CRM bằng tài khoản Owner→ Mở trang Thiết lập → Mục Quản lí người dùng → Chọn Nhân viên
**(Step 1.** Login CRM by Owner account → Open Settings page → User management section → Choose Users)

**Bước 2**: Click vào tên nhân viên cần cấu hình
(**Step 2:** Click on user that needs to configure)

Trang sẽ chuyển đến trang xem Thông tin cá nhân và thiết lập các quyền cho user đó: Quyền hiển thị và Quyền hoạt động
(The page will move to the personal information view page and set up the permissions for that user: Display permissions and Activity permissions.)
Bước 3. Mở qua tab Quyền hoạt động
(**Step 3.** Open Activity permissions tab)

Tab này sẽ hiển thị toàn bộ các tính năng và modules trong phần mềm CRM để owner vào thiết lập quyền hoạt động cho nhân viên
(This tab will display all features and modules in CRM software so the owner can set up the activity permission for employees.)
* Cấp quyền hoạt động cho user bằng cách tick vào checkbox, và hủy quyền bằng cách bỏ tick.(Grant activity permissions for users by ticking into the checkbox, and cancel permission by removing tick.)
* Sau khi cập nhật, nhấn Lưu để lưu các thay đổi
(After updating, press Save to save the changes)
Ví dụ: Để cho phép nhân viên gửi tin nhắn SMS và Email, bạn tick vào các ô sau và nhấn Lưu:
(For example: Allow employees to send message and email, you tick the following boxes and press Save)
* Send SMS - Send with the template, Send with custom content
(Send SMS - Send with the template, Send with custom content)
* Send Email - Send with the template, Send with custom content
(Send Email - Send with the template, Send with custom content)

Có thể cấp quyền cấu hình, sửa, xóa mẫu WhatsApp cho người dùng tại trang này
(It is possible to grant users permission to **configure, edit, and delete WhatsApp templates** on this page.)

**LƯU Ý: Cần cấu hình quyền thêm, sửa, xóa Ticket theo Agent tại đây**
**(NOTE: Need to configure Setting more permission, editing, deleting Ticket by Agent here.)**
Tại trang Thiết lập quyền hoạt động - mục Ticket, click **Cấu hình thêm**
(At Setting activity permission page - Ticket section, click on **setting more**)
Trang sẽ chuyển đến trang thiết lập quyền thao tác ticket theo agent, thực hiện cấu hình và nhấn Lưu.
(The page will move to setting ticket operation permission by agent, configure and click on Save button.)
#### **1.2.** Cấu hình quyền hoạt động cho nhóm
#### **(Configure activity permissions for group)**
**Bước 1.** Đăng nhập vào AntCRM bằng tài khoản Owner→ Mở trang Thiết lập → Mục Quản lí người dùng → Chọn Nhóm
(**Step 1.** Login AntCRM by Owner account→ Open Setting page → User management section → Choose Group)

**Bước 2:** Click Sửa đổi tại nhóm cần cấu hình
(**Step 2:** Click on Edit button at group that need to configure)

Trang sẽ chuyển đến trang **Cập nhật nhóm** và thiết lập các quyền cho nhóm đó: Quyền hiển thị và Quyền hoạt động
(The page will move to **Update group** and set the permissions for that group: Display permissions and Activity permissions)

**Bước 3.** Mở qua tab Quyền hoạt động
(**Step 3**. Open Activity permissions tab)

Việc thiết lập quyền hoạt động cho nhóm cũng giống như thiết lập quyền hoạt động của User ở phần[ 5.1. Cấu hình quyền hoạt động cho user](https://docs.google.com/document/d/1obRvIfQ2OnxchMDqqAncG9wlPILiW4We6mJchoFI9pU/edit#heading=h.11s0mfbpku05).
(Setting up activity permissions for a group is the same as setting up activity permissions for users in section[ 5.1. Configure activity permission for user](https://docs.google.com/document/d/1obRvIfQ2OnxchMDqqAncG9wlPILiW4We6mJchoFI9pU/edit#heading=h.11s0mfbpku05).)
**Bước 4**. Sau khi tick xong các ô tương ứng với quyền hoạt động, click Lưu
(**Step 4.** After ticking the boxes correspond to the activity permissions, click on Save button)
**Bước 5**. Click Áp dụng
(**Step 5.** Click on Apply button)

Bước này để tùy chọn các đối tượng trong nhóm sẽ được áp dụng thiết lập. Có 2 tùy chọn là:
(This step is to customize the objects in the group to which the settings will be applied. There are 2 options:)
Tất cả: Áp dụng thiết lập này cho tất cả các thành viên của nhóm
(**All**: Apply this setting to all members of the group)

* Tùy chỉnh nhân viên: Chọn nhân viên để áp dụng thiết lập
**Some users:** Choose user to apply the setting

**Bước 6**. Click Áp dụng trên popup tùy chọn đối tượng áp dụng
(**Step 6.** Click on Apply on applicable object options popup)

# Thông tin doanh nghiệp (Company Information)
### Cấu hình thông tin doanh nghiệp (Configure Company Information)
#### Bước 1: Truy cập Cài đặt
**Step 1: Access Settings**
* Nhấn vào **biểu tượng Cài đặt (⚙️)** ở góc trên bên phải màn hình.
* Click the **Settings (⚙️)** icon at the **top-right corner** of the screen.
#### Bước 2: Chọn Thông tin doanh nghiệp
**Step 2: Go to Company Information**
* Trong menu bên trái, chọn **Thông tin doanh nghiệp**.
* In the left sidebar, select **Company Information**.
#### Bước 3: Cấu hình thông tin doanh nghiệp
**Step 3: Configure Company Information**
Tại màn hình này, bạn có thể cấu hình các thông tin sau:\
On this screen, you can configure the following information:
* **Tên công ty:** Tên của doanh nghiệp được hiển thị trong hệ thống.\
Company name: The name of the company displayed in the system.
* **Tự động đăng xuất:** Cấu hình thời gian hệ thống sẽ tự động đăng xuất người dùng nếu không có hoạt động trong một khoảng thời gian nhất định, giúp tăng tính bảo mật cho tài khoản.\
Auto logout settings: Configure the time after which the system will automatically log out the user if there is no activity, helping enhance account security.
* **Đăng xuất trên thiết bị khác khi đăng nhập thiết bị mới:** Khi bật tùy chọn này, nếu người dùng đăng nhập tài khoản trên một thiết bị hoặc trình duyệt mới, hệ thống sẽ tự động đăng xuất tài khoản đó khỏi các thiết bị hoặc trình duyệt khác.\
Log out from other devices when logging in on a new device: When this option is enabled, if a user logs in on a new device or browser, the system will automatically log out the account from other devices or browsers.
* **Logo công ty:** Logo đại diện cho doanh nghiệp được hiển thị trên giao diện hệ thống hoặc các trang liên quan. Người quản trị có thể tải lên hoặc thay đổi logo tại đây.\
Company logo: The company’s logo displayed on the system interface or related pages. Administrators can upload or change the logo here.
#### Bước 4: Lưu cấu hình
**Step 4: Save the Configuration**
* Sau khi cập nhật thông tin, **lưu lại cài đặt** để áp dụng thay đổi.
* After updating the information, **save the settings** to apply the changes.
### Cấu hình Thương hiệu (Configure Brand)
#### Bước 1: Truy cập Cài đặt
**Step 1: Access Settings**
* Nhấn vào **biểu tượng Cài đặt (⚙️)** ở góc trên bên phải màn hình.
* Click the **Settings (⚙️)** icon at the **top-right corner** of the screen.
#### Bước 2: Chọn Thông tin doanh nghiệp
**Step 2: Go to Company Information**
* Trong menu bên trái, chọn **Thông tin doanh nghiệp**.
* In the left sidebar, select **Company Information**.
#### Bước 3: Chọn tab Thương hiệu
**Step 3: Select the Brand tab**
* Nhấn vào **Thương hiệu** để xem danh sách các thương hiệu trong hệ thống.
* Click **Brand** to view the list of brands in the system.
#### Bước 4: Quản lý thương hiệu
**Step 4: Manage Brands**
Tại màn hình này bạn có thể:\
On this screen, you can:
* **Xem danh sách thương hiệu** gồm:\
**Tên thương hiệu, mã thương hiệu, số điện thoại, địa chỉ, người quản lý**.\
View the **brand list** including:\
**Brand name, brand code, phone number, address, and manager**.
* **Thêm thương hiệu mới** bằng cách nhấn **Thêm thương hiệu**.\
Add a new brand by clicking **Add Brand**.
* **Chỉnh sửa thông tin thương hiệu** bằng nút **Sửa đổi**.\
Edit brand information by clicking **Edit**.
* **Xóa thương hiệu** bằng nút **Xóa**.\
Delete a brand by clicking **Delete**.
#### Bước 5: Thêm thương hiệu
**Tên thương hiệu:** Tên của thương hiệu trong hệ thống. Đây là thông tin bắt buộc dùng để phân biệt giữa các thương hiệu khác nhau.\
**Brand name:** The name of the brand in the system. This is a required field used to distinguish between different brands.
**Mã thương hiệu:** Mã định danh của thương hiệu trong hệ thống, thường được dùng cho mục đích quản lý hoặc tích hợp hệ thống.\
**Brand code:**The unique identifier code of the brand used for management or system integration.
**DIDs:** Danh sách các số điện thoại tổng đài được gán cho thương hiệu này để nhận hoặc thực hiện cuộc gọi.\
**Direct Inward Dialing numbers:** The list of DID numbers assigned to this brand for receiving or making calls.
**Điện thoại:** Số điện thoại liên hệ của thương hiệu. Có thể thêm nhiều số nếu cần.\
**Phone number:** Contact phone numbers of the brand. Multiple numbers can be added if needed.
**Người quản lý:** Người chịu trách nhiệm quản lý thương hiệu trong hệ thống.\
**Manager:** The person responsible for managing this brand in the system.
**Nhóm phụ trách:** Nhóm người dùng được phân công phụ trách hoặc xử lý các hoạt động liên quan đến thương hiệu này.\
**Responsible group:** The user group responsible for handling activities related to this brand.
**Địa chỉ:** Địa chỉ của thương hiệu bao gồm quốc gia, tỉnh/thành phố, quận/huyện, phường/xã, số nhà và tên đường.\
**Address:** The brand’s address including country, city/province, district, ward, house number, and street.
**Hộp thư:** Email liên hệ của thương hiệu, có thể thêm nhiều địa chỉ email. \
**Email:** Contact email addresses of the brand. Multiple emails can be adde
**Website:** Trang web chính thức của thương hiệu.\
**Website:** The official website of the brand
**Logo thương hiệu:** Hình ảnh logo đại diện cho thương hiệu hiển thị trên hệ thống.
**Brand logo:** The brand’s logo image displayed in the system
**Thông tin thêm:** Phần ghi chú hoặc mô tả thêm về thương hiệu.
**Additional information:** Additional notes or description about the brand.
#### Bước 6: Lưu cấu hình
**Step 5: Save the Configuration**
* Sau khi thêm hoặc chỉnh sửa thông tin, **lưu lại để áp dụng thay đổi**.
* After adding or editing information, **save to apply the changes**.
### Cấu hình Chi nhánh (Configure Brand)
# Thao tác với task (Operations with task)
**1. Cập nhật Task**\
(**Update Task)**
Có 2 cách cập nhật Task:
(There are 2 ways to update task:)
1. Cập nhật thủ công Task\
(Update task manually)
2. Cập nhật tại trang Danh sách Tas\
(Update at task list)
**Lưu ý**: Nhân viên phải được cấp quyền mới được phép chỉnh sửa, cụ thể như sau:
**(Note:** The employees must be granted permission to edit, specifically as follows:)
* Member được cấp quyền sửa ticket sẽ có thể sửa các task:\
(Members who are granted permission to edit ticket will be able to edit tasks:)
* Task được phân công\
(Tasks are assigned)
* Task cho chính mình tạo\
(Tasks create for yourself)
* Admin được cấp quyền sửa ticket có thể chỉnh sửa các task được chia sẻ\
(Admins who are granted permission to edit ticket can edit shared tasks)
* Owner được chỉnh sửa bất kỳ task\
(Owner can edit any task.)
#### **1.1.** Cập nhật thủ công Task
#### **(Update task)**
**Bước 1**: Mở danh sách Task, nhấn vào nút Sửa đổi tại Task mà bạn muốn chỉnh sửa
**(Step 1**: Open task list, press  button at task which you want to edit)
Trang chuyển đến trang chỉnh sửa Task
(The page moves to the task editing page.)
**Bước 2**: Thay đổi các thông tin mong muốn và nhấn **Lưu**
**(Step 2:** Change the desired information and press **Save)**
Nhập và thay đổi thông tin tương tự như lúc tạo Task
(Enter and change the same information when creating task)
* Trạng thái (Status)
* Nội dung (Description)
* Phụ trách (nhóm, nhân viên) (PIC Group, employee)
* Độ ưu tiên (Priority)
* Danh mục (Category)
* Khách hàng, giao dịch liên quan (Customer, related to order)
* File đính kèm (Attach files)
* Chế độ chia sẻ (Share)
#### **2.2.** Cập nhật tại trang Danh sách Task
#### **(Update at Task list)**
Bước 1. Tại Menu bên trái, nhấp vào **Tasks** để mở trang danh sách Task
(Step 1. At the menu on the left, press **Tasks** to open task list page)
Bước 2. Nhấp vào tiêu đề của Task bất kỳ -> Cửa sổ bên phải hiện ra cho phép chỉnh sửa thông tin task (xem hình ở bước 3)
(Step 2. Press the title of any task -> The right window appears allowing editing task information (see image in step 3))
Bước 3. Thay đổi nội dung mong muốn và nhấn nút Lưu
(Step 3. Change the desired information and press Save)

### **2.** Phân công Task
### **(Assign task)**
Nhân viên có thể phân công Task cho nhân viên khác hoặc cho bản thân.
(Employees can assign Tasks to other employees or themselves.)
Có 3 cách phân công task
(There are 3 ways to assign task:)
* [Phân công tại trang thông tin Task](https://docs.google.com/document/d/1VbNKnRJDIEKxvKmjSghZRS3L8ScdofSp1kgYj4VBH2w/edit#heading=h.87q44v2lfjc8)\
([Assignment at the task information page](https://docs.google.com/document/d/1VbNKnRJDIEKxvKmjSghZRS3L8ScdofSp1kgYj4VBH2w/edit#heading=h.9vriji3f02g0))
* [Phân công Task tại trang cập nhật Task](https://docs.google.com/document/d/1VbNKnRJDIEKxvKmjSghZRS3L8ScdofSp1kgYj4VBH2w/edit#heading=h.9vriji3f02g0)\
([Assign Task at the task updating page](https://docs.google.com/document/d/1VbNKnRJDIEKxvKmjSghZRS3L8ScdofSp1kgYj4VBH2w/edit#heading=h.9vriji3f02g0))
* [Phân công tại trang Danh sách Tasks](https://docs.google.com/document/d/1VbNKnRJDIEKxvKmjSghZRS3L8ScdofSp1kgYj4VBH2w/edit#heading=h.ryo3azyei90b)\
([Assignment at the task list page](https://docs.google.com/document/d/1VbNKnRJDIEKxvKmjSghZRS3L8ScdofSp1kgYj4VBH2w/edit#heading=h.9vriji3f02g0))
* [Phân công hàng loạt Task tại trang Danh sách Tasks](https://docs.google.com/document/d/1VbNKnRJDIEKxvKmjSghZRS3L8ScdofSp1kgYj4VBH2w/edit#heading=h.oov8n8g1kdwa)\
([Assign a series of the task on the Task List page](https://docs.google.com/document/d/1VbNKnRJDIEKxvKmjSghZRS3L8ScdofSp1kgYj4VBH2w/edit#heading=h.9vriji3f02g0))
### **2.1.** Phân công tại trang thông tin Task
### **(Assignment at the tại trang thông tin Task)**
**Bước 1**. Tại Menu bên trái, nhấp vào **Tasks** để mở trang danh sách Task , nhấp vào nút Xem ở task bất kỳ
**(Step 1**. At the menu on the left, press **Tasks** to open task list page, press View button at any task
Trang chuyển hướng đến trang Chi tiết thông tin Task
(The page redirects to the task detail information page.)
**Bước 2**. Nhấn vào tên nhân viên phụ trách để mở hộp thoại chỉnh sửa
**(Step 2**. Enter the person in charge’s name to open the editing dialog box)
**Bước 3**. Chọn nhân viên mong muốn và nhấn dấu tick xanh để lưu thay đổi.
**(Step 3**. Choose the desired employee and press the green tick to save changes.)

### **2.2.** Phân công Task tại trang cập nhật Task
### **(Assign Task at the task updating page)**
**Bước 1**. Mở danh sách Task, nhấn vào nút **Sửa đổi** tại Task mà bạn muốn chỉnh sửa\
(**Step 1**. Open task list, press **Edit** button at task which you want to edit)
**Bước 2**. Tại trang Sửa đổi Task, thay đổi Phụ trách sang cho nhân viên mong muốn
**(Step 2**. At the task editing page, change person in charge to the desired employee)
**Bước 3**. Nhấn **Lưu** để lưu thay đổi.
**(Step 3**. Press **Save** to save change.)
### **2.3.** Phân công tại trang Danh sách Tasks
### **(Assign at the task list page)**
Bước 1. Tại Menu bên trái, nhấp vào Tasks để mở trang danh sách Task
(Step 1. At the menu on the left, press **Tasks** to open the task list page)
Bước 2. Nhấp vào tiêu đề của Task bất kỳ -> Cửa sổ bên phải hiện ra cho phép chỉnh sửa thông tin task (xem hình ở bước 3)
(Step 2. Press the title of any task -> The right window appears allowing editing task information (see image in step 3))
Bước 3. Thay đổi người phụ trách mong muốn và nhấn nút **Lưu**
(Step 3. Change person in charge and press **Save** button)
### **2.4.** Phân công hàng loạt Task tại trang Danh sách Tasks
### **(Assign a series of Tasks on the List page)**
Bước 1. Tại Menu bên trái, nhấp vào **Tasks** để mở trang danh sách Task
(Step 1. At the menu on the left, press **Tasks** to open Task list page)
Bước 2. Tick chọn các Task cần phân công, nhấn nút Phụ trách
(Step 2. Tick Tasks which need to assign, press **Person in charge** button)
Bước 3. Chọn đối tượng để phân công
(Step 3. Select the object to assign)
* Chọn Nhóm : “Không có” hoặc nhóm có chứa nhân viên cần chọn.\
(Select Group: “None” or the group containing the employee to be chosen.)
* Chọn Người chịu trách nhiệm là nhân viên bạn muốn phân công.\
(Choose a responsible Person as the employee you want to assign.)

### **3.** Hoàn thành Task
### **(Complete Task)**
Khi nhiệm vụ được hoàn thành xong, nhân viên cần Done task (hoàn thành Task).\
(When the task is completed, the employee needs to Done task (complete the Task).)
Có 2 cách hoàn thành:\
(There are 2 ways to complete:)
* Hoàn thành task tại trang chi tiết Task\
(Complete the task at the Task detail page)
* Hoàn thành hàng loạt Task tại trang Danh sách Tasks\
(Complete a series of tasks at the task list page)
**Lưu ý**: Chỉ nhân viên được cấp quyền mới được phép hoàn thành Task\
(**Note**: Only authorized employees are allowed to complete the Task)
Để mở lại task, có thể chỉnh sửa trạng thái task theo hướng dẫn ở phần 1. Cập nhật Task\
(To reopen the task, you can edit the task status according to the instructions in part 1. Updating the Task)
### **3.1.** Hoàn thành task tại trang chi tiết Task
### **(Complete task at the task detail page)**
Tại trang thông tin Task , nhấn vào trạng thái **DONE** để hoàn thành Task.\
(At the task information page, press the **DONE** status to complete the task.)

### **3.2.** Hoàn thành hàng loạt Task tại trang Danh sách Tasks
### **(Complete a series of tasks at the task list page)**
Bước 1. Tại Menu bên trái, nhấp vào Tasks để mở trang danh sách Task
(Step 1. At the menu on the left, press **Tasks** to open Task list page)
Bước 2. Tick chọn các Task cần hoàn thành, nhấn nút **Hoàn thành** và xác nhận hoàn thành.
(Step 2. Tick tasks which need to complete, press **Complete** and confirm completion)
### **4.** Xóa Task
### **(Delete Task)**
**Owner được phép xóa bất kỳ task**\
(**Owner is allowed to delete any task)**
**Admin được phép xóa các task được chia sẻ**\
(**Admin is allowed to delete the shared tasks)**
**Member chỉ được phép xóa task do chính member đó tạo**\
(**Member is only allowed to delete tasks created by that member)**
Mở trang **Cập nhật Task**, nhấn nút **Xóa** và xác nhận để hoàn tất
(Open **Updating task page**, press **Delete** button and confirm to complete)
### **5.** Thông báo trước khi hết hạn Task
### **(Notification before Task expires)**
Có 3 mức cảnh báo task sắp hết hạn\
(There are 3 levels of warnings for a task about to expire:)
* Trước hạn 15 phút\
(Before the deadline of 15 minutes)
* Trước hạn 10 phút\
(Before the deadline of 10 minutes)
* Trước hạn 5 phút\
(Before the deadline of 5 minutes)
Tất cả thông báo hết hạn task sẽ hiện trên màn hình cho đến khi nhân viên Xác nhận hoặc chọn Báo lại\
(All task expiration notifications will appear on the screen until the employee confirms or chooses to inform.)

Cảnh báo sẽ hiện ở giữa màn hình, kèm ID Task, nhấp vào ID task sẽ mở trang chi tiết Task cần hoàn thành.\
(A warning will appear in the middle of the screen, with the Task ID. Clicking on the task ID will open the Task details page that needs to be completed.)
# Làm thế nào để lọc và tải về danh sách Task? (How to filter and download Task list?)
I. Lọc task bằng bộ lọc cơ bản.\
(Filter tasks by using basic filters)
-------------------------------------
Bước 1. Mở trang Tasks\
(Step 1. Open Tasks page)
Bước 2. Tại bộ lọc cơ bản, thực hiện nhập/ chọn thông tin để lọc\
(Step 2. At the basic filter, enter/choose information to filter)
Bạn có thể lọc task theo: \
(You can filter task according to:)
* Task ID
* Danh mục Task\
(Task category)
* Nhân viên\
(Employee)
II. Lọc task bằng bộ lọc ở Cột thông tin\
(Filter task by using the filter in the Information Column)
-----------------------------------------------------------
Bước 1. Mở trang Tasks\
(Step 1. Open Tasks page)
Trang hiển thị danh sách Task có các cột thông tin\
(The task list display page with information columns)
Bước 2. Tùy theo thông tin bạn có mà chọn tìm kiếm theo cột đó. Bạn có thể lọc theo nhiều cột cùng lúc.\
(Step 2. Depending on the information you have, choose to search by that column. You can filter by many columns at the same time.)
AntCRM hỗ trợ tìm kiếm theo tất cả cột thông tin như: Thời hạn. Nội dung , Ngày tạo task, Phụ trách, Khách hàng liên quan, Trạng thái Task, Độ ưu tiên, Ngày phân công task.\
(AntCRM supports searching by all columns of information such as: Term. Content, Task creation date, In charge, Related customers, Task status, Priority, Task assignment date.)
Lưu ý: Mặc định hệ thống chỉ hiển thị 1 số cột thông tin, để mở thêm các cột thông tin cần thiết, bạn thực hiện theo hướng dẫn[ tại đây](https://docs.google.com/document/d/18GtLyc_qihrqTirTudO1vkoOz438pF_GVsS4dBzencw/edit#). \
(Note: By default, the system only displays a few columns of information, to open additional columns of necessary information, follow the instructions here.)
Ví dụ: bạn muốn lọc các Task có Trạng thái là “Đã đóng” và phụ trách là “Bình Lê”\
(For example, you want to filter Tasks that have status is "Closed" and responsibility is "Binh Le".”)
* Chọn trạng thái “To do” tại cột Trạng thái.\
(Choose status “To do” at the status column)
* Tiếp tục chọn nhân viên “TT Phong” tại cột Phụ trách.\
(Continue to select employee "TT Phong" in the In charge column.)
III. Tải về danh sách Tasks\
(Download task list)
--------------------
Chỉ Owner và Admin mới có quyền export Tasks\
(Only Owner and Admin have permission to export Tasks)
Bước 1. Tại danh sách task (đã lọc hoặc chưa lọc) , nhấn nút Export\
(Step 1. At the task list (filtered or unfiltered), press Export button)
Bước 2. Tùy chỉnh thông tin tải về nếu muốn:\
(Step 2. Customize download information if desired:)
* Tùy chọn trường để export: lựa chọn các cột thông tin muốn tải về\
(Field options for export: choose the information columns you want to download)
* Kiểu export: Tất cả các ticket của công ty (giới hạn là 10.000 tasks) hoặc tải về theo bộ lọc hiện tại. \
(Export type: All company tickets (limit to 10,000 tasks) or download according to current filter.)
* Tên file: nhập tên file mong muốn hoặc sử dụng tên mà hệ thống random sẵn.\
(File name: Enter the desired file name or use the name that the random system has available.)
Bước 3. Nhấn Tải về để hoàn tất công việc.\
(Step 3. Press Download to complete.)
# Hướng dẫn sử dụng tính năng tự động gửi tin nhắn SMS/ZNS khi có cuộc gọi nhỡ
## Cuộc gọi ra nhỡ:
**Bước 1:** Vào Thiết lập -> Thiết lập tổng đài -> Gửi tin nhắn với cuộc gọi nhỡ
**Bước 2:** Chọn Kích hoạt tính năng cho Cuộc gọi ra
**Bước 3**: Chọn các thiết lập liên quan
* **Danh mục:** Danh mục cuộc gọi để tự động gửi tin ra
* **Số tin nhắn tối đa/số điện thoại:** Kích hoạt để có thể giới hạn số lượng SMS/ZNS có thể gửi ra theo thời gian (ngày/tuần/tháng/năm)
* **Chọn dịch vụ gửi:** Chọn thêm mới để có thể chọn gửi từ ZNS hoặc SMS
**Bước 4:** Kéo xuống dưới cùng và ấn Lưu
\
**Cách sử dụng**: Sau khi gọi ra cho khách hàng nhỡ, agent chỉ cần chọn danh mục được thiết lập sau đó bấm lưu và đóng popup. Hệ thống sẽ kiểm tra trạng thái của cuộc gọi và gửi tin ZNS/SMS ra
## Cuộc gọi vào nhỡ:
**Bước 1:** Vào Thiết lập -> Thiết lập tổng đài -> Gửi tin nhắn với cuộc gọi nhỡ
**Bước 2:** Chọn Kích hoạt tính năng cho Cuộc gọi vào
**Bước 3:** Chọn các thiết lập liên quan
* **Hàng đợi:** Chọn hàng đợi để gửi tin ra
* **Số tin nhắn tối đa/số điện thoại:** Kích hoạt để có thể giới hạn số lượng SMS/ZNS có thể gửi ra theo thời gian (ngày/tuần/tháng/năm)
* **Chọn dịch vụ gửi:** Chọn thêm mới để có thể chọn gửi từ ZNS hoặc SMS
**Bước 4:** **Lưu**
Cách sử dụng: Sau khi khách hàng gọi vào hàng đợi nhỡ, hệ thống sẽ kiểm tra trạng thái của cuộc gọi và gửi tin ZNS/SMS ra
# Cách sử dụng tính năng Giới hạn số phiên chat tối đa cho từng nhân viên
**Mục đích:** Thiết lập được số lượng chattối đa mà mỗi nhân viên có thể nhận được phân công tự động
**Ví dụ:** Có 3 nhân viên, và muốn thiết lập
* Nhân viên A tối đa nhận được 30 chat mới/ 1 ngày hoặc 1 tuần hoặc 1 tháng
* Nhân viên B tối đa nhận được 50 chat mới / 1 ngày hoặc 1 tuần hoặc 1 tháng
* Nhân viên C tối đa nhận được 20 chat mới / 1 ngày hoặc 1 tuần hoặc 1 tháng => Nếu tuần hoặc tháng đó có số chat nhiều hơn 100 (tổng maximum 3 nhân viên được nhận) => Chat sẽ là chưa chỉ định để admin/owner vào phân công thủ công.
**Cách thiết lập trên hệ thống**
**Bước 1**: Vào Thiết lập -> Thiết lập chat đa kênh -> Thiết lập khác
**Bước 2:** Kích hoạt tính năng Giới hạn số phiên chat tối đa cho từng nhân viên
**Bước 3:** Chọn nhân viên để áp dụng quy tắc
**Bước 4:** Chọn số lượng chat tối đa, số ngày
**Bước 5:** Kéo xuống dưới cùng và nhấn **Lưu**
**Lưu ý:**
* Khi lựa chọn này tắt: Thì sẽ áp dụng số lượng tối đa cho tất cả chat cũ và mới
* Khi lựa chọn này được bật: Thì chỉ áp dụng số lượng tối đa cho chat lần đầu chat vào hệ thống
# Hướng dẫn Cấu hình điện thoại Yealink T19 E2 (Instruction to Configure Yealink T19 E2 phone)
## Set up thiết bị:
(Set up device:)
* Cắm nguồn\
(Plug in the power source)
* Cắm dây mạng (cổng Internet)\
(Plug in the network wire (Internet port))
* Cắm handset, headset (Lưu ý cắm đúng cổng).\
(Plug in handset, headset (Note be sure to plug in the correct port).)
## Network
Mặc định thiết bị sẽ dùng DHCP để lấy IP. Để xem được IP của thiết bị, vui lòng làm theo các bước sau:\
(By default, the device will use DHCP to get the IP. To view your device's IP, please follow these steps:)
## Bước 1:
**(Step 1:)**
* Đợi thiết bị khởi động hoàn tất, hiển thị màn hình chính\
(Wait for the device to boot up and display the main screen)
* Chọn Menu trên thanh công cụ\
(Choose Menu on the toolbar)
## Bước 2:
(Step 2:)
* Main Menu sẽ được hiển thị\
(Main Menu will display)
* Chọn Status (hoặc nhấn phím 1 trên Dialpad)\
(Choose Status (or press key 1 on Dialpad))
Bước 3: Kiểm tra địa chỉ IP của thiết bị IP Phone Yealink, như trong hình ví dụ bên dưới thì địa chỉ IP sẽ là 192.168.6.137\
(Step 3: Check the IP address of the Yealink IP Phone device, as in the example image below, the IP address will be 192.168.6.137)
## Cấu hình SIP account lên IP Phone
**(Configure SIP account on IP Phone)**
### Với thông tin từ device account được tạo trên AntBuddy, ví dụ:
(With information from the device account created on AntBuddy, for example:)
* Account Name: testing
* Authen ID: testing
* Authen Password: 123456
* SIP Server: qahtksungroup.anttel-pro.ab-kz-02.antbuddy.com
* Outbound Proxy: ab-kz-02.antbuddy.com
* SIP Transport: TCP
Thực hiện nhập thông tin này thiết bị IP Phone Yealink T19 E2 theo các bước sau:\
(Enter this information on the Yealink T19 E2 IP Phone device by following these steps:)
**Bước 1:** \
**(Step 1**:)
* Truy cập địa chỉ IP của IP Phone đã nhận trên trình duyệt web (browser), ví dụ ở đây là địa chỉ[ http://192.168.6.137](http://192.168.6.137/)\
(Access the IP address of the received IP Phone on the web browser, for example here is the address )
* Đăng nhập với username và mật khẩu mặc định là\
(Login by username and default password:)
* Username: admin
* Mật khẩu: admin
**Bước 2:** Chọn Mục Account\
(**Step 2**: Choose Account section)
**Bước 3:** Nhập thông tin hình bên dưới, sau đó chọn nút Confirm.\
(**Step 3**: Enter the information shown below, after choosing Confirm button.)
**Bước 4:** Sau khi chọn nút Confirm, kiểm tra thông tin đã được cập nhật (Registered), như hình là hoàn tất việc cấu hình thông tin lên IP Phone Yealink T19 E2\
(**Step 4:** After choosing Confirm button, check the updated information (Registered), as shown in the picture, you have completed configuring information on IP Phone Yealink T19 E2)
**Bước 5:** Chọn codec PCMU và PCMA là 2 codec chính cho điện thoại trong Account - Codec sau đó nhấn Confirm để lưu cấu hình\
(**Step 5**: Choose PCMU and PCMA codecs as the two main codecs for the phone in Account - Codec, after pressing Confirm to save configuration)
**Bước 6:** Chỉnh Time zone thành +7 trong Settings - Time & Date , nhấn Confirm để lưu cấu hình\
(**Step 6:** Adjust time zone to +7 in Settings - Time & Date , press Confirm to save configuration)
**Bước 7:** Cấu hình Phím nhấn để thao tác hàng đợi (Nếu không dùng kịch bản có Queue thì có thể bỏ qua bước này)\
(**Step 7:** Configure the key press for queue operations (This step can be skipped if you're not using a script with a Queue))
Chọn Dsskey:\
(Select Dsskey)
Trong SoftKey 1 , chọn Speed Dial -> Value: 8000 và Label: Login \ (In SoftKey 1 , select Speed Dial -> Value: 8000 and Label: Login )Trong SoftKey 2 , chọn Speed Dial -> Value: 8001 và Label: Logout \ (In SoftKey 2 , select Speed Dial -> Value: 8001 and Label: Logout )Trong SoftKey 3 , chọn Speed Dial -> Value: 8002 và Label: Pause \ (In SoftKey 3 , select Speed Dial -> Value: 8002 and Label: Pause )Trong SoftKey 4 , chọn Speed Dial -> Value: 8003 và Label: Resume \ (In SoftKey 4 , select Speed Dial -> Value: 8003 and Label: Resume )
Nhấn Confirm để lưu\
(press Confirm to save)
Màn hình IP Phone sau khi cấu hình\
(IP Phone screen after configuration)
# Cấu hình IP Phone Grandstream GXP 1610 (Configure IP Phone Grandstream GXP 1610)
## **1. Set up thiết bị**
**(Set up device)**
**Bước 1:** Cắm nguồn\
(**Step 1:** Plug in the power source)
**Bước 2:** Cắm dây mạng (cổng LAN)\
(**Step 2:** Plug in the network cable (LAN port))
**Bước 3**: Cắm handset, headset (Lưu ý cắm đúng cổng).\
(**Step 3**: Plug in the handset and headset (Be sure to plug in the correct port).
**Bước 4:** Lấy địa chỉ IP\
(**Step 4:** Get IP address)
Mặc định thiết bị sẽ dùng DHCP để lấy IP. Để xem được IP của thiết bị:\
(By default, the device will use DHCP to get the IP. To view the IP of the device:)
* Đợi thiết bị khởi động hoàn tất.\
(Wait for the device to boot up completely.)
* Nhấn phím NextScr 2 lần\
(Press NextScr key 2 times)
## 2. Truy cập WebAdmin
**(Access WebAdmin)**
Sau khi có được IP của thiết bị, chúng ta có thể đăng nhập vào trang quản lý bằng cách: vào địa chỉ IP trên trình duyệt (ví dụ: ở đây là
(After getting the device's IP, we can log in to the management page by: entering the IP address on the browser (for example, here is ))
Đăng nhập vào user mặc định: admin/admin\
(Login to the default user: admin/admin)
Sau đó nhận được yêu cầu thay đổi password\
(Then receive a request to change the password)
Ví dụ : thay đổi thành admin1610 => nhấn Save.\
(For example: change to admin1610 => click Save.)
Sau khi đăng nhập thành công, bạn sẽ được chuyển vào trang cấu hình sau:\
(After successfully logging in, you will be redirected to the following configuration page:)
## 3. Cấu hình SIP account
**(Configure SIP account)**
Để điền thông tin account ta click chọn ACCOUNTS -> Account 1 -> General Settings \
(To fill in account information, click om ACCOUNTS -> Account 1 -> General Settings)
Điền thông tin của SIP account được cấp tương ứng như sau: \
(Fill in the corresponding SIP account information as follows:)
## General Settings
**(General Settings)**
\
Basic Settings : Chọn giao thức SIP transport là TCP, Register Expiration giảm từ 60 về 5\
(Basic Settings : Choose the SIP transport protocol as TCP, Register Expiration decreases from 60 to 5)
Audio Settings : chọn PCMA or PCMU\
(Audio Settings : choose PCMA or PCMU)
Date and Time:
Kiểm tra
Chọn STATUS xem mục "SIP Registration" hiện "YES" màu xanh như hình : \
(Choose STATUS view "SIP Registration" section appear "YES" green color like the image:)
Giao diện Ip Phone :\
(Ip Phone interface:)
# Thiết lập cuộc gọi
# Cài đặt các trường bắt buộc trong Call Popup (Set up required information fields in Call Popup)
Thêm tính năng thiết lập trường thông tin bắt buộc trong Call Popup. Cho phép user lựa chọn trường thông tin nào bắt buộc hoặc không bắt buộc
Bước 1: Vào Thiết lập -> chọn Thiết lập tổng đài -> chọn Cửa sổ cuộc gọi
Bước 2: Tick vào ô Trường bắt buộc mong muốn
Bước 3: Lưu
Giao diện Popup cuộc gọi sau khi chọn trường bắt buộc
Lưu ý: Khi chọn trường bắt buộc (ô viền đỏ), user phải nhập thông tin cho trường đó thì mới có thể Lưu/Đóng Popup
# Yêu cầu gọi lại
# Cấu hình phân công tự động YCGL chưa được phân công
## Hướng dẫn sử dụng:
### 1. Giới thiệu
Tính năng Cấu hình phân công tự động YCGL cho phép hệ thống tự động gán nhân sự xử lý các yêu cầu gọi lại (YCGL) chưa được phân công.\
Điều này giúp:
* Tránh bỏ sót YCGL phát sinh ngoài giờ làm việc hoặc trong giờ nhưng chưa có nhân sự phù hợp.
* Đảm bảo mọi yêu cầu đều được xử lý đúng người, đúng nhóm.
### 2. Vị trí tính năng
* Vào menu: Thiết lập → Thiết lập tổng đài → Thiết lập Yêu cầu gọi lại.
* Tại mục Cấu hình thời gian phân công tự động các yêu cầu gọi lại chưa phân công.
### 3. Các bước thao tác
#### Bước 1: Truy cập màn hình cấu hình
* Đăng nhập hệ thống bằng tài khoản quản trị (Admin).
* Vào Thiết lập → Thiết lập tổng đài → Thiết lập Yêu cầu gọi lại.
* Thiết lập phân công yêu cầu gọi lại như bình thường
* Kéo xuống phần Cấu hình thời gian phân công tự động các yêu cầu gọi lại chưa phân công.
#### Bước 2: Thiết lập mốc thời gian
* Tại ô Thời gian phân công, chọn mốc giờ mong muốn (ví dụ: 8:00).
* Nhấn nút để thêm nhiều mốc giờ (ví dụ: 8:00, 8:30, 14:00).
* Để xóa mốc giờ không cần thiết → nhấn nút xoá màu đỏ.
#### Bước 3: Kích hoạt tính năng

* Bật công tắc Kích hoạt (chuyển sang trạng thái ON).
* Nhấn Lưu để hoàn tất thiết lập.
### 4. Nguyên lý hoạt động
* Khi đến mốc giờ đã cấu hình, hệ thống sẽ:\
1\. Rà soát toàn bộ YCGL chưa phân công.
2\. Tự động phân công cho nhân sự theo quy luật đã thiết lập trước (tuần tự hoặc ngẫu nhiên).
3\. Áp dụng cho nhân viên trực tuyến hoặc tất cả nhân viên trong nhóm tùy cấu hình.
* Nếu sau mốc đầu tiên vẫn còn YCGL chưa được gán, hệ thống sẽ tiếp tục xử lý tại các mốc tiếp theo.
### 5. Ví dụ minh họa
* Admin cấu hình:
* 8:00
* 8:30
* Tình huống:
* Trong ca đêm, có 10 YCGL phát sinh nhưng chưa được gán vì không có nhân viên trực.
* 8:00 sáng hôm sau → hệ thống tự động phân công 10 YCGL cho nhân sự trực ca sáng.
* 8:30 → nếu còn YCGL nào chưa gán (ví dụ: 8h không có nhân viên nào Online) → hệ thống tiếp tục phân công lại theo quy tắc.
### 6. Lưu ý
* Có thể cấu hình nhiều mốc thời gian trong ngày để tối ưu xử lý.
* Hệ thống sẽ tuân theo chế độ phân công đã chọn trong phần thiết lập YCGL (tuần tự hoặc ngẫu nhiên).
* Chỉ khi nút Kích hoạt bật ON thì tính năng mới có hiệu lực.
📌 Với hướng dẫn này, admin có thể dễ dàng chủ động cấu hình và đảm bảo mọi YCGL đều được xử lý kịp thời.
# Popup cuộc gọi (Call Popup)
# Popup cuộc gọi là gì? Cách thiết lập popup cuộc gọi (What is a call popup? How to set up call popup)
I. Popup cuộc gọi là gì?\
(I. What is a call popup?)
--------------------------
Trong thời đại 4.0, có rất nhiều phương tiện để tiếp cận và chăm sóc khách hàng như SMS, website, Facebook, Zalo, Quảng cáo và các mạng xã hội khác. Nhưng việc chăm sóc khách hàng qua điện thoại vẫn luôn là sự lựa chọn hàng đầu cho các doanh nghiệp hiện nay. Còn gì hoàn hảo hơn khi bạn vừa có thể gọi điện chăm sóc khách hàng, vừa cập nhật được thông tin khách hàng yêu cầu cũng như xem lại thông tin khách hàng ngay lúc gọi, không những thế bạn còn có thể tạo nhanh phiếu yêu cầu với các thông tin đó chỉ với thao tác đơn giản, đó là những gì mà AntCRM mang lại cho bạn với Popup cuộc gọi.\
(In the 4.0 era, there are many media to reach and take care of customers such as SMS, websites, Facebook, Zalo, Advertising and other social networks. But customer care by phone is still the top choice for businesses today. What could be more perfect than being able to call customer service, update requested customer information as well as review customer information right at the time of the call? Not only that, you can also quickly create request tickets with the information with just a simple operation, that's what AntCRM brings you with Call Popup.)
II. Cách thiết lập popup cuộc gọi\
(II. How to set up call popup)
------------------------------
* AntCRM hỗ trợ popup cuộc gọi vào , ra. \
(AntCRM supports popup of incoming and outgoing calls.)
* Cho phép tùy chỉnh tắt/ bật popup gọi cho nhân viên bất kỳ\
(Allows you to customize the call popup to turn on/off for any employee)
* Cho phép tùy chỉnh tính ngày chăm sóc khách hàng chỉ với những cuộc gọi thành công\
(Allows you to customize customer service days for only successful calls)
* Bạn có thể thiết lập loại khách hàng được tạo mới (lead/contact/account), nhãn mặc định và nguồn mặc định để gán cho các khách hàng đó.\
(You can set up newly created account types (lead/contact/account), default labels, and default sources to assign to those accounts.)
* Tùy chỉnh hiển thị các tab thông tin của khách hàng liên quan như: Lịch sử cập nhật, tương tác, Ghi chú, Email, Cuộc gọi, SMS, nhiệm vụ, giao dịch, Ticket…\
(Customize the display of relevant customer information tabs such as: Update history, interactions, Notes, Email, Calls, SMS, tasks, orders , Tickets…)
* Cầu hình danh mục loại cuộc gọi giúp việc tạo ticket trở nên dễ dàng và chính xác hơn khi được liên kết với danh mục ticket, SLA và nhóm phân công . \
(Call type category configuration makes ticket creation easier and more accurate when linked to ticket categories, SLAs, and assignment groups .)
* Tùy chỉnh thiết lập cảm xúc của cuộc gọi\
(Customize call emotion settings)
Dưới đây là các hướng dẫn cụ thể.\
(Below are specific instructions.)
### 1. Thiết lập Cảm xúc cuộc gọi (1. Setup call emotion)
Mở trang Thiết lập → Thiết lập Tổng đài → Cảm xúc cuộc gọi\
(Open settings page→ Call settings → Call emotion)
Nhập tên loại cảm xúc và nhấn Thêm\
(Enter name of the emotion type and press Add)
Để chỉnh sửa loại cảm xúc, nhấn vào nút chỉnh sửa, chỉnh sửa tên loại cảm xúc và nhấn Lưu\
(To edit the emotion type, press Edit button, edit name of the emotion type and press Save)
Để xóa loại cảm xúc, nhấn vào nút Xóa và xác nhận xóa.\
(To delete the emotion type, press Delete button and confirm the deletion)
2\. Thiết lập Popup cuộc gọi\
(2. Setup call Popup)
---------------------
Mở trang Thiết lập cuộc gọi → Cửa sổ cuộc gọi → Cuộc gọi vào( và Cuộc gọi ra)\
(Open Call settings page → Call Popup → Incoming call ( and outgoing call))
#### Bật/tắt popup gọi vào/ra: (Turn on/off popup of incoming/outgoing call:)
Gạt sang phải/trái nút Bật ở phần thiết lập Cuộc gọi vào/ra. Nhấn Lưu ở cuối trang để áp dụng thay đổi\
(Swipe the Enable button right/left in the In/Out Call settings section. Press Save at the bottom of the page to apply the changes)
#### Tùy chỉnh tắt popup đối với một số nhân viên: (Customize to turn off popup for some agents:)
Thực hiện bật cuộc gọi vào/ra, tick vào ô “Chặn popup cuộc gọi đối với người dùng trong danh sách” và chọn nhân viên áp dụng chặn popup gọi. \
(To turn on incoming/outgoing calls, tick the box "Block popup calls for users in the list" and choose the agent to apply to block call popups.)
Nhấn Lưu ở cuối trang để áp dụng thay đổi\
(Press Save at the bottom of the page to apply changes.)
#### Tùy chỉnh chỉ bật popup đối với một số nhân viên: (Customize to enable popup only for certain agents:)
Thực hiện bật cuộc gọi vào/ra, tick vào ô “ Chỉ những người dùng trong danh sách được popup cuộc gọi” và chọn nhân viên áp dụng nhận popup gọi.\
(To turn on incoming/outgoing calls, tick the box "Only users in the list will receive call popups" and select the applicable staff to receive call popups.)
Nhấn Lưu ở cuối trang để áp dụng thay đổi\
(Press Save at the bottom of the page to apply changes.)
#### Thiết lập loại khách hàng được tạo tự động: Set up automatically created customer types:
Tại phần Mặc định lưu trữ dữ liệu mới trên call popup, tick vào loại khách hàng mà bạn muốn hệ thống tạo mới, nhấn Lưu ở cuối trang để áp dụng thay đổi\
(In the Default store new data on the call popup section, tick the type of customer you want the system to create, click Save at the bottom of the page to apply the changes.)
Có 3 loại là : Lead, Contact và Account\
(There are 3 types: Lead, Contact and Account)
#### Thiết lập nhãn và nguồn gắn mặc định cho các khách hàng tạo mới tự động:
Chọn nhãn mặc định và nguồn mặc định, nhấn Lưu ở cuối trang để áp dụng thay đổi
#### Thiết lập hiển thị Tab trên popup cuộc gọi
Mở trang Thiết lập cuộc gọi → Popup cuộc gọi → Thiết lập hiển thị Tab trên popup cuộc gọi
Tick chọn các tab thông tin mà bạn muốn hiển thị trên popup cuộc gọi. Nhấn Lưu ở cuối trang để áp dụng thay đổi
Dưới đây là popup cuộc gọi theo thiết lập hiển thị các tab thông tin
3\. Thiết lập Danh mục loại cuộc gọi
#### 3.1. Tạo Danh mục loại cuộc gọi
Bước 1. Mở trang Thiết lập cuộc gọi → Danh mục loại cuộc gọi
Bước 2. Nhấn nút Thêm
Bước 3. Điền các thông tin cần thiết, được mô tả như bên dưới
* Name: Tên của Danh mục
* Parent Category: là Danh mục cha, có 3 trường hợp sử dụng như sau:
* Đối với nhu cầu tạo Danh mục: không chọn Parent Category
* Đối với nhu cầu tạo Sub Danh mục cho Danh mục X: chọn Parent Category là “Danh mục X”
* Đối với nhu cầu tạo Sub sub Danh mục của Sub danh mục Y: chọn Parent Category là “Danh mục Y”
* Mapping Ticket Category: là Danh mục ticket được liên kết với danh mục loại cuộc gọi. Danh mục ticket này đã được liên kết sẵn với nhóm và SLA phù hợp với tính chất loại công việc.
Lưu ý:
* Danh mục được liên kết với nhau phải cùng cấp : nghĩa là danh mục loại cuộc gọi cấp 1 chỉ được liên kết với danh mục ticket cấp 1, tương tự với cấp 2 và 3.
* Bạn phải liên kết danh mục cấp cao hơn thì mới có thể liên kết danh mục cấp thấp: nghĩa là nếu bạn muốn liên kết danh mục loại cuộc gọi cấp 3 với danh mục ticket, bạn phải liên kết danh mục loại cuộc gọi cha (cấp 1 và 2) với danh mục ticket chat (cấp 1 và 2) trước.
* Tùy chọn áp dụng danh mục cuộc gọi với popup gọi vào hoặc gọi ra
Parent Category: là Danh mục cha, có 3 trường hợp sử dụng như sau:
Bước 4. Nhấn Tạo mới để hoàn tất việc tạo danh mục loại cuộc gọi.
#### 3.2. Chỉnh sửa danh mục loại cuộc gọi.
Nhấn vào nút chỉnh sửa của danh mục mà bạn muốn chỉnh sửa
Thay đổi nội dung theo mong muốn và nhấn Lưu
#### 3.2. Xóa Danh mục loại cuộc gọi
Nhấn vào nút xóa của danh mục mà bạn muốn xóa và xác nhận
Lưu ý: khi xóa danh mục cha chứa danh mục con, danh mục con cũng sẽ bị xóa theo.
# Sử dụng popup cuộc gọi (Using call popup)
### 1. Mở xem thông tin chi tiết khách hàng (1. Open to view detailed customer information)
Tại popup cuộc gọi, nhấn vào icon loại khách hàng hàng trên popup để chuyển đến xem chi tiết thông tin khách hàng.\
(In the call popup, click on the customer type icon on the popup to go to view detailed customer information.)
### 2. Chỉnh sửa thông tin khách hàng trên popup cuộc gọi (2. Edit customer information on the call popup)
Popup cuộc gọi hỗ trợ chỉnh sửa các thông tin cơ bản của khách hàng như:\
(Call popup supports editing basic customer information such as:)
* Tên\
(Name)
* Họ\
(Surname)
* Địa chỉ\
(Address)
* Email\
(Email)
Không hỗ trợ chỉnh sửa: SĐT và Vai trò (hay còn gọi là loại khách hàng)\
(Editing is not supported: Phone number and Role (also known as customer type))
Để chỉnh sửa thông tin, chỉ cần nhập thông tin mong muốn, popup sẽ tự động lưu ngay sau khi nhập xong.\
(To edit information, just enter the desired information, the popup will automatically save immediately after entering.)
### 3. Nhập nội dung trao đổi với khách hàng (3. Enter the content exchange information with customer)
Khi gọi điện thoại với khách hàng, nhân viên có thể dễ dàng lưu lại thông tin trao đổi bằng cách nhập vào ô Nội dung trao đổi, nội dung sẽ được tự động lưu ngay sau khi nhập.\
(When calling with customers, employees can easily save the exchange information by entering it in the Exchange content box, the content will be automatically saved immediately after entering.)
### 4. Cảm xúc cuộc gọi (4. Call emotion)
Việc chọn cảm xúc cuộc gọi sẽ giúp lọc ra các khách hàng không hài lòng dịch vụ để hỗ trợ thêm, trưng cầu ý kiến… và có các chiến lược quảng bá với các khách hàng hài lòng dịch vụ…\
(Choosing call emotions will help filter out customers who are dissatisfied with the service for further support, solicit opinions... and have promotional strategies with customers who are satisfied with the service...)
Tại popup cuộc gọi, chọn loại cảm xúc phù hợp với cảm xúc của khách hàng. Hệ thống sẽ tự lưu thông tin sau khi chọn.\
(At the call popup, choose the type of emotion that matches the customer's emotions. The system will automatically save the information after selecting.)
### 5. Danh mục loại cuộc gọi (5. Call type category)
Danh mục loại cuộc gọi có 2 chức năng chính\
(The call type category has two main functions:)
* Phân loại cuộc gọi để giúp báo cáo và phân công công việc hỗ trợ khách hàng\
(Classify calls to help report and assign customer support work)
* Liên kết với danh mục ticket để việc tạo ticket trở nên đơn giản và chính xác về SLA, nhóm, nhân viên thực hiện hỗ trợ. Tiết kiệm thời gian tạo ticket và phân công.\
(Link to ticket categories to make ticket creation simple and accurate about SLA, team, and support staff. Save time creating tickets and assigning assignments.)
Thực hiện chọn theo thứ tự Danh mục cấp 1 → 2 → 3\
(Make selections in the order of Category level 1 → 2 → 3)
### 6. Tạo Ticket từ popup gọi (6. Create Ticket from call popup)
Sau khi nhận yêu cầu từ phía khách hàng và nhập các thông tin cần thiết như nội dung trao đổi, danh mục cuộc gọi …, nhân viên có thể tạo nhanh ticket bằng cách nhấp vào nút Tạo ticket trên popup cuộc gọi\
(After receiving a request from the customer and entering necessary information such as conversation content, call list, etc., employees can quickly create a ticket by clicking the Create ticket button on the call popup.)
Trang sẽ chuyển đến trang tạo mới ticket, đồng thời điền sẵn các thông tin như: \
(The page will redirect to the page to create a new ticket, and pre-fill information such as:)
* Tiêu đề: \[Phone] tên\_khách\_hàng\
(Title: \[Phone] customer\_name)
* Tóm lược: Nội dung trao đổi của cuộc gọi\
(Brief: The exchange content of call)
* Khách hàng: Khách hàng đang tương tác\
(Customer: Customer is interacting)
* Danh mục ticket cấp 1 -2 -3 sẽ được tự động điền dựa theo thiết lập liên kết ở[ mục II.3](https://docs.google.com/document/d/1lwcvV8345Oinnm8u3WXXO76GGCBg017R9XsZWJcmMhY/edit#heading=h.cpx4wtimsubz)\
(Ticket category level 1 -2 -3 will automatically fill in according to the setting link in section II.3)
* Nhóm và SLA cũng sẽ tự động điền theo thiết lập liên kết với Danh mục Ticket.\
(Group and SLA will also automatically fill in according to the setting link with Ticket category.)
* Kênh ticket tạo từ popup cuộc gọi mặc định là “Phone”\
(Ticket channel creates from default call popup is “Phone”)
* Bạn chỉ cần nhập các thông tin còn lại và nhấn Lưu để tạo mới ticket.\
(You only enter the remaining information and press Save to create a new ticket.)
7\. Ẩn popup cuộc gọi\
(7. Hide call popup)
Ẩn popup cuộc gọi là một hình thức thu nhỏ popup, nhấn vào nút  để ẩn popup\
(Hiding call popup is a popup thumbnail form, press  button to hide popup)
8\. Đóng popup cuộc gọi\
(8. Close call popup)
* Nhấn vào nút X trên popup\
(Press button on the popup)
* Nhấn nút Lưu và đóng trên popup\
(Press Save and close on the popup)
# Lưu thông tin cuộc gọi vào Task / Order / Ticket cụ thể
#### Tính năng: Lưu thông tin cuộc gọi vào Task / Order / Ticket cụ thể
***
#### 1. Mô tả tính năng
Khi TVV thực hiện cuộc gọi đi hoặc tiếp nhận cuộc gọi đến, cuộc gọi đó có thể liên quan đến một nhiệm vụ (Task), đơn hàng (Order) hoặc phiếu yêu cầu (Ticket) đã có sẵn trong hệ thống.
Tính năng này cho phép TVV lưu trực tiếp thông tin cuộc gọi vào Task/Order/Ticket cụ thể, giúp thuận tiện cho việc theo dõi lịch sử làm việc, quản lý dữ liệu và chăm sóc khách hàng hiệu quả hơn.
***
#### 2. Hướng dẫn thao tác
**Bước 1: Thực hiện hoặc nhận cuộc gọi như bình thường**
* Khi cuộc gọi diễn ra, call popup sẽ hiển thị trên giao diện của bạn.\
**Bước 2: Mở tab đối tượng liên quan mà bạn cần lưu thông tin cuộc gọi này vào**
* Bấm vào tab Task/Order/Ticket ngay trên call popup mà cuộc gọi này đang đề cập.\
**Bước 3: Tick chọn Task/Order/Ticket để lưu thông tin cuộc gọi**
✅ Tick chọn ô này để liên kết cuộc gọi hiện tại với Task/Order/Ticket đang mở.
**Bước 4: Bấm “Lưu và Đóng” trên popup**
* Sau khi cuộc gọi kết thúc, thông tin cuộc gọi (thời gian, số điện thoại, người gọi, ghi chú…) sẽ được ghi nhận vào timeline và tab **Cuộc gọi** của Task/Order/Ticket tương ứng.\
#### 3. Lưu ý
* TVV cần đảm bảo đang mở đúng Task/Order/Ticket trước khi tick chọn.
* Nếu không tick, cuộc gọi vẫn được ghi log chung nhưng không gắn vào mục cụ thể.
* Sau khi lưu, thông tin có thể được tra cứu trong phần chi tiết lịch sử của mục được liên kết.\
# Hướng dẫn cách Clear Cache browsing data
## 1. Hướng dẫn clear cache trên trình duyệt Chrome
### 1.1. Hướng dẫn cách thông thường
Bước 1: Mở Inspect của trình duyệt
Windows:
Cách 1: Nhấn tổ hợp phím Ctrl + Shift + I
Cách 2: Nhấn F12 trên bàn phím
Cách 3: Click chuột phải trên trang web, chọn Kiểm tra
Bước 2: chọn Network tab
Bước 3: Làm mới lại trình duyệt
Click chọn icon reload, hoặc nhấn phím tắt F5 để làm tươi trình duyệt
Bước 4: Click Chuột phải vào khu vực request → chọn Clear browser Cache
Bước 5: chọn tab Application
Mở mục Cookies
Click chuột phải vào Dòng url: (mỗi công ty sẽ có domain khác nhau), chọn CLear
Thao tác tương tự với mục Session Storage
Bước 6: Làm mới lại trình duyệt một lần nữa
Click chọn icon reload, hoặc nhấn phím tắt F5 để làm tươi trình duyệt. Cache của trình duyệt sẽ được clear sau lần làm tươi ở bước này.
### 1.2. Hướng dẫn cách clear trong Settings
Bước 1: Vào mục Clear browsing data
Vào Settings bằng cách mở tab mới và chạy đường dẫn chrome://settings → tìm kiếm từ khóa “bộ nhớ đệm” → chọn mục Xóa dữ liệu duyệt web.
Hoặc nhấn tổ hợp phím tắt Ctrl + Shift + Del
Bước 2: Chọn Nâng cao → chọn All Time → chọn Cookie và các dữ liệu khác của trang web
Bước 3: Cuối cùng bạn chọn Xóa dữ liệu để thực hiện
# Cho phép xuất dữ liệu AntCRM Data Platform (Guide to enable data export from AntCRM Data Platform)
### 1. Giới thiệu (1. Introduction)
AntCRM Data platform cho phép người sử dụng xuất dữ liệu từ AntCRM Data Platform ra những hệ thống bên ngoài để phục vụ các công việc trên hệ thống đó theo dõi, thông báo, cập nhật dữ liệu. Tài liệu này dùng để hướng dẫn cách thực hiện xuất dữ liệu từ AntCRM Data Platform một cách tự động.\
\
(AntCRM Data platform allows users to export data from AntCRM Data Platform to external systems to serve work on that system to monitor, notify and update data. This document is used to guide how to perform data export from AntCRM Data Platform automatically.)
### 2. Hướng dẫn cấu hình (2. Configuration instruction)
#### 2.1. Hướng dẫn Cấu hình AntCRM Webhook URL (2.1. AntCRM Webhook URL configuration instruction)
Để xuất dữ liệu từ hệ thống AntCRM Data Platform ra bên ngoài, người dùng cần phải được cài đặt Webhook URL cho tài khoản của riêng mình. URL này là đường dẫn của hệ thống mà người dùng muốn đưa dữ liệu ra ngoài từ AntCRM Data Platform. Mỗi tài khoản người dùng có thể chèn nhiều URL cho nhiều mục đích. Để cấu hình URL này, người dùng cần đăng nhập hệ thống bằng Chỉ có tài khoản admin hoặc owner mới có quyền cấu hình URL. Các bước thực hiện cụ thể như bên dưới:\
\
(To export data from the AntCRM Data Platform system to the outside, users need to install a Webhook URL for their own account. This URL is the path of the system which the user wants to export data from AntCRM Data Platform. Each user account can insert many URLs for many purposes. To configure this URL, users need to log in to the system with only admin or owner accounts have the right to configure URL.The specific steps are as below:)
Bước 1: Vào phần Thiết lập → chọn Thiết lập khác → chọn Webhook\
(Step 1: Enter Setting → choose Other setting → choose Webhook)
Bước 2: Chọn Tab Webhook\
(Step 2: Choose Webhook Tab)
Bước 3: Nhập URL của hệ thống mà bạn muốn xuất dữ liệu đến ra ngoài\
(Step 3: Enter URL of the system that you want to export data)
Bước 4: Cấu hình điều kiện để AntCRM Data Platform gửi sự kiện ra ngoài → chọn Thêm Webhook\
(Step 4: Configure the condition to AntCRM Data Platform send the event out → choose Thêm Webhook)
Lưu ý: Xem mục 2.2. Sự kiện của AntCRM Webhook để tìm hiểu chi tiết các sự kiện mà AntCRM Data Platform cung cấp.\
(Note: View section 2.2. The event of AntCRM Webhook to learn about the details of the events that AntCRM Data Platform provides.)
Sau khi thêm mới Webhook URL, giao diện AntCRM Data Platform sẽ hiển thị như sau\
(After adding new Webhook URL, AntCRM Data Platform interface will display as follow:)
2.2. Sự kiện của AntCRM Webhook\
(2.2. Event of AntCRM Webhook)
Các sự kiện AntCRM Webhook hỗ trợ đẩy thông tin ra ngoài, được mô tả như bên dưới\
(AntCRM Webhook events support to push information out, described below:)
Trường thông tin (Information field)
Sự kiện (Event)
Mô tả (Description)
Khách hàng (Contact)
Tạo mới (Create new)
Khi Khách hàng được tạo mới AntCRM Webhook sẽ đẩy thông tin đến Webhook URL đã cấu hình (When a new contact is created, AntCRM Webhook will push information to the configured Webhook URL)
Khách hàng (Contact)
Cập nhật (Update)
Khi Khách hàng được cập nhật AntCRM Webhook sẽ đẩy thông tin đến Webhook URL đã cấu hình (When a contact is updated, AntCRM Webhook will push information to the configured Webhook URL)
Khách hàng (Contact)
Thêm ghi chú hoặc comment (Add note or comment)
Khi Khách hàng được thêm ghi chú AntCRM Webhook sẽ đẩy thông tin đến Webhook URL đã cấu hình (When a contact is added note, AntCRM Webhook will push information to the configured Webhook URL)
Task
(Nhiệm vụ)
Tạo mới (Create new)
Khi nhiệm vụ được tạo mới AntCRM Webhook sẽ đẩy thông tin đến Webhook URL đã cấu hình (When a new task is created, AntCRM Webhook will push information to the configured Webhook URL)
Task (Nhiệm vụ)
Cập nhật (Update)
Khi nhiệm vụ được cập nhật AntCRM Webhook sẽ đẩy thông tin đến Webhook URL đã cấu hình (When a task is updated, AntCRM Webhook will push information to the configured Webhook URL)
Task (Nhiệm vụ)
Thêm ghi chú (Add note)
Khi nhiệm vụ được thêm ghi chú AntCRM Webhook sẽ đẩy thông tin đến Webhook URL đã cấu hình (When a task is added note, AntCRM Webhook will push information to the configured Webhook URL)
Task (Nhiệm vụ)
Chỉ định (Assign)
Khi nhiệm vụ được Assign AntCRM Webhook sẽ đẩy thông tin đến Webhook URL đã cấu hình
Ticket (Phiếu yêu cầu)
Tạo mới (Add note)
Khi Phiếu yêu cầu được tạo mới AntCRM Webhook sẽ đẩy thông tin đến Webhook URL đã cấu hình (When a task is added note, AntCRM Webhook will push information to the configured Webhook URL)
Ticket (Phiếu yêu cầu)
Cập nhật (Update)
Khi Phiếu yêu cầu được cập nhật AntCRM Webhook sẽ đẩy thông tin đến Webhook URL đã cấu hình (When a Ticket is updated, AntCRM Webhook will push information to the configured Webhook URL)
Ticket (Phiếu yêu cầu)
Add note (Ghi chú)
Khi phiếu yêu cầu được thêm ghi chú AntCRM Webhook sẽ đẩy thông tin đến Webhook URL đã cấu hình (When a task is added note, AntCRM Webhook will push information to the configured Webhook URL)
Ticket (Phiếu yêu cầu)
Chỉ định (Assign)
Khi Phiếu yêu cầu được phân công AntCRM Webhook sẽ đẩy thông tin đến Webhook URL đã cấu hình (When a new task is assigned, AntCRM Webhook will push information to the configured Webhook URL)
Đơn hàng (Order)
Tạo mới (Create new)
Khi Đơn hàng được tạo mới AntCRM Webhook sẽ đẩy thông tin đến Webhook URL đã cấu hình (When a new order is created, AntCRM Webhook will push information to the configured Webhook URL)
Đơn hàng (Order)
Cập nhật (Update)
Khi Đơn hàng được cập nhật AntCRM Webhook sẽ đẩy thông tin đến Webhook URL đã cấu hình (When a new Order is updated, AntCRM Webhook will push information to the configured Webhook URL)
Đơn hàng (Order)
Thêm ghi chú (Add note)
Khi Giao Đơn hàng thêm ghi chú AntCRM Webhook sẽ đẩy thông tin đến Webhook URL đã cấu hình (When a new Order is added note, AntCRM Webhook will push information to the configured Webhook URL)
2.3. Mô tả tham số\
(2.3. Parameter description)
Dưới đây là bảng mô tả các tham số của AntCRM Data platform\
(Below is a table describing the AntCRM Data platform parameters)
Chú ý: Contact danh cho các event của contact và có liên quan đến contact
(Note: Contact is for events of the contact and related to the contact.)
ticket
Object
{TicketId:434
assignedTo:"584a439acdff33ff1756b4df"
createdBy:"584a439acdff33ff1756b4df"
followers:[]
group:"584a4142cdff33ff1756b4d3"
id:"59b290f6820385fd1e26c3e5"
title:"Cai dat pfsense cho van phong moi"}
Chú ý: (Note:)
- Ticket dành cho các event liên quan đến ticket (Ticket is for events related to the ticket.)
- assignTo sẽ được populate để lấy thông tin người / group được assigned (assignTo will be populated to retrieve information about the person or group assigned.))
task
Object
{"taskId":3704,
"assignTo":"5923f118cacbe6ed63bb7bbe",
"createdBy":"57fb8157fa0e60a8625145a8",
"completedBy":"5923f118cacbe6ed63bb7bbe",
"Permit":{"status":1,"users":[]},
"Id":"59ae89d521f7cfa03f02f8eb"
}
Chú ý: (Note:)
- Ticket dành cho các event liên quan đến task (The "Ticket" represents events associated with a task.)
- assignTo sẽ được populate để lấy thông tin người / group được assigned (The assignTo field will be automatically populated with details of the assigned user or group.)
Bảng eventCode: \
(eventCode table:)
| CONTACT\_CREATE | Tạo Khách hàng |
| ---------------------- | ---------------------------------- |
| CONTACT\_CHANGE | Cập nhật Khách hàng |
| CONTACT\_CHANGE\_STAGE | Cập nhật trạng thái cho Khách hàng |
| TICKET\_CHANGE | Cập nhật Phiếu yêu cầu |
| TICKET\_CREATE | Tạo Phiếu yêu cầu |
| TASK\_CREATE | Tạo Nhiệm vụ |
| TASK\_CHANGE | Cập nhật Nhiệm vụ |
| DEAL\_CREATE | Tạo Đơn hàng |
| DEAL\_CHANGE | Cập nhật Đơn hàng |
| NOTE\_CREATE | Tao ghi chú |
# Bản mẫu
# Mẫu nhiệm vụ
Bước 1: Tại thanh menu chính, chọn Thiết lập → Bản mẫu → Mẫu nhiệm vụ
Bước 2: Để tạo mới mẫu nhiệm vụ, bấm nút Thêm mẫu
Bước 3: Nhập các thông tin cần thiết, sau đó bấm nút Lưu
Trong đó có các thông tin như sau:
| Tên trường | Mô tả |
| ----------------------- | -------------------------------------------------------------------------------------------------------------------------------------------------------------------------------------------------------------------------------------------------------------------------------------------------------------------------------------------------------------------------------------------- |
| Nội dung | Nội dung mô tả nhiệm vụ. Là thông tin bắt buộc phải nhập |
| Nhóm | Nhóm tiếp nhận nhiệm vụ |
| Phụ trách |
Nhân viên tiếp nhận nhiệm vụ
Có thể chỉ định nhân viên cụ thể hoặc chọn nhóm có assignment rule để hệ thống phân công tự động
|
| Độ ưu tiên |
Độ ưu tiên của nhiệm vụ.
Có 3 cấp độ ưu tiên: Thấp, Trung bình, Cao
|
| Thời hạn |
Thời hạn hoàn thành task, Có 2 cách chọn thời hạn:
Chọn khoảng thời gian
Chọn thời điểm kết thúc
|
| Danh mục | Dùng để phân loại nhiệm vụ |
| Liên quan đến | Khách hàng liên quan đến nhiệm vụ |
| Liên quan đến giao dịch | Giao dịch liên quan đến nhiệm vụ |
| Đính kèm | Các tệp đính kèm liên quan đến nhiệm vụ |
| Chia sẻ |
Lựa chọn nhân viên hoặc nhóm có thể nhìn thấy nhiệm vụ
Tất cả: tất cả nhân viên trên org đều nhìn thấy task
Chỉ tôi: Chỉ bản thân người tạo và Owner có thể nhìn thấy task
Tội và nhóm: Người tạo, Owner và nhóm được chọn có thể nhìn thấy task.
Tôi và những nhân viên: Người tạo, Owner và các nhân viên được chọn có thể nhìn thấy task.
|
Bước 4: Sau khi tạo thành công, màn hình sẽ hiển thị thông báo Thêm thành công
Tại danh sách mẫu, nếu bạn muốn chỉnh sửa mẫu thì bấm nút 
Nếu muốn xóa mẫu, vào sửa đổi. kéo xuống dưới cùng và ấn
# Làm thế nào để tạo mẫu SMS, Email? (How to create SMS, Email template?)
SMS, Email Marketing có lẽ không còn là khái niệm xa lạ với doanh nghiệp. Việc gửi SMS, Email chăm sóc khách hàng, giới thiệu sản phẩm, chúc mừng sinh nhật…. mang lại lượng lớn khách hàng, vô vàng lợi nhuận, càng nhiều tương tác, khách hàng càng thân thiết và tin dùng.\
(SMS and Email Marketing are probably no longer unfamiliar concepts to businesses. Sending SMS, Email for customer care, product introduction, happy birthday... brings a large number of customers, countless profits, the more interactions, the more loyal and trustworthy customers are.)
Với AntCRM, bạn có thể soạn các mẫu SMS, Email sẵn có , mẫu này sẽ được dùng cho mọi thứ, mọi nơi, mọi nhân viên mà bạn cho phép, nhân viên chỉ việc gửi đi với thao tác đơn giản, hơn nữa bạn có thể dùng mẫu này để chạy chiến dịch SMS, Mailchimp, Marketing Automation…\
(With AntCRM, you can compose existing SMS and Email templates, this template will be used for everything, everywhere, every employee you allow, employees just need to send it with a simple operation, moreover, you You can use this template to run SMS, Mailchimp,Marketing Automation…)
Dưới đây là hướng dẫn tạo mẫu SMS, Email.\
(Below are instructions to create SMS and Email templates.)
1\. Làm thế nào để tạo mẫu SMS\
(1. How to create SMS template)
-------------------------------
Bước 1. Đi đến trang Thiết lập - Bản mẫu - Mẫu SMS\
(Step 1.Go to Settings page - Template - SMS template)
Bước 2. Nhấn nút .\
(Step 2. Press  button)
Bước 3. Nhập các thông tin cần thiết\
(Step 3. Enter the necessary information)
* **Tên mẫu** (bắt buộc)\
(Template name (required))
* **Mô tả**: Là nội dung mô tả nội dung, mục đích, tính chất… của mẫu SMS để người dùng nhận biết, khách hàng sẽ không nhận thông tin này. \
(**Description**: Is the content that describes the content, purpose, nature... of the SMS template for users to recognize, customers will not receive this information.)
* **Nội dung** (bắt buộc): Là nội dung tin nhắn SMS mà khách hàng nhận được\
(**Content** (required): Is the content of the SMS message that the customer receives)
* **Thông tin có sẵn**: Sử dụng các từ khóa này để đại diện cho thông tin tương ứng của mỗi khách hàng, với mỗi khách hàng, thông tin sẽ được thay thế một cách chính xác.\
(**Available information**: Use these keywords to represent the corresponding information of each customer, for each customer, the information will be replaced correctly.)
Ví dụ: \
(For example:)
* {{CUS\_FIRST\_NAME}}: \
thay thế tên theo mỗi khách hàng\
(Replace the name per customer)
* {{CUS\_DOB}} : \
thay thế ngày sinh theo mỗi khách hàng\
(Replace the date of birth according to each customer.)
Danh sách Thông tin có sẵn :\
(Available information list:)
| |
| --------------------------------------------------- |
| {{CUS\_GENDER}} : Gender |
| {{CUS\_FIRST\_NAME}} : Fisrt Name |
| {{CUS\_LAST\_NAME}} : Last Name |
| {{CUS\_PASSPORT}} : Passport |
| {{CUS\_DOB}} : Date Of Birth |
| {{CUS\_EMAIL}} : Email |
| {{CUS\_PHONE\_NUMBER}} : Phone |
| {{CUS\_COUNTRY}} : Country |
| {{DEAL\_NUMBER}} : Deal number |
| {{DEAL\_NAME}} : Deal name |
| {{DEAL\_STAGE}} : Deal stage |
| {{DEAL\_GROUP\_PACKAGE}} : Deal group package |
| {{DEAL\_VALUE}} : Deal value |
| {{DEAL\_CLOSE\_DATE}} : Deal close date |
| {{DEAL\_DESCRIPTION}} : Deal description |
| {{DEAL\_CATEGORY}} : Deal category |
| {{DEAL\_RECEIVER\_NAME}} : Deal receiver name |
| {{DEAL\_RECEIVER\_PHONE}} : Deal receiver phone |
| {{DEAL\_RECEIVER\_ADDRESS}} : Deal receiver address |
| {{DEAL\_BY\_USERS}} : Deal by users |
| {{DEAL\_BY\_GROUPS}} : Deal by groups |
| {{rank}} : Hạng hiện tại |
| {{score\_rank}} : Điểm tích lũy |
Thiết lập quyền chia sẻ mẫu SMS, có 4 lựa chọn sau:\
(Set permissions to share SMS templates, with the following 4 options:)
* Tất cả\
(Everyone)
* Nhân viên\
(User)
* Nhóm\
(Group)
* Chỉ mình tôi\
(Only me)
Nếu user được chia sẻ quyền với một mẫu SMS thì user đó có thể nhìn thấy và sử dụng mẫu đó, có thể thao tác cập nhật mẫu SMS đó ( nếu được cấp quyền chỉnh sửa mẫu SMS).\
(If a user shares rights to an SMS template, that user can see and use that template, and can update that SMS template (if granted permission to edit the SMS template).)
2\. Làm thế nào để tạo mẫu Email\
(2. How to create Email template)
---------------------------------
Bước 1. Đi đến trang Thiết lập - Bản mẫu - Mẫu Email\
(Step 1. Go to Settings page - Template - Email template)
Bước 2. Nhấn nút \
(Step 2. Press  button)
Bước 3. Nhập các thông tin cần thiết\
(Step 3. Enter the necessary information)
* Tên mẫu (bắt buộc)\
(Template name (required))
* Mô tả: Là nội dung mô tả nội dung, mục đích, tính chất… của mẫu SMS để người dùng nhận biết, khách hàng sẽ không nhận thông tin này. \
(Description: Is the content that describes the content, purpose, nature... of the SMS form so that users can recognize it, customers will not receive this information.)
* Chủ đề Email: là Tiêu đề của email, chính là phần đầu tiên mà người nhận nhìn thấy, vì vậy tiêu đề Email cần phải ngắn gọn và thu hút. \
(Email subject: is the title of the email, it is the first part that the recipient sees, so the email subject line needs to be short and attractive.)
* Nội dung (bắt buộc): Là nội dung email mà khách hàng nhận được\
(Content (required): Is the content of the email that the customer receives)
* Thông tin có sẵn: Sử dụng các từ khóa này để đại diện cho thông tin tương ứng của mỗi khách hàng, với mỗi khách hàng, thông tin sẽ được thay thế một cách chính xác.\
(Available information: Use these keywords to represent the corresponding information of each customer, for each customer, the information will be replaced correctly.)
Ví dụ: \
(For example)
* {{CUS\_FIRST\_NAME}}: \
thay thế tên theo mỗi khách hàng\
(replace the name per customer)
* {{CUS\_DOB}} :\
thay thế ngày sinh theo mỗi khách hàng\
(replace date of birth for each customer)
Danh sách Thông tin có sẵn : \
(List of available Information:)
| | |
| --------------------------------------------------------- | ----------------------------------------------------- |
| {{CUS\_GENDER}} : Gender | {{TICKET\_RESOLUTION\_TYPE}} : Ticket Resolution Type |
| {{CUS\_FIRST\_NAME}} : First Name | {{TICKET\_CATEGORY}} : Ticket Resolution Type |
| {{CUS\_LAST\_NAME}} : Last Name | {{TICKET\_SUBCATEGORY}} : Ticket Subcategory |
| {{CUS\_TITLE}} : Title | {{TICKET\_SUBSUBCATEGORY}} : Ticket Subsubcategory |
| {{CUS\_BGINFO}} : Background Information | {{TICKET\_STATUS}} : Ticket Status |
| {{CUS\_WEBSITE}} : Website | {{TICKET\_PRIORITY}} : Ticket Priority |
| {{CUS\_PASSPORT}} : Passport | {{TICKET\_CREATED\_AT}} : Ticket Created At |
| {{CUS\_DOB}} : Date Of Birth | {{LINK\_TICKET}} : Link ticket |
| {{CUS\_EMAIL}} : Email | {{TICKET\_ASSIGNED\_TO}} : Ticket Assigned To |
| {{CUS\_PHONE\_NUMBER}} : Phone | {{GROUP\_NAME}} : Group Name |
| {{CUS\_STREET}} : Street | {{LINK\_RATING\_TICKET}} : Link rating ticket |
| {{CUS\_STATE}} : State | {{DEAL\_NUMBER}} : Deal number |
| {{CUS\_CITY}} : City | {{DEAL\_NAME}} : Deal name |
| {{CUS\_ZIP}} : Zip | {{DEAL\_STAGE}} : Deal stage |
| {{CUS\_COUNTRY}} : Country | {{DEAL\_GROUP\_PACKAGE}} : Deal group package |
| {{TICKET\_ID}} : Ticket ID | {{DEAL\_VALUE}} : Deal value |
| {{TICKET\_TITLE}} : Ticket Title | {{DEAL\_CLOSE\_DATE}} : Deal close date |
| {{TICKET\_SUMMARY}} : Ticket Summary | {{DEAL\_DESCRIPTION}} : Deal description |
| {{TICKET\_SLA}} : Ticket SLA | {{DEAL\_CATEGORY}} : Deal category |
| {{TICKET\_SLA\_STATUS}} : Ticket SLA Status | {{DEAL\_RECEIVER\_NAME}} : Deal receiver name |
| {{TICKET\_CHANNEL}} : Ticket Channel | {{DEAL\_RECEIVER\_PHONE}} : Deal receiver phone |
| {{TICKET\_RESOLUTION\_ACTUAL}} : Ticket Resolution Actual | {{DEAL\_RECEIVER\_ADDRESS}} : Deal receiver address |
| | {{DEAL\_BY\_USERS}} : Deal by users |
| | {{DEAL\_BY\_GROUPS}} : Deal by groups |
**Đính kèm:** chọn tệp đính kèm với email để gửi cho người nhận, tối đa là 20Mb trên 1 mẫu Email.\
(**Attachment**: select the file attached to the email to send to the recipient, maximum 20Mb per Email template.)
Thiết lập quyền chia sẻ mẫu Email, có 4 lựa chọn sau:\
(Set permissions to share SMS templates, with the following 4 options:)
* Tất cả mọi người\
(Everyone)
* Nhân viên\
(User)
* Nhóm\
(Group)
* Chỉ mình tôi\
(Only me)
Nếu user được chia sẻ quyền với một mẫu Email thì user đó có thể nhìn thấy và sử dụng mẫu đó, có thể thao tác cập nhật mẫu Email đó ( nếu được cấp quyền chỉnh sửa mẫu Email).\
(If a user has shared permissions to an Email template, that user can see and use that template, and can update that Email template (if granted permission to edit the Email template)..
# Tạo bản mẫu cho Ticket
### Xem tại [đây](/tai-lieu-antbuddy-huong-dan-su-dung-antbuddy-docs-user-guide/quan-tri-khach-hang-antcrm-antcrm-customer-management/phieu-yeu-cau-ticket/tao-ban-mau-cho-ticket-create-a-template-for-ticket)
# Mẫu ZNS
Bước 1: Tại thanh menu chính, chọn Thiết lập ⇒ Bản mẫu ⇒ mẫu ZNS
Bước 2: Để tạo mẫu ZNS mới, bấm nút Thêm mẫu
Bước 3: Nhập các thông tin cần thiết, sau đó bấm nút Lưu
Sau khi tạo thành công, màn hình sẽ hiển thị thông báo Thêm thành công
Tại danh sách mẫu, nếu bạn muốn chỉnh sửa mẫu thì bấm nút 
Nếu muốn xóa mẫu, chọn sửa đổi, kéo xuống dưới cùng và bấm nút
**Thông tin các trường ánh xa hiện có:**
1/ Thông tin khách hàng:\
Tên\
Họ\
Chức danh\
Tên KH cá nhân\
Số CMND/CCCD\
Ngày sinh\
Địa chỉ\
Điện thoại\
Email\
Website\
Mã KH tiềm năng\
Mã KH cá nhân/doanh nghiệp\
Điểm tích lũy (Loyalty)\
Hạng hiên tại (Loyalty)\
Các trường tùy chỉnh của khách hàng
2/ Thông tin đơn hàng:\
Mã đơn hàng\
Tên đơn hàng\
Khách hàng\
Ngày tạo\
Ngày kết thúc\
Trạng thái\
Giá Trị\
Mô tả\
Sản phẩm\
Tên người nhận\
Địa chỉ người nhận\
Các trường tùy chỉnh của đơn hàng
3/Phiếu yêu cầu:\
Mã đơn hàng\
Nguồn\
SLA\
Trạng thái SLA\
Danh mục\
Kênh hỗ trợ\
Loại giải quyết
# Hướng dẫn thay đổi từ, cụm từ trong AntCRM
Tính năng này cho phép người dùng thay đổi các từ, cụm từ ở menu sử dụng trong AntCRM
Bước 1: Vào Thiết lập ⇒ Quản lý người dùng ⇒ Thông tin doanh nghiệp ⇒ Ngôn ngữ
Bước 2: Chọn Kích hoạt
Lúc này hệ thống sẽ hiển thị ô nhập Ban đầu và Đổi thành
Bước 3: Nhập các từ, cụm từ cần thay đổi vào ô Ban đầu
Bước 4: Nhập các từ mong muốn tương ứng vào ô Đổi thành
Lúc này, người dùng có thể bấm dấu + để có thể nhập thêm nội dung cần thay đổi
Bước 5: Chọn Lưu
Hệ thống xuất hiện bảng thông báo, người dùng chọn Tải lại để hoàn tất quá trình thiết lập
Giao diện sau khi thay đổi
# Hướng dẫn sử dụng Callbar Web (Instruction to use Callbar web)
Tích hợp Callbar web lên CRM nhằm thay thế cho giao diện call web cũ. Sử dụng giao diện của Callbar desktop app nhằm tối ưu hóa trải nghiệm người dùng.\
(Integrate web Callbar into CRM to replace the old web call interface. Use the interface of the Callbar desktop app to optimize the user experience..)
Dưới đây là hướng dẫn sử dụng cho Callbar web\
(Below is the user guide for web Callbar)
## 1. Thao tác với Callbar
**(Operations with Callbar)**
### **1.1 Login và cho hiển thị giao diện Callbar**
**(Login and display the Callbar interface)**
**Bước 1:** User login vào AntCRM. Sau khi user login CRM, hệ thống tự động đăng nhập Callbar\
(**Step** 1: User logs into AntCRM. After the user logs into the CRM, the system automatically logs into Callbar)
**Bước 2:** Bấm nút  ở góc trên bên phải giao diện CRM để hiển thị được Callbar\
(**Step 2:** Press t  button in the upper right corner of CRM interface to display Callbar)
Để ẩn Callbar, user bấm nút X trên Callbar ở góc trên bên phải \
(To hide Callbar, user press X button on Callbar )
### 1.2 Giao diện Callbar web
Position
Description
1
Menu bar
2
Dial keyboard
3
Operations in queue (Enter Queue, Exit Queue, Pause, Resume)
4
User status (: Online, : Offline, : Busy)
5
Queue status of user (Ready / Exited / Pause / Outgoing / Incoming)
6
The dial button
## 1.3. Các thao tác trên Callbar web
**(Operations on Callbar web)**
#### 1.3.1. Thực hiện cuộc gọi ra
**(Make outgoing call)**
Nhập số từ bàn phím máy tính vào hoặc bấm trực tiếp từ bàn phím quay số (2) trên Callbar, số gọi ra sẽ hiển thị trên màn hình Callbar.\
(Enter the number from the computer keyboard or press directly from the dial keyboard (2) on the Callbar, the called number will be displayed on the Callbar screen.)
Bấm nút quay số  hoặc bấm Enter trên bàn phím để thực hiện cuộc gọi ra. \
(Press the dial button  or press Enter on the keyboard to make an outgoing call.)
#### 1.3.2. Tiếp nhận cuộc gọi vào
**(Receive incoming call)**
Khi có cuộc gọi đến, tai nghe (loa) sẽ phát ra âm thanh\
(When there is a coming call, headphones (speaker) will play a sound.)
Callbar sẽ tự động bật lên cho phép user tiếp nhận cuộc gọi hoặc từ chối cuộc gọi\
(Callbar will pop up automatically to allow Agent receive calls or reject calls)
|  | Show the dial keyboard (Dialpad) |
| ------------------------------------------------------------------------------------------------------------------------------------------------------------------------------------------------- | -------------------------------- |
|  | (Hold) the call |
|  | Turn off (turn on) Micro |
|  | (Transfer) the call |
#### 1.3.3. Các thao tác trên Queue:
**(Operations on the Queue:)**
Đối với nhân viên trực điện thoại tiếp nhận cuộc gọi vào (nhân viên nhận đơn) cần thực hiện đăng nhập vào Queue (hàng đợi) để hệ thống đẩy cuộc gọi đến Callbar khi có khách hàng gọi vào. Các thao tác trên Queue bao gồm: \
(For a staff phone call who receives incoming calls (receiving staff) need to log in to the queue (queue) so that the system pushes incoming calls to the callbar when customer calls in. Operations on the Queue consist of:)
**(1) Vào Queue:** thực hiện đăng nhập vào hàng đợi để tiếp nhận cuộc gọi (thực hiện khi vào đầu ca làm việc) bằng cách bấm vào nút , hệ thống sẽ phát thông báo qua loa (tai nghe) và chuyển trạng thái Queue của Agent thành \
((1) **Enter Queue:** Log in to enter queue to receive call (made when at the beginning of work shift) by press button, the system will broadcast the notification through the speaker (headphone) and change the queue status of Agent to)
 
**(2) Thoát Queue:** thực hiện đăng xuất khỏi hàng đợi để không nhận cuộc gọi nữa (thực hiện ở cuối ca làm việc, trước khi thoát ứng dụng) bằng cách bấm vào nút \
\&#xNAN;**((2)Exit Queue:** log out the queue in order not to receive call (made when at the end of work shift, before exiting the application) by pressing button .
**Lưu ý:** cần đợi hệ thống phát thông báo qua loa (tai nghe) và chuyển trạng thái Queue của Agent thành ; nếu hết ca làm việc, nhân viên không thoát queue thì cuộc gọi đến sẽ bị nhỡ.\
(**Note**: Need to wait for the system which broadcasts the notification through the speaker (headphone) and change the queue status of Agent to ; if the work shift ends, the staff does not exit the queue so the incoming call will be missed.)
 
\
\&#xNAN;**(3) Tạm dừng:** thực hiện tạm dừng nhận cuộc gọi vào khi đang ở trong Queue (thực hiện khi cần xử lý việc khác không thể tiếp nhận cuộc gọi được) bằng cách bấm vào nút , hệ thống sẽ phát thông báo qua loa (tai nghe) và nút tạm dừng chuyển thành \
\&#xNAN;**((3) Pause:** pause the incoming call while in queue (made when need to deal other work so can not receive the call) by pressing  button, the system will broadcast the notification through the speaker (headphone) and the pause button change to)
 
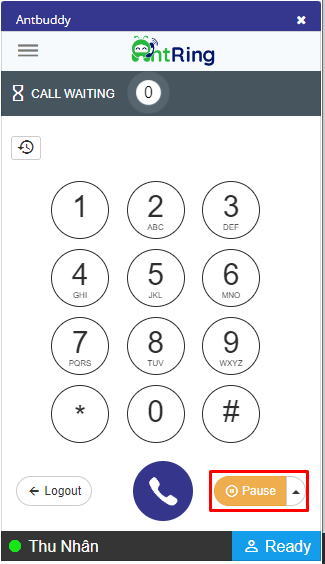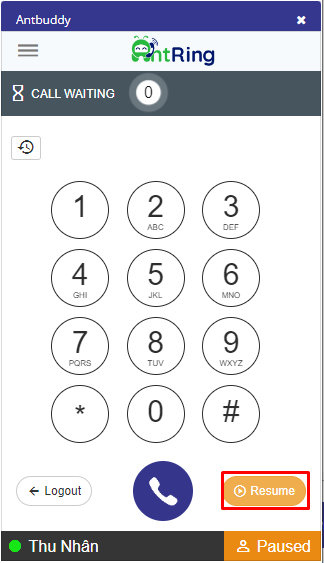
**(4) Tiếp tục:** tiếp tục thực hiện nhận cuộc gọi từ hàng đợi bằng cách bấm vào nút ,hệ thống sẽ phát ra thông báo và chuyển trạng thái Queue của Agent thành \
(**(4) Resume:** Resume to receive the call from the queue by pressing button, the system will broadcast the notification through the speaker (headphone) and the queue status of Agent to .)
 

#### 1.3.4. Thao tác disable Callbar web khi user muốn sử dụng Callbar desktop hoặc IPPhone
Bước 1: Click icon profile ở góc trên bên phải giao diện\
(Step 1: Click profile icon in the upper right of interface)
Bước 2: Chọn Hồ Sơ Của Bạn\
(Step 2: Choose your profile)
Bước 3: Chọn tắt nút Sử dụng Callbar Web \
(Step 3: Choose turn off use callbar web button)
# Cấu hình nhắc lịch, mẫu tin nhắn ( Configure calendar reminders, message templates)
1. Cấu hình nhắc lịch\
(Configure calendar reminders)
* Bước 1: Trên trang AntCRM, chọn Thiết lập, sau đó chọn Nhắc nhở lịch khám\
(Step 1: On AntCRM page, choose Settings, then choose Calendar reminders)
* Bước 2: Chọn Danh sách cấu hình nhắc lịch, sau đó chọn Đặt lịch khám\
(Step 2: Select List of calendar reminder configurations, then select Schedule appointment)
* Bước 3: Nhập các thông tin cần thiết trong bảng Thêm cấu hình, sau đó nhấn nút Lưu\
(Step 3:Enter the necessary information in the Add Configuration panel, then press Save button)
|
Thời gian lấy dữ liệu (hàng ngày) \* (Data retrieval time (daily) \*)
|
Chọn thời gian để lấy dữ liệu (Select the time to retrieve data)
|
|
Lấy lịch khám trước \* (Retrieve the appointment schedule in advance \*)
|
Chọn thời gian (ngày) để lấy lịch khám đã được đặt (Select the date to retrieve the scheduled appointments)
|
|
Thời gian gửi SMS (hàng ngày) \* (SMS sending time (daily) \*)
|
Chọn thời gian để gửi SMS cho khách hàng (Choose the time to send SMS to customers)
|
|
Thông báo đến (Notification to)
|
Thông báo đến người liên quan (Notice to relevant persons)
|
Lưu ý: các trường có dấu (\*) là thông tin bắt buộc phải nhập.\
(Note: Fields marked with an asterisk (\*) are required information.)
* Bước 4: Sau khi thêm cấu hình nhắc lịch thành công, cấu hình sẽ hiển thị trên màn hình như hình bên dưới, người dùng có thể sửa đổi bằng cách nhấn nút và xóa bằng cách nhấn nút \
(Step 4: After successfully adding the reminder configuration, it will appear on the screen as shown below. Users can make modifications by pressingbutton and delete by pressing button)
2. Thêm mẫu tin nhắn\
(Add message template)
* Bước 1: Chọn Danh sách mẫu tin nhắn, sau đó chọn Thêm\
(Step 1: Select Message Template List, then select Add)
* Bước 2: Nhập các thông tin cần thiết trong bảng Đặt lịch khám, sau đó nhấn nút \
(Step 2: Enter the necessary information in the Appointment Scheduling form, then pressbutton)
|
Nhập nội dung tin nhắn để gửi đi cho khách hàng (Enter the message content to send to the customer)
|
Lưu ý: các trường có dấu (\*) là thông tin bắt buộc phải nhập.\
(Note: Fields marked with an asterisk (\*) are required information.)
* **Bước 3**: Sau khi thêm mẫu tin nhắn thành công, mẫu tin nhắn sẽ hiển thị trên màn hình như hình bên dưới, người dùng có thể sửa đổi bằng cách nhấn nút và xóa bằng cách nhấn nút \
(**Step 3**: After successfully adding the message template, it will be displayed on the screen as shown in the image below, Users can make modifications by pressing button and delete by pressing button)
# Thiết lập gọi bằng CallBar App cho Lead/Contact/Account
# Tính năng Số điện thoại ẩn cho vai trò Telesales (Masked Phone Number Feature for Telesales Role )
## I. Tổng quan (**Overview**)
* Tính năng Số điện thoại ẩn (Masked Phone Number) được thiết kế nhằm bảo vệ thông tin cá nhân của khách hàng khi các nhân viên telesales thực hiện cuộc gọi đi hoặc nhận cuộc gọi đến.\
(The Masked Phone Number feature is designed to protect customers’ personal information when telesales agents make or receive calls.)
* Khi tính năng này được bật, nhân viên chỉ nhìn thấy một phần số điện thoại của khách hàng (ví dụ: xxx-xxx-123) thay vì toàn bộ số.\
(When this feature is enabled, agents will only see a partial customer phone number (e.g., xxx-xxx-123) instead of the full number.)
## II. Mục đích (Purpose)
* Bảo vệ quyền riêng tư của khách hàng\
(Protect customer privacy)
* Ngăn chặn việc sử dụng sai mục đích\
(Prevent misuse of contact data)
* Tuân thủ chính sách bảo mật dữ liệu\
(Comply with data privacy policies)
* Hạn chế rủi ro trong các chiến dịch telesales ngắn hạn\
(Reduce risk in short-term telesales campaigns)
### III. Cách hoạt động (How It Works)
* Hệ thống xác định vai trò telesales hoặc quyền hạn được cấp.\
(The system identifies users with the telesales role or assigned permissions.)
* Khi xem thông tin liên hệ hoặc thực hiện cuộc gọi, nhân viên chỉ thấy số điện thoại đã được ẩn bớt.\
(When viewing contact details or handling calls, agents only see a masked phone number.)
* Cuộc gọi vẫn có thể được thực hiện hoặc nhận qua hệ thống tổng đài.\
(Calls can still be made and received through the system.)
* Số đầy đủ được lưu bảo mật trong hệ thống và chỉ người có quyền mới xem được.\
(The full phone number is securely stored and only accessible to authorized personnel (e.g., supervisors).
### IV. Vai trò bị ảnh hưởng (Affected Roles)
* Nhân viên telesales: Chỉ thấy số bị ẩn.\
(Telesales agents: See masked phone numbers only.)
* Quản lý/Giám sát: Có quyền xem số đầy đủ.\
(Managers/Supervisors: Can access full phone numbers.)
* Vai trò khác không được cấp quyền: Không xem được số điện thoại.\
(Other unauthorized roles: Cannot access phone numbers.)
Ví dụ (Example)
* Số khách hàng đầy đủ: 0905 123 456\
(Full customer number: 0905 123 456)
* Hiển thị với telesales: xxx xxx 456\
(Shown to telesales agent: xxx xxx 456)
### V. Ảnh hưởng tới báo cáo (Impact on Reports)
* Dữ liệu trong báo cáo vẫn lưu số đầy đủ để đảm bảo thống kê chính xác.\
(Report data still contains full phone numbers for accurate analytics.)
* Không ảnh hưởng tới các chỉ số như CSAT, AHT, tổng số cuộc gọi,…\
(No impact on metrics such as CSAT, AHT, total calls, etc.)
**Lưu ý (Note)**
* Tính năng này có thể được cấu hình bật/tắt theo từng nhân viên cụ thể.\
(This feature can be configured per agent depending on system settings.)
## VI. Cách cài đặt
Đăng nhập vào tài khoản Admin ⇒ Vào thiết lập ⇒ Quản lý người dùng ⇒ Nhân viên\
(Login to Admin account ⇒ Settings ⇒ User management ⇒ Users
Tại đây, tích chọn Telesale cho nhân viên. Nhân viên telesale sẽ không nhìn thấy số điện thoại của người được gọi trên callbar.\
(Here, select the "Telesale" option for the agent. Telesale agents will not see the phone number of the person they are calling on the callbar.)
## VII. Giao diện của nhân viên Telesale
Số của người được gọi sẽ được ẩn một phần khi nhân viên Telesale gọi bằng callbar, xem danh sách khách hàng, xem khách hàng trong chiến dịch hoặc gọi ra từ chiến dịch\
(The callee's phone number will be partially hidden when a Telesale agent makes a call via the callbar, views the customer list, opens a customer profile in a campaign, or makes an outbound call from a campaign.)
1. **Giao diện khi gọi trên callbar**\
**(Calling interface on the callbar)**
2. **Giao diện khi xem danh sách khách hàng**\
**(Customer list interface)**
3. **Giao diện khi xem khách hàng trong chiến dịch**\
**(Interface for viewing a customer in a campaign)**
4. **Giao diện khi gọi ra từ chiến dịch**\
**(Interface for making outbound calls from a campaign)**
# Khách hàng (Customer)
# What are Lead, Contact, Account? How to create Lead, Contact, Account?
**1. What is Lead? What are Contact, Account?**\
Leads - also known as Potential Customers, are people who are in need of the product or service you provide, but have never purchased your product (service). Maybe they are using a competitor's product or service, maybe they don't know about your product (service), or maybe your product (service) hasn't really satisfied them yet. ... However, they can become real customers if you have good marketing strategies.\
Contact (individual customer), Account (business, company) related to purchasing activities or using services. It is the most precious thing, the deciding factor in the success or failure of each business. That's why businesses are always looking for ways to manage customers, such as::
* * Information about customers who have previously purchased the product
* Classify customer
* Potential customer status
* Update customer information from advertising campaigns
* Chăm sóc khách hàng cũ của doanh nghiệp
AntCRM is the solution to all of the above problems, bringing you a rich and loyal customer base..\
**2. How to create Lead, Contact, Account?**\
Lead, Contact, Account can be created by all authorized employees in the company
There are many different ways to create customers. Currently the system supports 5 ways to create Lead, Contact, Account:
**Create manually:** Enter the detailed information of Lead, Contact, Account manually on the interface of the Leads, Contacts, Accounts creation page\
**Import:** Import from data file (supports Excel or CSV files)\
**Webforms:** Automatically create Lead, Contact, Account for information, requests, questions left on the website (kite chat / kite call)\
**Email:** Automatically create Lead, Contact, Account for emails pushed to email forwarder\
**Create quickly**: Lead, Contact, Account are created from a quick create form with basic information
**2.1. Create manually:**\
**a) Create leads manually:**\
Step 1. At Menu bar → choose **Leads** → click button **Create lead**\
\
The page goes to the Lead creation page\
\
Step 2: Enter the necessary information of Lead\
There are the following information fields:
| Information | Description |
| -------------------------------------------------- | --------------------------------------------------------------------------------------------------------------------------------------------------------------------------------------------------------------------------------------------------------------------------------------------------------------------------------------------------------------------------------------------------------------------------------------------------------------------------------------------------------------------------------------------------------------------------------------------------- |
| Status | Lead stages. This section is pre-set up by the admin/Owner on the Leads Settings page |
| Name | Name of customer, it is a required field |
| Surname | Surname of customer |
| Date of birth | Date of birth of customer |
| Gender | Gender of customer |
| Identity card number/Citizen identification number | Identity card number/Citizen identification number of customer |
| Position | Position and authority of the customer |
| Lead source | Source of information of customer |
| Career | The industry in which that customer is working |
| Account name | Company name of customer |
|
Phone
number
| Customer's phone number, multiple numbers can be added phone calls for 1 customer and cannot be duplicated. |
| Email | Email of customer, you can add multiple emails for 1 customer and they cannot be duplicates |
| Social network | Customer social network information |
| Website | Web page of customer |
| Address |
You can add multiple addresses for a customer, including the following information:
Apartment number, street, ward
District
Province/City
Country
|
| Attached | Customer's own note information |
| Custom fields | Each business will have its own important information, and custom fields serve to add information fields that suit your wishes. Set up by Admin/Owner on the Leads Setup page |
| Tag | Tags are assigned to customers, with the aim of grouping customers with similar characteristics for future customer interactions. |
| Share |
Decentralize permissions so employees can see and operate on Lead. Use 1 of 4 options:
All
Employee
Group
Only me
If a user has shared rights with a Lead, that user can see all detailed information of that Lead and can update the Lead. .
However, not everyone who can see the Lead can see the Lead's Permission. Users can see and change the Lead's Permission including:
Lead creator
The person who is authorized and is the admin/owner of the company
Admin/owner is in “Data Owner” group
|
| PIC | The employee in charge of the customer carries out interactions related to this customer such as calling, texting, and sending emails... |
Step 3: Press Save.\
**b) Create contacts manually:**\
Step 1. At Menu bar → choose **Contacts**→ click button **New contact**\
\
The page goes to the Contact creation page\
\
Step 2: Enter the necessary information of Contact\
There are the following information fields:
| Information | Description |
| -------------------------------------------------- | -------------------------------------------------------------------------------------------------------------------------------------------------------------------------------------------------------------------------------------------------------------------------------------------------------------------------------------------------------------------------------------------------------------------------------------------------------------------------------------------------------------------------------------------------------------------------------------------------------------- |
| Status | Stages of Contact. This section is pre-set by the admin/Owner at the Contacts/Accounts Settings page |
| Name | Name of customer, it is required field |
| Last name | Last name of customer |
| Date of birth | Date of birth of customer |
| Gender | Gender of customer |
| Identity card number/Citizen identification number | Identity card number/Citizen identification number of customer |
| Position | Position and authority of the customer |
| Contact source | Source of information of customer |
| Career | The industry in which that customer is working |
| Account name | Company name of customer |
|
Phone
number
| Customer's phone number, multiple numbers can be added phone calls for 1 customer and cannot be duplicated. |
| Email | Email of customer, you can add multiple emails for 1 customer and they cannot be duplicates |
|
Social
network
| Customer social network information |
| Website | Web page of customer |
| Address |
You can add multiple addresses for a customer, including the following information:
Apartment number, street, ward
District
Province/City
Country
|
| Attached | Customer's own note information |
| Custom field | Each business will have its own important information, and custom fields serve to add information fields that suit your wishes. Set up by Admin/Owner on the Contacts/Accounts Setup page. |
| Tag | Tags are assigned to customers, with the aim of grouping customers with similar characteristics for future customer interactions. |
| Share |
Decentralize permissions so employees can see and operate on Contact. Use 1 of 4 options:
All
Employee
Group
Only me
If a user has shared rights with a Contact, that user can see all detailed information of that Contact and can update the Contact .
However, not everyone who can see the Lead can see the Lead's Permission. Users can see and change the Lead's Permission including:
Lead creator
The person who is authorized and is the admin/owner of the company
Admin/owner is in “Data Owner” group
|
| PIC | The employee in charge of the customer carries out interactions related to this customer such as calling, texting, and sending emails... |
Step 3: Press Save.\
**b) Create Accounts manually:**\
Step 1. At Menu bar → choose **Accounts**→ click button **New account**\
\
The page goes to the Account creation page\

Step 3. Enter Account name (required) and the necessary information\
The information of Account is also similar to the information of contact, there are only a few differences like: No date of birth, gender, ID card number, position, account.
Step 4. Press **Save** to complete creating a new account\
**2.2. Import Lead, Contact, Account**\
Import Lead, Contact, Account is a method of uploading an existing customer list in an excel file, saving a lot of time and effort compared to manually adding it. AntCRM supports uploading up to 10,000 customers in 1 import.\
Steps to import customer files into AntCRM:\
Step 1. At **Contacts** page, Click on the arrow  next to the button **Create Contact**\
(For Lead, do it on **Leads** page, press  button beside **Create Lead** button)\
(For Lead, do it on **Accounts** page, press  button beside **Tạo Account**)\
\
Step 2. Press **Import** button\
\
The page goes to the first step of importing customer lists\
\
Step 3. At the Download Template Step, click the Download button to download the import template\
**Note:** Please follow our template to ensure information is uploaded correctly.\
Prepare the file accurately and clearly according to the form.\
Press Continue to go to Upload step\
Step 4. Press **Choose Files** button, choose the prepared customer list file, choose the sheet containing the customer list\
\
Click Continue to go to **Mapping** stepStep 5. Choose the columns with the corresponding information. Click Continue\
\
Step 6: At **Option** step, There are 4 settings for data uploaded to CRM::
| Setup section | Description |
| ------------------------------------------------------------------------ | -------------------------------------------------------------------------------------------------------------------------------------------------------------------------------------------------------------------------------------------------------------------------------------------------------------------------------------------------------------------------------------------------------------------------------------------------------------------------------------------------------------------------------------------------------------------------------------------------------------------------------------------------------------------------------------------------------------------------------------------------------------------------------------------------------------------------------------------------------------------------------------------------------------------------------- |
| Share |
Set up shared permissions to view and edit customer lists for employees, with 4 options:
All: All employees have the right to view and edit
Only me: Only the person who imported this list has permission to view and edit
Group: Only members of the chosen group have the right to view and edit
Employee: Only chosen employees have the right to view and edit
|
| Tag |
Tagging serves the purpose of classifying customer groups, making it convenient for filtering and manipulating later. There are 2 ways to tag:
Choose and tag available tag
Press + button to add new and tag
|
| Choose how to import when checking for duplicate phone numbers or emails |
When importing a customer list into the system, duplication is unavoidable, so this step is needed to have the option to add/remove/merge duplicate data, there are 4 options as follows:
Skip if identical: If the data in the import file matches the data already available in CRM, the system will no longer import the customer.
Double if it is the same: The system still imports this customer as a new customer, not affecting the old information.
Overwrite if duplicate: The system will import this customer, the new information will overwrite the old information, the old information will be lost.
Merge if duplicate: The system will import this customer, the new information will be merged with the old information. The combined information is: Phone number, email, address, card.
|
| PIC |
This is the step of assigning customers to care staff, there are 2 ways of assignment:
Assign to the group according to Assignment Rule: Choose the group that contains caregivers, Note that you must select the group that has the assignment rule set (round robin or random) to assign.
Assign to a specific employee: Assign all uploaded customer lists to any employee in charge
|
Click on Continue to go to **Review** step
Step 6. At **Review** step, Please check all information in the customer list file to upload:
* * Check if **the file name** is correct or not
* Check if **the Sheet Name** is the correct sheet to upload
* Check Number of **Contacts** in the file
* Check **Set up how to import when there is a duplicate phone number or email**
* Check **tag**
* Check the list of customers in the details table
In addition to the above checking steps, the system will automatically check and warn you of the following errors:
* * The uploaded list has duplicate information in the file, which means there are 2 or more customers in the list file with duplicate emails or phone numbers.
* The uploaded list contains customers with invalid phone numbers or emails
* The uploaded list has unnamed customers
If the file has one of the errors above, please edit the file and import again.
If there are no problems with the file, you press Continue button to upload to CRM.\
Step 7. Press Continue button in the import confirmation popup.


The system will notify that the list is being uploaded. The longest time to download is 5 minutes. In fact, if the number of customers is small, the list will finish uploading immediately..
### **2.3. Automatically create customers from Webforms:**
Businesses that have their own website can contact us () or hotline (1900 636 412) to set up a customer registration form, customer information will be automatically saved to AntCRM system.
This form will bring a large number of potential customers to your company, which will then use this information to run product promotion campaigns.
For example, the form below:

### **2.4. Automatically create customers from Email Forwarder:**
Your company has set up an Email forwarder. Every time a customer sends an email to the system, the system will create a new corresponding customer..
Ex:
Your company's support email is , with forward settings to AntCRM system (see how to set up forwarder here)
Customers have email , with email registration name KhachHang A, and send an email to your company's support email ().
The system will automatically create a new customer named KhachHang A and email is .
### 
### **2.5. Create customer quickly:**
**Case 1. Press (+) Create button at the top of the page:**
This is a quick step to create Lead or Contact or Account, you can create customers no matter where you are on any page of AntCRM..
Strep 1. Press (+) Create button at the top of the page

Step 2. Press **Create Lead** or **Create Contact** or **Create Account** depending on your needs
The page goes to the Create Customer page
Step 3. Enter information and press Save the same way as creating manually.
**Case 2. Quickly create customers on the Create/Edit Tickets and Tasks pages**
Step 1. At Create/Edit Ticket/ Task page, press **+** button in the customer field
For Account, change the customer type and then press the button **+** .

The page will pop up a customer quick creation popup
Step 2. Enter the name customer (required) and the necessary information
Step 3. Press Add to create a new customer.
# Lead, Contact, Account là gì và cách tạo (What are Lead, Contact, Account and how to create)
What are Lead, Contact, Account? How to create Lead, Contact, Account?
**1. Lead là gì? Contact, Account là gì?**\
(**What is Lead? What are Contact, Account?)**\
\
Lead - hay còn gọi là Khách hàng tiềm năng, là những người đang có nhu cầu về sản phẩm hoặc dịch vụ mà bạn cung cấp, nhưng chưa bao giờ mua sản phẩm (dịch vụ) của bạn. Có thể họ đang sử dụng sản phẩm hoặc dịch vụ của đối thủ cạnh tranh, có thể họ chưa biết về sản phẩm (dịch vụ) của bạn, hoặc có thể sản phẩm (dịch vụ) của bạn chưa thực sự làm hài lòng họ... Tuy nhiên họ hoàn toàn có thể trở thành khách hàng thực sự nếu bạn có những chiến lược marketing tốt.\
(Leads - also known as Potential Customers, are people who are in need of the product or service you provide, but have never purchased your product (service). Maybe they are using a competitor's product or service, maybe they don't know about your product (service), or maybe your product (service) hasn't really satisfied them yet. ... However, they can become real customers if you have good marketing strategies.)\
Contact ( khách hàng cá nhân), Account (doanh nghiệp, công ty) có liên quan đến hoạt động mua hàng hoặc sử dụng dịch vụ. Là thứ quý giá nhất, yếu tố quyết định đến sự thành công hay thất bại của từng doanh nghiệp. Chính vì thế các doanh nghiệp luôn tìm mọi cách để quản lý khách hàng, có thể kể đến như:\
(Contact (individual customer), Account (business, company) related to purchasing activities or using services. It is the most precious thing, the deciding factor in the success or failure of each business. That's why businesses are always looking for ways to manage customers, such as:)
* Thông tin khách hàng từng mua sản phẩm
(Information about customers who have previously purchased the product)
* Phân loại khách hàng
(Classify customer)
* Tình trạng khách hàng tiềm năng
(Potential customer status)
* Cập nhật thông tin khách hàng từ các chiến dịch quảng cáo
(Update customer information from advertising campaigns)
* Chăm sóc khách hàng cũ của doanh nghiệp\
(Chăm sóc khách hàng cũ của doanh nghiệp)
AntCRM chính là giải pháp cho tất cả các vấn đề trên, mang lại nguồn khách hàng dồi dào và trung thành cho các bạn.\
(AntCRM is the solution to all of the above problems, bringing you a rich and loyal customer base.)
\
**2. Làm thế nào để tạo Lead, Contact, Account?**\
(**How to create Lead, Contact, Account?)**\
Lead, Contact, Account có thể được tạo bởi tất cả nhân viên được cấp quyền trong công ty\
(Lead, Contact, Account can be created by all authorized employees in the company)
Có nhiều cách khác nhau để tạo ra các khách hàng. Hiện tại hệ thống hỗ trợ 5 cách tạo Lead, Contact, Account:\
(There are many different ways to create customers. Currently the system supports 5 ways to create Lead, Contact, Account:)
* **Tạo thủ công**: nhập các thông tin chi tiết của Lead, Contact, Account theo cách thủ công trên giao diện của trang tạo Leads, Contacts, Accounts
* (**Create manually:** Enter the detailed information of Lead, Contact, Account manually on the interface of the Leads, Contacts, Accounts creation page)
* **Import**: Nhập từ file dữ liệu(hỗ trợ file Excel hoặc CSV)\
(**Import:** Import from data file (supports Excel or CSV files))
* **Webforms**: Tự động tạo Lead, Contact, Account cho những thông tin, yêu cầu, thắc mắc để lại trên website(kite chat/ kite call)\
(**Webforms:** Automatically create Lead, Contact, Account for information, requests, questions left on the website (kite chat / kite call))
* **Email**: Tự động tạo Lead, Contact, Account cho các email đẩy về email forwarder\
(**Email:** Automatically create Lead, Contact, Account for emails pushed to email forwarder)\
**Tạo nhanh**: Lead, Contact, Account được tạo từ form tạo nhanh với các thông tin cơ bản\
(**Create quickly**: Lead, Contact, Account are created from a quick create form with basic information)
**2.1. Tạo thủ công:**\
(**Create manually:)**\
\
**a) Tạo thủ công KH tiềm năng:**\
(**Create leads manually:)**\
Bước 1. Tại thanh Menu → chọn **KH tiềm năng**→ click button **Tạo KH tiềm năng**\
(Step 1. At Menu bar → choose **Leads** → click button **Create lead)**\
\
Trang chuyển đến trang tạo Lead\
(The page goes to the Lead creation page)
Bước 2: Nhập các thông tin cần thiết của Lead\
(Step 2: Enter the necessary information of Lead)\
Có các trường thông tin như sau:\
(There are the following information fields:)
|
Các giai đoạn của Lead. Phần này được admin/ Owner thiết lập sẵn tại trang Cài đặt của Leads (Lead stages. This section is pre-set up by the admin/Owner on the Leads Settings page)
|
|
Tên (Name)
|
Tên của khách hàng, là trường bắt buộc (Name of customer, it is a required field)
|
|
Họ (Surname)
|
Họ của khách hàng (Surname of customer)
|
|
Ngày sinh (Date of birth)
|
Ngày sinh của khách hàng (Date of birth of customer)
|
|
Giới tính (Gender)
|
Giới tính của khách hàng (Gender of customer)
|
|
Số CMND/CCCD (Identity card number/Citizen identification number)
|
Số chứng minh nhân dân/căn cước công dân của khách hàng (Identity card number/Citizen identification number of customer)
|
|
Chức vụ (Position)
|
Chức vụ, quyền hạn của khách hàng (Position and authority of the customer)
|
|
Nguồn Lead/KH tiềm năng (Lead source)
|
Nguồn cung cấp thông tin của khách hàng (Source of information of customer)
|
|
Ngành nghề (Career)
|
Lĩnh vực mà khách hàng đó đang làm việc (The industry in which that customer is working)
|
|
Tên Account (Account name)
|
Tên công ty của khách hàng (Company name of customer)
|
|
Điện thoại (Phone number)
|
Số điện thoại của khách hàng, có thể thêm nhiều số điện thoại cho 1 khách hàng và không được trùng nhau. (Customer's phone number, multiple numbers can be added phone calls for 1 customer and cannot be duplicated.)
|
| Email |
Email của khách hàng, có thể thêm nhiều email cho 1 khách hàng và không được trùng nhau (Email of customer, you can add multiple emails for 1 customer and they cannot be duplicates)
|
|
Mạng xã hội (Social network)
|
Thông tin các mạng xã hội của khách hàng (Customer social network information)
|
| Website |
Trang web của khách hàng (Web page of customer)
|
|
Địa chỉ (Address)
|
Có thể thêm nhiều địa chỉ cho 1 khách hàng, gồm các thông tin sau: (You can add multiple addresses for a customer, including the following information:)
Số nhà, đường, phường/xã (Apartment number, street, ward)
Quận/Huyện
(District)
Tỉnh/hành phố
(Province/City)
Quốc gia
(Country)
|
|
Đính kèm (Attached)
|
Thông tin ghi chú riêng của khách hàng (Customer's own note information)
|
|
Trường tùy chỉnh (Custom fields)
|
Từng doanh nghiệp sẽ có các thông tin quan trọng riêng, trường tùy chỉnh phục vụ việc thêm các trường thông tin phù hợp với mong muốn. Được Admin/Owner thiết lập tại trang Thiết lập Leads (Each business will have its own important information, and custom fields serve to add information fields that suit your wishes. Set up by Admin/Owner on the Leads Setup page)
|
|
Nhãn (Tag)
|
Nhãn được gắn cho khách hàng, nhằm mục đích phân nhóm các khách hàng có tính chất giống nhau để phục vụ cho các tương tác khách hàng sau này. (Tags are assigned to customers, with the aim of grouping customers with similar characteristics for future customer interactions.)
|
|
Chia sẻ (Share)
|
Phân quyền để nhân viên có thể thấy và hoạt động trên Lead. Dùng 1 trong 4 lựa chọn (Decentralize permissions so employees can see and operate on Lead. Use 1 of 4 options:)
Tất cả
(All)
Nhân viên
(Employee)
Nhóm
(Group)
Chỉ mình tôi
(Only me)
Nếu user được chia sẻ quyền với một Lead thì user đó có thể thấy tất cả các thông tin chi tiết của Lead đó, có thể thao tác cập nhật Lead . (If a user has shared rights with a Lead, that user can see all detailed information of that Lead and can update the Lead.)
Tuy nhiên không phải tất cả ai thấy được Lead đều thấy được Permission của Lead . User có thể thấy và thay đổi được Permission của Lead bao gồm: (However, not everyone who can see the Lead can see the Lead's Permission. Users can see and change the Lead's Permission including:)
Người tạo ra Lead (Lead creator)
Người được phân quyền và là admin/owner của công ty
(The person who is authorized and is the admin/owner of the company)
Admin/owner nằm trong group “Data Owner”
(Admin/owner is in “Data Owner” group)
|
|
Phụ trách (PIC)
|
Nhân viên phụ trách khách hàng, thực hiện các tương tác liên quan đến khách hàng này như gọi điện, nhắn tin, gửi email... (The employee in charge of the customer carries out interactions related to this customer such as calling, texting, and sending emails...)
|
Bước 3: Nhấn Lưu\
(Step 3: Press Save.)
\
**b) Tạo thủ công KH cá nhân**\
(**Create contacts manually:)**\
Bước 1. Tại thanh Menu → chọn **KH cá nhân**→ click button **Tạo KH cá nhân**\
(Step 1. At Menu bar → choose **Contacts**→ click button **New contact)**\
Trang chuyển đến trang tạo Contact\
(The page goes to the Contact creation page)
Bước 2: Nhập các thông tin cần thiết của Contact Có các trường thông tin như sau:\
(Step 2: Enter the necessary information of Contact\
There are the following information fields:)
|
Các giai đoạn của Contact. Phần này được admin/ Owner thiết lập sẵn tại trang Cài đặt của Contacts/Accounts (Stages of Contact. This section is pre-set by the admin/Owner at the Contacts/Accounts Settings page)
|
|
Tên (Name)
|
Tên của khách hàng, là trường bắt buộc (Name of customer, it is required field)
|
|
Họ (Last name)
|
Họ của khách hàng (Last name of customer)
|
|
Ngày sinh (Date of birth)
|
Ngày sinh của khách hàng (Date of birth of customer)
|
|
Giới tính (Gender)
|
Giới tính của khách hàng (Gender of customer)
|
|
Số CMND/CCCD (Identity card number/Citizen identification number)
|
Số chứng minh nhân dân/căn cước công dân của khách hàng (Identity card number/Citizen identification number of customer)
|
|
Chức vụ (Position)
|
Chức vụ, quyền hạn của khách hàng (Position and authority of the customer)
|
|
Nguồn Contact (Contact source)
|
Nguồn cung cấp thông tin của khách hàng (Source of information of customer)
|
|
Ngành nghề (Career)
|
Lĩnh vực mà khách hàng đó đang làm việc (The industry in which that customer is working)
|
|
Tên doanh nghiệp (Account name)
|
Tên công ty của khách hàng (Company name of customer)
|
|
Điện thoại (Phone number)
|
Số điện thoại của khách hàng, có thể thêm nhiều số điện thoại cho 1 khách hàng và không được trùng nhau (Customer's phone number, multiple numbers can be added phone calls for 1 customer and cannot be duplicated)
|
| Email |
Email của khách hàng, có thể thêm nhiều email cho 1 khách hàng và không được trùng nhau (Email of customer, you can add multiple emails for 1 customer and they cannot be duplicates)
|
|
Mạng xã hội (Social network)
|
Thông tin các mạng xã hội của khách hàng (Customer social network information)
|
| Website |
Trang web của khách hàng (Web page of customer)
|
|
Địa chỉ (Address)
|
Có thể thêm nhiều địa chỉ cho 1 khách hàng, gồm các thông tin sau: (You can add multiple addresses for a customer, including the following information:)
Số nhà, đường, phường/xã
(Apartment number, street, ward)
Quận/Huyện
(District)
Tỉnh/Thành phố
(Province/City)
Quốc gia
(Country)
|
|
Đính kèm (Attached)
|
Thông tin ghi chú riêng của khách hàng (Customer's own note information)
|
|
Trường tùy chỉnh (Custom field)
|
Từng doanh nghiệp sẽ có các thông tin quan trọng riêng, trường tùy chỉnh phục vụ việc thêm các trường thông tin phù hợp với mong muốn. Được Admin/Owner thiết lập tại trang Thiết lập Contacts/Accounts. (Each business will have its own important information, and custom fields serve to add information fields that suit your wishes. Set up by Admin/Owner on the Contacts/Accounts Setup page.)
|
|
Nhãn (Tag)
|
Nhãn được gắn cho khách hàng, nhằm mục đích phân nhóm các khách hàng có tính chất giống nhau để phục vụ cho các tương tác khách hàng sau này. (Tags are assigned to customers, with the aim of grouping customers with similar characteristics for future customer interactions.)
|
|
Chia sẻ (Share)
|
Phân quyền để nhân viên có thể thấy và hoạt động trên Contact. Dùng 1 trong 4 lựa chọn: (Decentralize permissions so employees can see and operate on Contact. Use 1 of 4 options:)
Tất cả
(All)
Nhân viên
(Employee)
Nhóm
(Group)
Chỉ mình tôi
(Only me)
Nếu user có được chia sẻ quyền với một Contact thì user đó có thể thấy tất cả các thông tin chi tiết của của Contact đó, có thể thao tác cập nhập Contact. (If a user has shared rights with a Contact, that user can see all detailed information of that Contact and can update the Contact.)
Tuy nhiên không phải tất cả ai thấy được Contact đều thấy được Permission của Contact. User có thể thấy và thay đổi được Permission của Contact bao gồm: (However, not everyone who can see the Lead can see the Lead's Permission. Users can see and change the Lead's Permission including:)
Người tạo ra Contact
(Lead creator)
Người được phân quyền và là admin/owner của công ty
(The person who is authorized and is the admin/owner of the company)
Admin/owner nằm trong group “Data Owner (Admin/owner is in “Data Owner” group)
|
|
Phụ trách (PIC)
|
Nhân viên phụ trách khách hàng, thực hiện các tương tác liên quan đến khách hàng này như gọi điện, nhắn tin, gửi email... (The employee in charge of the customer carries out interactions related to this customer such as calling, texting, and sending emails...)
|
Bước 3: Nhấn Lưu\
(Step 3: Press Save.)
\
**b) Tạo thủ công KH doanh nghiệ**p\
(**Create Accounts manually:)**\
Bước 1. Tại thanh Menu → chọn **KH doanh nghiệp**→ click button **Tạo KH doanh nghiệp**\
(Step 1. At Menu bar → choose **Accounts**→ click button **New account)**\
Trang chuyển đến trang tạo mới Account\
(The page goes to the Account creation page)
Bước 3. Nhập Tên Account (bắt buộc) và các thông tin cần thiết\
(Step 3. Enter Account name (required) and the necessary information)\
\
Thông tin của Account cũng gần giống như thông tin của Contact, chỉ khác một số chỗ như: không có Ngày sinh, Giới tính, Số CMND, Chức vụ, Account.\
(The information of Account is also similar to the information of contact, there are only a few differences like: No date of birth, gender, ID card number, position, account.)
Bước 4. Nhấn **Lưu** để hoàn tất tạo mới Account.\
(Step 4. Press **Save** to complete creating a new account)
\
**2.2. Import Lead, Contact, Accou**nt\
(**Import Lead, Contact, Account)**\
Import Lead, Contact, Account là phương pháp tải lên danh sách khách hàng có sẵn trong file excel, tiết kiệm rất nhiều thời gian và công sức so với việc thêm thủ công. AntCRM hỗ trợ tải lên đến 10.000 khách hàng trong 1 lần import. Các bước để import file khách hàng vào AntCRM:\
(Import Lead, Contact, Account is a method of uploading an existing customer list in an excel file, saving a lot of time and effort compared to manually adding it. AntCRM supports uploading up to 10,000 customers in 1 import.)
Các bước import khách hàng vào AntCRM\
(Steps to import customer files into AntCRM:)
\
Bước 1. Tại trang Contacts, nhấn vào mũi tên  ở bên cạnh nút **Tạo Contact**\
(Step 1. At **Contacts** page, Click on the arrow  next to the button **Create Contact)**
Đối với Lead thì thực hiện tại trang Leads, nhấn nút  ở cạnh nút **Tạo Lead**)\
(For Lead, do it on **Leads** page, press  button beside **Create Lead** button)
Đối với Account thì thực hiện tại trang Accounts, nhấn nút  ở cạnh nút **Tạo Account**\
(For Lead, do it on **Accounts** page, press  button beside **Tạo Account**)
Bước 2. Nhấn nút **Import**\
(Step 2. Press **Import** button)
Trang chuyển đến Bước đầu tiên của việc Import danh sách khách hàng\
(The page goes to the first step of importing customer lists)
Bước 3. Tại Bước Tải về mẫu, nhấn nút Tải về để tải về mẫu import\
(Step 3. At the Download Template Step, click the Download button to download the import template)\
\
**Lưu ý**: Nên làm theo mẫu của chúng tôi để đảm bảo thông tin được tải lên chính xác.\
(**Note:** Please follow our template to ensure information is uploaded correctly.)
\
Chuẩn bị file thật chính xác và rõ ràng theo mẫu.\
(Prepare the file accurately and clearly according to the form.)\
\
Nhấn Tiếp tục để đến bước Upload\
(Press Continue to go to Upload step)
Bước 4. Nhấn nút Choose Files, chọn file danh sách khách hàng đã chuẩn bị, Chọn sheet chứa danh sách khách hàng\
(Step 4. Press **Choose Files** button, choose the prepared customer list file, choose the sheet containing the customer list)
Click Tiếp tục để đến bước **Mapping** \
(Click Continue to go to **Mapping** step)
Bước 5. Chọn các cột có nội dung thông tin tương ứng. Click Tiếp tục
(Step 5. Choose the columns with the corresponding information. Click Continue)
Bước 6. Tại bước **Tùy chọn**, có 4 thiết lập cho các dữ liệu được đưa lên CRM là:\
(Step 6: At **Option** step, There are 4 settings for data uploaded to CRM:)
|
Thiết lập chia sẻ quyền xem và chỉnh sửa danh sách khách hàng cho nhân viên, có 4 tùy chọn: (Set up shared permissions to view and edit customer lists for employees, with 4 options:)
Tất cả: tất cả nhân viên đều có quyền xem và sửa
(All: All employees have the right to view and edit)
Chỉ mình tôi: Chỉ người import danh sách này mới có quyền xem và sửa
Only me: Only the person who imported this list has permission to view and edit
Nhóm: Các thành viên của nhóm được chọn mới có quyền xem và sửa
(Group: Only members of the chosen group have the right to view and edit)
Nhân viên: Các nhân viên được chọn mới có quyền xem và sửa
(Employee: Only chosen employees have the right to view and edit)
|
| Tag |
Gắn thẻ nhằm mục đích phân loại nhóm khách hàng, tiện cho việc lọc và thao tác sau này. Có 2 cách gắn thẻ: (Tagging serves the purpose of classifying customer groups, making it convenient for filtering and manipulating later. There are 2 ways to tag:)
Chọn và gắn thẻ có sẵn
(Choose and tag available tag)
Nhấn nút + để thêm mới và gắn thẻ (Press + button to add new and tag)
|
|
Chọn cách import khi kiểm tra trùng số điện thoại hoặc email (Choose how to import when checking for duplicate phone numbers or emails)
|
Khi import danh sách khách hàng lên hệ thống, không tránh khỏi việc trùng lặp, vì vậy cần phải có bước này để tùy chọn thêm/bỏ/gộp dữ liệu trùng, có 4 tùy chọn như sau: (When importing a customer list into the system, duplication is unavoidable, so this step is needed to have the option to add/remove/merge duplicate data, there are 4 options as follows:)
Bỏ qua nếu trùng: nếu dữ liệu trong file import trùng với dữ liệu đã có trên CRM, hệ thống sẽ không import khách hàng nãy nữa.
(Skip if identical: If the data in the import file matches the data already available in CRM, the system will no longer import the customer.)
Nhân đôi nếu trùng: Hệ thống vẫn import khách hàng này với tư cách là một khách hàng mới, không ảnh hưởng đến thông tin cũ.
(Double if it is the same: The system still imports this customer as a new customer, not affecting the old information.)
Ghi đè nếu trùng: Hệ thống sẽ import khách hàng này, thông tin mới sẽ đè lên thông tin cũ, thông tin cũ sẽ mất đi.
(Overwrite if duplicate: The system will import this customer, the new information will overwrite the old information, the old information will be lost.)
Gộp nếu trùng: Hệ thống sẽ import khách hàng này, thông tin mới sẽ được gộp vào với thông tin cũ. Các thông tin được gộp là: Số điện thoại, email, địa chỉ, thẻ. (Merge if duplicate: The system will import this customer, the new information will be merged with the old information. The combined information is: Phone number, email, address, card.)
|
|
Phân công (PIC)
|
Là bước phân công khách hàng cho nhân viên chăm sóc, có 2 cách phân công: (This is the step of assigning customers to care staff, there are 2 ways of assignment:)
Phân công cho nhóm theo Assignment Rule: Chọn nhóm chứa các nhân viên chăm sóc, Lưu ý là phải chọn nhóm có thiết lập assignment rule (tuần tự hoặc ngẫu nhiên) để phân công. (Assign to the group according to Assignment Rule: Choose the group that contains caregivers, Note that you must select the group that has the assignment rule set (round robin or random) to assign.)
Phân công cho 1 nhân viên cụ thể: Phân công tất cả danh sách khách hàng tải lên cho chỉ 1 nhân viên bất kỳ phụ trách
(Assign to a specific employee: Assign all uploaded customer lists to any employee in charge)
|
Click Tiếp tục để đến bước Xem lại\
(Click on Continue to go to **Review** step)
Bước 6. Tại bước Xem lại, vui lòng kiểm tra toàn bộ các thông tin của file danh sách khách hàng cần tải lên:\
(Step 6. At **Review** step, Please check all information in the customer list file to upload:)
* * Kiểm tra **Tên tệp** có đúng file cần tải hay không
(Check if **the file name** is correct or not)
* Kiểm tra Tên trang có đúng sheet cần tải lên hay không
(Check if **the Sheet Name** is the correct sheet to upload)
* Kiểm tra Số lượng KH cá nhân có trong file
(Check Number of **Contacts** in the file)
* Kiểm tra Chọn cách tải lên khi trùng số điện thoại hoặc email
(Check **Set up how to import when there is a duplicate phone number or email)**
* Kiểm tra Nhãn
(Check **tag)**
* Kiểm tra danh sách các khách hàng ở bảng chi tiết
(Check the list of customers in the details table)
Ngoài các bước kiểm tra trên, hệ thống sẽ tự kiểm tra vào cảnh báo bạn các lỗi như sau:\
(In addition to the above checking steps, the system will automatically check and warn you of the following errors:)
* * Danh sách tải lên có thông tin trùng trong file, nghĩa là có 2 hoặc nhiều khách hàng trong file danh sách bị trùng email hoặc số điện thoại
(The uploaded list has duplicate information in the file, which means there are 2 or more customers in the list file with duplicate emails or phone numbers.)
* Danh sách tải lên có khách hàng có số điện thoại hoặc email không hợp lệ
(The uploaded list contains customers with invalid phone numbers or emails)
* Danh sách tải lên có khách hàng không có tên
(The uploaded list has unnamed customers)
Nếu file có 1 trong các lỗi như trên, bạn vui lòng chỉnh sửa lại file và thực hiện import lại.\
(If the file has one of the errors above, please edit the file and import again.)
Nếu file không có vấn đề gì, bạn nhấn nút Tiếp tục để tiến hành tải lên CRM.\
(If there are no problems with the file, you press Continue button to upload to CRM.)\
\
Bước 7. Nhấn nút Tiếp tục ở popup xác nhận Import\
(Step 7. Press Continue button in the import confirmation popup.)
Hệ thống sẽ thông báo danh sách đang được tải lên, thời gian lâu nhất để tải là 5 phút, thực tế nếu lượng khách hàng ít, thì danh sách sẽ tải lên xong ngay lập tức.\
(The system will notify that the list is being uploaded. The longest time to download is 5 minutes. In fact, if the number of customers is small, the list will finish uploading immediately..)
### **2.3.** Tự động tạo khách hàng từ Webforms:
### **(Automatically create customers from Webforms:)**
Doanh nghiệp có 1 trang web riêng, có thể liên hệ với chúng tôi () hoặc hotline (1900 636 412) để thiết lập một Form đăng ký khách hàng, các thông tin khách hàng sẽ được tự động lưu về hệ thống AntCRM.\
(Businesses that have their own website can contact us () or hotline (1900 636 412) to set up a customer registration form, customer information will be automatically saved to AntCRM system.)
Hình thức này sẽ đem về một số lượng lớn các khách hàng tiềm năng cho công ty bạn, từ đó sẽ dùng thông tin này để chạy chiến dịch quảng bá sản phẩm.\
(This form will bring a large number of potential customers to your company, which will then use this information to run product promotion campaigns.)
Ví dụ như form dưới đây:\
(For example, the form below:)

### **2.4.** Tự động tạo khách hàng từ Email Forwarder:
### **(Automatically create customers from Email Forwarder:)**
Công ty bạn có thiết lập Email forwarder, mỗi khi có khách hàng gửi email về hệ thống, hệ thống sẽ tạo 1 khách hàng mới tương ứng.\
(Your company has set up an Email forwarder. Every time a customer sends an email to the system, the system will create a new corresponding customer..)
Ví dụ:\
(Ex:)
Email support của công ty bạn là , có thiết lập forward về hệ thống AntCRM (xem cách thiết lập forwarder[ tại đây](https://docs.google.com/document/d/1dqmD8XwPI7xZXUFYm8rmkGvfjukSG3JH0OJtdjGEWng/edit#))\
(Your company's support email is , with forward settings to AntCRM system (see how to set up forwarder here))
Khách hàng có email , có tên đăng ký Email là KhachHang A, thực hiện gửi email về email support của công ty bạn ()\
(Customers have email , with email registration name KhachHang A, and send an email to your company's support email ())
Hệ thống sẽ tự động tạo khách hàng mới có tên KhachHang A và email là .\
(The system will automatically create a new customer named KhachHang A and email is .)
### **2.5.** Tạo nhanh khách hàng:
### **(Create customer quickly:)**
**Trường hợp 1. Nhấn nút (+) Tạo ở đầu trang:**\
(**Case 1. Press (+) Create button at the top of the page:)**
Đây là bước tạo nhanh Lead hoặc Contact hoặc Account, bạn có thể tạo khách hàng dù bạn đang ở bất cứ trang nào của AntCRM.\
(This is a quick step to create Lead or Contact or Account, you can create customers no matter where you are on any page of AntCRM.)
Bước 1. Nhấn nút (+) Tạo ở trên đầu trang\
(Step 1. Press (+) Create button at the top of the page)

Bước 2. Nhấn **Tạo Lead** hoặc **Tạo Contact** hoặc **Tạo Account** tùy vào nhu cầu của bạn\
(Step 2. Press **Create Lead** or **Create Contact** or **Create Account** depending on your needs)
Trang chuyển đến trang Tạo khách hàng\
(The page goes to the Create Customer page)
Bước 3. Thực hiện nhập thông tin và nhấn Lưu giống như cách Tạo thủ công.\
(Step 3. Enter information and press Save the same way as creating manually.)
**Trường hợp 2. Tạo nhanh khách hàng tại các trang Tạo/ Chỉnh sửa Tickets, Task**\
(**Case 2. Quickly create customers on the Create/Edit Tickets and Tasks pages)**
Bước 1. Tại trang Tạo/Chỉnh sửa Ticket/ Task, nhấn nút  tại trường Khách hàng\
(Step 1. At Create/Edit Ticket/ Task page, press  button in the customer field)
Đối với Account thì thay đổi loại khách hàng rồi nhấn nút \
(For Account, change the customer type and then press the button )

Trang sẽ bật lên popup tạo nhanh khách hàng\
(The page will pop up a customer quick creation popup)
Bước 2. Nhập Tên khách hàng (bắt buộc) và các thông tin cần thiết\
(Step 2. Enter the name customer (required) and the necessary information)
Bước 3. Nhấn Thêm để tạo mới khách hàng.\
(Step 3. Press Add to create a new customer.)
# Làm thế nào để hiển thị thêm các cột thông tin ? (How to display more columns of information? )
Đây là hướng dẫn chung cho các trang **danh sách** Leads, Contacts, Accounts, Tickets, Tasks, Giao dịch\
(This is a general guide for the Leads, Contacts, Accounts, Tickets, Tasks, Orders **list** pages)
Lưu ý: Chức năng này chỉ hoạt động khi hiển thị kiểu danh sách\
(Note: This feature only work in list view mode.)
Bước 1. Đi đến trang danh sách Contact (hoặc Leads, Accounts, Tickets, Tasks, Giao dịch).\
(Step 1. Go to the Contacts list page (or Leads, Accounts, Tickets, Tasks, Orders).)
Bước 2. Ở góc bên phải của bảng danh sách, nhấn vào icon \
(Step 2. In the right corner of the list table, click on the icon )
Cửa sổ thêm cột hiện ra.\
(The column addition window appears.)
Bước 3. Tại mục Cột bạn có thể thêm, nhấn vào cột bất kỳ để hiển thị cột đó.\
(Step 3. In the Columns section you can add, click on any column to display that column.)
Ví dụ: Nhấn để hiển thị cột Ngày sinh\
(For example: Click to display the Date of Birth column)
Cột Ngày sinh sẽ được thêm vào danh sách Cột bạn đã thêm\
(The Date of Birth column will be added to the list of Columns you have added.)
**Ấn Lưu (Click Save)**

\
 
Bạn có thể thay đổi thứ tự hiển thị cột bằng cách kéo thả tên cột \
(You can change the order of column display by dragging and dropping the column names)

 
**Ấn Lưu (Click Save)**
Danh sách cột sau khi thiết lập thay đổi :\
(List of columns after setting changes:)
# Các thiết lập cho Lead, Contact,Account (Settings for Lead, Contact, Account )
I. Thiết lập cho KH tiềm năng \
(Settings for Leads)
------------------------
### 1. Thiết lập nguồn KH tiềm năng (1. Settings for Lead sources)
#### 1.1. Thêm nguồn (1.1. Add sources)
Bước 1. Mở trang Thiết lập → KH tiềm năng → Nguồn KH tiềm năng\
(Step 1. Open Settings page → Leads → Lead sources)
Bước 2: Nhập Mã Nguồn và Tên nguồn\
(Step 2: Enter the Source Code and Source Name.)
* Mã nguồn đại diện cho nguồn, bạn có thể dùng chữ hoặc số một cách ngắn gọn và dễ hiểu nhất để nhận ra ngay khách hàng đến từ nguồn nào.\
(The Source Code represents the lead source; you can use letters or numbers in a concise and clear way to quickly identify which source the customer is coming from..)
* Tên Nguồn là tên của nguồn khách hàng \
(Source Name is the name of the lead source.)
Bước 3. Nhấn Thêm \
(Step 3: Click Add)
1.2. Chỉnh sửa nguồn\
(1.2 Edit source)
Để chỉnh sửa nguồn khách hàng tiềm năng, bạn thực hiện các bước sau: \
(To stage a lead source, follow these steps)
Bước 1. Mở trang Thiết lập → KH tiềm năng → Nguồn KH tiềm năng\
(Step 1. Open Settings page → Leads → Lead sources)
Bước 2. Tại danh sách nguồn, nhấp chuột vào mã nguồn hoặc tên nguồn bạn muốn chỉnh sửa\
(Step 2. In the source list, click on the source code or source name you want to edit.)
Bước 3. Nhập giá trị mong muốn\
(Step 3. Enter desired value)
Bước 4. Nhấn Lưu thay đổi\
(step 4: Click Save changes) .
#### 1.3. Xóa nguồn (1.3. Delete source)
Để xóa nguồn khách hàng tiềm năng, bạn thực hiện các bước sau:\
(To delete a lead source, follow these steps:)
Bước 1. Mở trang Thiết lập → KH tiềm năng → Nguồn KH tiềm năng\
(Step 1. Open Settings page - Leads - Lead sources)
Bước 2. Tại danh sách nguồn, rê chuột vào nguồn mà bạn muốn xóa, nút Lưu thay đổi và Xóa sẽ hiện ra\
(Step 2. In the source list, hover over the source you want to delete, and the Save Changes and Delete buttons will appear.)
Bước 3: Nhấn nút Xóa và xác nhận xóa để hoàn tất.\
(Step 3: Press Delete button and confirm delete to complete..)
2\. Thiết lập Trạng thái KH tiềm năng\
(2. Setting leads status)
-------------------------
Quá trình tiếp cận khách hàng tiềm năng cho đến khi khách mua hàng có thể là 1 quá trình dài và nhiều hoạt động xảy ra, vì vậy để thể hiện cho từng giai đoạn ấy, bạn có thể thiết lập trạng thái, tương ứng mỗi trạng thái là một giai đoạn. Dưới đây là các hướng dẫn thêm, sửa, xóa và trạng thái mặc định.\
(The process of engaging with leads until a customer makes a purchase can be long and involve multiple activities. To represent each stage of this process, you can set up statuses, with each status corresponding to a specific stage. Below are instructions for adding, editing, deleting, and setting the default status.)
#### 2.1. Thêm Trạng thái (2.1. Add stage)
**Bước 1**. Mở trang Thiết lập → KH tiềm năng → Trạng thái KH tiềm năng\
(**Step 1**. Open Settings page → Leads → Lead stages)
**Bước 2:** Nhập tên trạng thái và chọn màu cho trạng thái\
(**Step 2:** Enter the stage name and choose a color for the stage)
**Tên trạng thái:** Tùy vào mong muốn của bạn mà đặt tên cho ngắn gọn và dễ hiểu nhất, thể hiện được tính chất của giai đoạn.\
(**Stage Name:** Choose a name that is concise and easy to understand, reflecting the nature of the stage.)
**Màu**: Giúp bạn phân biệt nhanh chóng các trạng thái bằng màu sắc\
(**Color**: Helps you quickly distinguish between stages using colors)
**Bước 3**. Nhấn Lưu\
(**Bước 3**. Click Save)
#### 2.2. Chỉnh sửa Trạng thái (2.2. Edit stage)
Bạn có thể chỉnh sửa tên, màu sắc và cả thứ tự các trạng thái\
(You can edit the name, color and even the order of the stages.)
#### Các bước chỉnh sửa tên và màu đại diện: (Steps to edit name and representative color:)
**Bước 1**. Nhấn vào icon chỉnh sửa tại thanh trạng thái mà bạn muốn sửa\
(**Step 1.** Click the edit icon on the stage bar you want to edit.)
Bước 2: Tại popup cập nhật trạng thái, chỉnh sửa tên và màu sắc mong muốn\
(Step 2: In the stage update popup, edit the name and color as desired.)
Bước 3: Nhấn Lưu để lưu thay đổi\
(Step 3: Press Save to save changes)
#### Các bước chỉnh sửa thứ tự trạng thái: (Steps to edit the order of stages:)
Chỉ cần kéo thả thì bạn có thể thay đổi vị trí các trạng thái theo ý muốn , nhấn Lưu ở cuối trang để lưu thay đổi.\
(Simply drag and drop to rearrange the stages as desired, Click on Save at the bottom of the page to save the changes)
#### 2.3. Xóa Trạng thái (2.3. Delete stage)
Bước 1. Mở trang Thiết lập → KH tiềm năng → Trạng thái KH tiềm năng\
(Step 1. Open Settings page - Leads - Leads stages)
Bước 2. Nhấn icon xóa tại thanh trạng thái cần xóa \
(Step 2. Click the delete icon on the stage bar you want to delete.)
Lưu ý: Bạn không thể xóa trạng thái đang sử dụng (có Lead đang ở trạng thái này)\ (Note: You cannot delete a stage that is currently in use (if there are Leads in this stage))
#### 2.4. Thiết lập trạng thái mặc định (2.4. Set default stage)
Trạng thái mặc định là trạng thái được gắn cho khách hàng mới\
(The default status is the status assigned to new customers).
Bước 1: Mở trang Thiết lập - Leads - Trạng thái Leads\
(Step 1: Open Settings page - Leads - Leads stages)
Tại cuối trang có phần thiết lập Trạng thái mặc định\
(At the bottom of the page, there is a section to set the default status).
Bước 2. Nhấp chuột vào thanh chọn trạng thái, chọn trạng thái mong muốn\
(Step 2. Click on the status dropdown and select the desired status)
#### 3. Thiết lập chuyển đổi KH tiềm năng (Set up lead conversion)
Đây là việc thiết lập nguồn Contact/Account sau khi chuyển đổi.\
(This is the setup for the Contact/Account source after conversion.)\\
Lead chuyển đổi sang Contact/Account mới sẽ tự động có nguồn tương ứng với sự lựa chọn của bạn\
(When a lead is converted to a new Contact/Account, it will automatically have the corresponding source based on your selection.)
**Bước 1.** Mở trang Thiết lập → KH tiềm năng → Thiết lập chuyển đổi KH tiềm năng\
(**Step 1.** Open Settings page → Leads → Setting of lead conversion)
Bước 2. Lần lượt chọn gắn nguồn Contact/Account tương ứng cho từng nguồn KH tiềm năng\
(Step 2. Select and assign the corresponding Contact/Account source for each lead source.)
Bước 3: Ấn Lưu\
(Step 3: Click Save)
II. Thiết lập cho KH cá nhân/ KH doanh nghiệp\
(II. Set up for Contacts/Accounts)
----------------------------------
#### 1. Thiết lập nguồn KH cá nhân/ KH doanh nghiệp (1. Set up Contacts/Accounts source)
#### 1.1. Thêm nguồn (1.1. Add sources)
**Bước 1**. Mở trang Thiết lập → KH cá nhân/ KH doanh nghiệp → Nguồn KH cá nhân/ KH doanh nghiệp\
(**Step 1.** Open Settings page → Contacts/Accounts → Account/Contact Sources)
**Bước 2:** Nhập Mã Nguồn và Tên nguồn\
(**Step 2:** Enter Source Code and Source Name)
\\
* Mã nguồn đại diện cho nguồn, bạn có thể dùng chữ hoặc số một cách ngắn gọn và dễ hiểu nhất để nhận ra ngay khách hàng đến từ nguồn nào.\
(The Source Code represents the lead source; you can use letters or numbers in a concise and clear way to quickly identify which source the customer is coming from.)
* Tên Nguồn là tên của nguồn khách hàng\
(Source Name is the name of the lead source.)
**Bước 3.** Nhấn Lưu\
(**Step 3:** Click Save)
#### 1.2. Chỉnh sửa nguồn (1.2. Edit sources)
Để chỉnh sửa nguồn khách hàng, bạn thực hiện các bước sau: \
(To edit a lead source, follow these steps:)
Bước 1. Mở trang Thiết lập → KH cá nhân/ KH doanh nghiệp → Nguồn KH cá nhân/ KH doanh nghiệp\
(Step 1. Open Settings page - Contacts/Accounts - Contacts/Accounts sources)
Bước 2. Tại danh sách nguồn, nhấp chuột vào mã nguồn hoặc tên nguồn bạn muốn chỉnh sửa\
(Step 2. In the source list, click on the source code or source name you want to edit.)
Bước 3. Nhập giá trị mong muốn\
(Step 3. Enter the desired value.)
Bước 4. Nhấn Lưu thay đổi .\
(Step 4. Press Save changes .)
Thông báo khi cập nhật thành công\
(Notification when update is successful)
#### 1.3. Xóa nguồn
**(1.3. Delete sources)**
Để xóa nguồn khách hàng tiềm năng, bạn thực hiện các bước sau: \
(To delete a lead source, follow these steps:)
Bước 1. Mở trang Thiết lập - KH cá nhân/ KH doanh nghiệp - Nguồn KH cá nhân/ KH doanh nghiệp\
(Step 1. Open Settings page - Contacts/Accounts - Contacts/Accounts sources)
Bước 2. Tại danh sách nguồn, rê chuột vào nguồn mà bạn muốn xóa, nút Lưu thay đổi và Xóa sẽ hiện ra\
(Step 2. In the source list, hover over the source you want to delete; the Save Changes and Delete buttons will appear.)
Bước 3: Nhấn nút Xóa ⇒ Nhấn nút xóa\
(Step 3: Press Delete button and confirm delete to complete..)
Xác nhận xóa để hoàn tất\
(Confirm deletion to complete)
Thông báo khi xóa thành công\
(Notification when deletion is successful)
#### 2. Thiết lập Trạng thái Contacts/Accounts (Setting up Contacts/Accounts stages)
#### 2.1. Thêm Trạng thái
**(Add stages)**
Bước 1. Mở trang Thiết lập - KH cá nhân / Doanh nghiệp - Trạng thái\
(Step 1. Open Settings page - Contacts/Accounts - Contacts/Accounts stages)
**Bước 2:** Nhập tên trạng thái và chọn màu cho trạng thái\
(**Step 2:** Enter the stage name and select a color for the stage.)
**Tên trạng thái:** Tùy vào mong muốn của bạn mà đặt tên cho ngắn gọn và dễ hiểu nhất, thể hiện được tính chất của giai đoạn.\
(**Stages name:** You can name it as concisely and clearly as possible, reflecting the nature of the stage.)
**Màu**: Giúp bạn phân biệt nhanh chóng các trạng thái bằng màu sắc\
(**Color:** Helps you quickly distinguish between stages using colors.)
**Bước 3.** Nhấn Thêm\
(**Step 3.** Press Add)
#### 2.2. Chỉnh sửa Trạng thái
**(2.2. Edit stages)**
Bạn có thể chỉnh sửa tên, màu sắc và cả thứ tự các trạng thái\
(You can edit the name, color, and the order of the stageses.)
* Các bước chỉnh sửa tên và màu đại diện:\
(Steps to edit name and representative color:)
Bước 1. Nhấn vào icon chỉnh sửa tại thanh trạng thái mà bạn muốn sửa\
(Step 1. Click the edit icon on the stages bar you want to modify.)
Bước 2: Tại popup cập nhật trạng thái, chỉnh sửa tên và màu sắc mong muốn\
(Step 2: In the stages update popup, edit the name and color as desired.)
Bước 3: Nhấn Lưu để lưu thay đổi\
(Step 3: Press Save to save change)
* Các bước chỉnh sửa thứ tự trạng thái: \
(Steps to edit stages order)
Chỉ cần kéo thả thì bạn có thể thay đổi vị trí các trạng thái theo ý muốn , nhấn Lưu ở cuối trang để lưu thay đổi.\
(Simply drag and drop to rearrange the stageses as desired, then click Save at the bottom of the page to save the changes)
#### 2.3. Xóa Trạng thái
**(2.3. Delete stages)**
Bước 1. Mở trang Thiết lập - KH cá nhân/ KH doanh nghiệp - Trạng thái\
(Step 1. Open Settings page - Contacts/Accounts - Contacts/Accounts stages)
Bước 2. Nhấn icon xóa tại thanh trạng thái cần xóa \
(Step 2. Click the delete icon on the stages bar you wish to delete.)
Bước 3. Ấn xóa\
(Bước 3. Click Delete)
Thông báo khi đã xóa thành công\
(Notification when deletion is successful)
Lưu ý: Bạn không thể xóa trạng thái đang sử dụng (có Lead đang ở trạng thái này)\ (Note: You cannot delete a stage that is currently in use (if there are Leads in this stages)).
#### 2.4. Thiết lập trạng thái mặc định
**(2.4. Set default stages)**
Trạng thái mặc định là trạng thái được gắn cho khách hàng mới\
(The default stage is the stages assigned to new customers.)
Bước 1: Mở trang Thiết lập - KH cá nhân / KH doanh nghiệp - Trạng thái\
(Step 1: Open Settings page - Contacts/Accounts - Contacts/Accounts stages)
\\
Tại cuối trang có phần thiết lập Trạng thái mặc định\
(At the bottom of the page there is a section for setting Default stages)
Bước 2. Nhấp chuột vào thanh chọn trạng thái, chọn trạng thái mong muốn\
(Step 2. Click on the stages dropdown, and select the desired stages)
Bước 3. Nhấn Lưu.\
(Step 3: Click save)
III. Thiết lập trường tùy chỉnh Lead/Contact/Account\
(III. Set up Lead/Contact/Account custom fields)
------------------------------------------------
Mỗi doanh nghiệp, mỗi ngành nghề đều có những đặc tính thông tin, văn hóa khác nhau, nên sẽ cần các thông tin riêng ngoài những thông tin cố định như Họ, Tên, số điện thoại , địa chỉ … và “Trường tùy chỉnh” sẽ đáp ứng được nhu cầu này. Với sự đa dạng về loại dữ liệu, quản trị viên có thể tùy vào loại thông tin để chọn loại trường tùy chỉnh phù hợp, có các loại như sau: \
(Each business and industry has unique information characteristics and culture, so additional information beyond fixed fields like First Name, Last Name, Phone Number, Address, etc., may be needed. "Custom Fields" meet this requirement. With a variety of data types, administrators can select the appropriate custom field type based on the type of information needed. The available types include.)
* Input\
(Input)
* Text input : ký tự\
(Text input : character)
* Email: email \
(Email: email)
* Number: số\
(Number: number)
* Date: ngày (mm/dd/yyyy)\
(Date: date (mm/dd/yyyy))
* Text area : văn bản\
(Text area : text)
* Options\
(Options)
* Checkbox : danh sách các tùy chọn, chọn được cùng lúc nhiều options\
(Checkbox : Option list, multiple options can be selected simultaneously.)
* Radio: danh sách các tùy chọn, chỉ chọn được 1 option\
(Radio: Option list, only 1 option can be selected)
* Select\
(Select)
* Select: danh sách tùy chọn, chỉ chọn được 1 option\
(Select: Option list, only 1 option can be selected)
Cho phép thiết lập trường bắt buộc và yêu cầu đúng định dạng dữ liệu\
(Allow setting required fields and enforce correct data format.)
Dưới đây là hướng dẫn thêm trường tùy chỉnh:\
(Below is a guide to adding a custom field:)
Bước 1. Mở trang Thiết lập - Trường tùy chỉnh - Kh tiềm năng/cá nhân/doanh nghiệp\
(Step 1. Open Settings page - Custom field - Lead/Contact/Account)
Bước 2. Xác định định dạng thông tin là gì : ký tự, email, số, tùy chọn ….\
(Step 2. Determine what the information format is: characters, email, numbers, options ….)
Bước 3. Chọn trường thông tin theo đúng loại định dạng\
(Step 3. Select the field in the correct format)
Kéo trường thông tin đó từ bảng chọn sang bảng chứa bên trái\
(Drag the field from the selection panel to the left container)
Bước 4. Click vào trường tùy chỉnh tại bảng danh sách để hiện lên thanh chỉnh sửa.\
(Step 4. Click on the custom field in the list panel to display the editing bar.)
Bước 5. Thực hiện chỉnh sửa thông tin\
(Step 5. Make edits to information)
Trong đó: \
(Including:)
* Label: Tên gọi của trường thông tin, là thông tin khách hàng nhìn thấy và nhận diện\
(Label: The name of the information field, which is the information that customers see and recognize.)
* Description: Mô tả hoặc ghi chú cho trường thông tin.\
(Description: Mô tả hoặc ghi chú cho trường thông tin.)
* Placeholder: Tác dụng của placeholder là cung cấp thêm thông tin cho người dùng, giúp họ biết cần nhập dữ liệu gì.\
(Placeholder: The purpose of a placeholder is to provide additional information to the user, helping them understand what data needs to be entered..)
* Required: tick vào ô này , trường thông tin sẽ là trường bắt buộc\
(Required: tick this box, the information field will be a required field)
* Validation: loại định dạng dữ liệu, gồm có : None(không yêu cầu định dạng), Number, Email, URL\
(Validation: Data format types, including: None (no format required), Number, Email, URL)
Bước 6. Nhấn Save tại popup chỉnh sửa.\
(Step 6. Press Save in the edit popup.)
Bước 7. Thực hiện tương tự với các trường thông tin còn lại\
(Step 7. Do the same with the remaining information fields.)
Bước 8. Kéo xuống dưới cùng và nhấn Lưu sau khi thiết lập xong các trường tùy chỉnh.\
(Step 8. Press Save after setting up the custom fields.)
Thông báo khi Lưu thành công\
(Notification when save is successful)
Sau khi lưu thiết lập, danh sách trường tùy chỉnh sẽ được áp dụng tại các trang tạo/ chỉnh sửa / thông tin chi tiết khách hàng\
(After saving the settings, the custom field list will be applied on the create/edit/customer details pages. )
Kết quả hiển thị tại trang Tạo/ Cập nhật khách hàng:\
(The results are displayed on the Create/Update customer page:)
Tại trang chi tiết thông tin khách hàng:\
(At the customer information detail page:)''''''
# Rổ dữ liệu
Tài liệu về rổ dữ liệu
1.1. Tổng quan
\
Dựa trên thông tin được thu thập từ các nguồn, "Rổ dữ liệu" tạo các phân khúc khách
\
hàng dựa trên các điều kiện và tiêu chí cụ thể. Các đoạn này có thể được sử dụng để
\
nhóm người dùng có chung đặc điểm hoặc hành vi.
\
1.2. Các kiểu tạo “Rổ dữ liệu":
\
● Rổ dữ liệu thủ công: Đối tượng được thêm và thoát khỏi rổ dữ liệu thủ công khi bạn
\
thêm hoặc xóa chúng khỏi phân đoạn một cách rõ ràng. Bạn có thể tận dụng các phân
\
đoạn thủ công khi muốn di chuyển mọi người vào và ra khỏi các phân đoạn dựa trên
\
logic kinh doanh bên ngoài. Bạn có thể thêm người vào các phân đoạn thủ công thông
\
qua tải lên CSV, như một phần của quy trình làm việc của chiến dịch. Bạn có thể xóa
\
mọi người khỏi các phân đoạn thủ công bằng cách sử dụng tùy chọn “Xóa phân đoạn”,
\
hành động trong quy trình làm việc của chiến dịch.
\
● Rổ dữ liệu tích hợp: Đối tượng tự động nhập và thoát khỏi các rổ dữ liệu theo hướng
\
dữ liệu khi chúng khớp và ngừng khớp với các điều kiện mà bạn đặt cho rổ dữ liệu đó.
\
Những rổ dữ liệu này giúp bạn thực hiện hành động dựa trên hành động trong thời gian
\
thực của đối tượng. Bạn nên sử dụng rổ dữ liệu theo hướng dữ liệu khi muốn tự động di
\
chuyển mọi người vào và ra khỏi rổ dữ liệu của bạn dựa trên dữ liệu bạn gửi về của
\
từng người.
1.3. Quy trình hoạt động của rổ dữ liệu
# Tạo rổ dữ liệu
**1.4.1. Xem danh sách chi tiết khách hàng qua Rổ dữ liệu:**
Bước 1: Tại thanh menu chính, chọn Rổ dữ liệu, màn hình chính sẽ hiện các thông tin như sau:
* Loại rổ dữ liệu
* Tên rổ dữ liệu
* Trạng thái
* Mô tả
* Số khách hàng thuộc phân khúc rổ dữ liệu
.....
Bước 2: Bấm chọn một rổ dữ liệu, màn hình sẽ hiển thị chi tiết danh sách khách hàng
.........\
**1.4.2. Tạo Rổ dữ liệu**
Bước 1: Tại thanh menu chính, chọn Khách hàng --> Rổ dữ liệu → Tạo rổ dữ liệu
.....
Bước 2: Tại màn hình tạo rổ dữ liệu, nhập các thông tin cần thiết
* Tên của rỗ dữ liệu: Nhập tên rổ dữ liệu
* Loại đối tượng: Chọn loại khách hàng mà rổ dữ liệu lọc qua.
* Mô tả: Nhập mô tả rổ dữ liệu.
* Nhãn: Chọn nhãn để gán
* Loại rổ dữ liệu: Chọn loại rổ dữ liệu sử dụng
Sau khi nhập thông tin cần thiết xong, bấm nút Lưu.
Có 2 loại rổ dữ liệu:
* Rổ dữ liệu thủ công: Điền đầy đủ các trường bắt buộc, sau đó nhấn nút Lưu để lưu lại ngay hoặc tải lên danh sách khách hàng của rổ dữ liệu và bấm nút Lưu.
* Rổ dữ liệu tích hợp: Điền đầy đủ các trường bắt buộc giống với rổ dữ liệu thủ công, chọn thêm điều kiện lọc cho rổ dữ liệu như sau:
\+ Tên loại điều kiện Lọc
\+ Điều kiện so sánh (in, not in, near, exactly … tùy thuộc vào loại điều kiện lọc)
\+ Giá trị so sánh của điều kiện
Sau khi thêm thành công, màn hình sẽ hiển thị thông báo thành công.
# Tích hợp rổ trong chiến dịch
1. ***Tích hợp rổ dữ liệu vào chiến dịch SMS, ZNS, WhatsApp***
Bước 1: Tại thanh menu chính, chọn Chiến dịch → ZNS → Tạo chiến dịch
Bước 2: Tại màn hình tạo chiến dịch ZNS, chọn danh sách khách hàng
Có 2 cách chọn danh sách khách hàng:
* Cách 1: Chọn Bộ lọc có sẵn ⇒ Loại rỗ dữ liệu đã tạo ⇒ Danh sách khách hàng thuộc rổ dữ liệu.
* Cách 2: Chọn Bộ lọc nâng cao ⇒ Chọn đối tượng lọc ⇒ Chọn các điều kiện lọc tương ứng ⇒ Danh sách khách hàng thuộc rổ dữ liệu.
2. #### *Tích hợp rổ dữ liệu vào chiến dịch telesales*
Quy trình hoạt động chiến dịch telesales:
**Bước 1:** Tại thanh menu chính, chọn Chiến dịch → Telesales → Tạo chiến dịch
**Bước 2:** Tại màn hình tạo chiến dịch, nhập các thông tin cần thiết:
* Tên chiến dịch: Nhập tên chiến dịch
* Mô tả: Nhập mô tả chiến dịch
* Chọn ngày bắt đầu, ngày kết thúc
* Chọn loại khách hàng:
* KH cá nhân/ KH doanh nghiệp
* KH tiềm năng
* KH tiềm năng/KH cá nhân/KH doanh nghiệp
Sau khi điền hết thông tin, nhấn nút 
**Bước 3:** Sau khi tạo thành công, màn hình sẽ có thông báo Cập nhật thành công
**Bước 4:** Tại tab Khách hàng tham gia, Chọn Thêm KH tiềm năng/KH cá nhân/ KH doanh nghiệp Có 2 cách để chọn danh sách khách hàng:
* Cách 1: Chọn Bộ lọc có sẵn ⇒ Loại rỗ dữ liệu đã tạo ⇒ Danh sách khách hàng thuộc rổ dữ liệu.
* Cách 2: Chọn Bộ lọc nâng cao ⇒ Chọn đối tượng lọc ⇒ Chọn các điều kiện lọc tương ứng ⇒ Danh sách khách hàng thuộc rổ dữ liệu.Lưu ý: Ở chiến dịch Telesales thì bộ lọc này chỉ hiển thị các rổ dữ liệu có đối tượng khách hàng giống với mục tiêu khách hàng khi tạo chiến dịch.
Lưu ý: Ở chiến dịch Telesales thì bộ lọc này chỉ hiển thị các rổ dữ liệu có đối tượng khách hàng
\
giống với mục tiêu khách hàng khi tạo chiến dịch.
* Chiến dịch telesales tạo với mục tiêu là “khách hàng cá nhân/khách hàng doanh nghiệp” ⇒ Bộ lọc sẽ hiển thị các rổ dữ liệu có đối tượng là khách hàng cá nhân hoặc là khách hàng doanh nghiệp hoặc là cả 2 còn với rổ dữ liệu có chứa đối tượng khách hàng tiềm năng thì sẽ không hiện ra.
* Chiến dịch telesales tạo với mục tiêu là “khách hàng tiềm năng” ⇒ Bộ lọc sẽ hiển thị các rổ dữ liệu có đối tượng chỉ là “khách hàng tiềm năng”, với rổ dữ liệu có chứa đối tượng khách hàng tiềm năng nhưng có thêm các đối tượng khác thì sẽ không được hiện ra.
* Chiến dịch telesales tạo với mục tiêu là “khách hàng cá nhân/khách hàng doanh nghiệp/Khách hàng tiềm năng" ⇒ Bộ lọc sẽ hiển thị tất cả các rổ dữ liệu
* Các rổ dữ liệu thủ công thì sẽ luôn hiển thị trong bộ lọc.
**Bước 5:** Tại màn hình danh sách khách theo trạng thái, bạn có thể tiếp tục tạo các “rổ dữ liệu
\
con" để chuyển qua chiến dịch khác hoặc liên chiến dịch (có thể bỏ qua bước này nếu không dùng lại rổ này)
# Chat đa kênh (Conversation)
# Facebook Fanpage
# 1. Tích hợp Facebook (Facebook integration)
# 1.1 Truy cập vào trang tích hợp Facebook (Access the Facebook Integration Page)
**Bước 1:** Truy cập vào trang Tích hợp Facebook\
\&#xNAN;*(**Step 1:** Access the Facebook Integration Page)*
**Cách 1:** Trên thanh menu trái, Click **quản lý tin nhắn** -> chọn **tin nhắn đa kênh.** Chọn tab Facebook, click nút tích hợp\
\&#xNAN;*( **Method 1**: In the left menu bar, click on Message Management -> select Multi-channel Messaging*\
*Go to the Facebook tab, then click the Integrate button.)*
**Cách 2:** Vào trang **Thiết lập** => Chọn **Thiết lập chat đa kênh** => Chọn **Tích hợp kênh chat**\
\&#xNAN;*(**Method 2**: Go to the **Settings** page => Select **Multi-channel Conversation Settings** => Choose **message channel Integration**)*
# 1.2 Dùng tài khoản admin để tích hợp (Use the Admin account of the page to integrate)
Có 2 trường hợp:
(*There are two cases:)*
**Trường hợp 1:** Nếu bạn chưa đăng nhập Facebook, khi click nút Tích hợp -> Add page -> , trang sẽ mở một hộp thoại yêu cầu đăng nhập Facebook. Bạn phải đăng nhập để tích hợp.\
\&#xNAN;***(Case 1:** If you are not logged into Facebook, when you click the Integrate button, a dialog box will appear asking you to log in to Facebook. You must log in to integrate.)*
**Lưu ý:** tài khoản đăng nhập phải có ít nhất 1 Fanpage\
Nếu tài khoản của bạn chưa có Fanpage, vui lòng tạo Fanpage theo hướng dẫn [tại đây](/tai-lieu-antbuddy-huong-dan-su-dung-antbuddy-docs-user-guide/quan-tri-khach-hang-antcrm-antcrm-customer-management/chat-da-kenh-conversation/facebook-fanpage/2.-thiet-lap-fanpage-facebook-setting-up-facebook-fanpage)\
\&#xNAN;*(**Note**: The account you log in with must have at least one Fanpage.*\
\&#xNAN;*If your account does not have a Fanpage, please create one following the instructions* [*here*](/tai-lieu-antbuddy-huong-dan-su-dung-antbuddy-docs-user-guide/quan-tri-khach-hang-antcrm-antcrm-customer-management/chat-da-kenh-conversation/facebook-fanpage/2.-thiet-lap-fanpage-facebook-setting-up-facebook-fanpage)*)*
Sau khi đăng nhập, popup xác nhận tiếp tục với tài khoản hiện tại sẽ bật lên, Click Tiếp tục dưới tên...\
\&#xNAN;*(After logging in, a popup confirmation to continue with the current account will appear. Click Continue under the name…)*
**Trường hợp 2:** Nếu đã đăng nhập Facebook thì khi click nút Tích hợp, popup xác nhận tiếp tục với tài khoản hiện tại sẽ bật lên, click Tiếp tục dưới tên …\
\&#xNAN;*(**Case 2:** If logged in with Facebook, when clicking the Integration button, a popup confirmation to continue with the current account will appear. Click Continue under the name …)*
**Lưu ý:** Tài khoản hiện tại phải có ít nhất 1 Fanpage, nếu không đúng tài khoản cần dùng thì click Đăng nhập bằng tài khoản khác để thực hiện đăng nhập lại với đúng tài khoản có Fanpage mong muốn.\
\&#xNAN;*(**Note**: The current account must have at least one Fanpage. If it is not the correct account, click Log in with a different account to log in again with the desired account that has the required Fanpage.)*
**Bước 4.** Tick để chọn các trang sẽ dùng để tích hợp vào AntCRM, click Tiếp tục\
\&#xNAN;*(**Step 4:** Tick to select the pages to be integrated into AntCRM, then click Continue.)*
Khi tích hợp thành công, màn hình sẽ hiện thông báo “Tích hợp Facebook thành công!” và các trang của bạn sẽ hiện ra\
\&#xNAN;*(When the integration is successful, a message “Facebook integration successful!” will appear, and your pages will be displayed.)*
**Bước 5:** Chọn trang mà bạn muốn đăng ký, click nút cài đặt. Dưới đây là màn hình đăng ký thành công.\
\&#xNAN;*(**Step 5:** Select the page you want to register, then click the settings button. Below is the screen showing successful registration.)*
# 2. Thiết lập Fanpage Facebook (Setting Up Facebook Fanpage)
**Bước 1:** Đi đến trang Thiết lập hội thoại đa kênh - Tích hợp kênh tin nhắn - Tích hợp Facebook\
(**Step 1:** Go to the Multi-Channel Conversation Setup page - Message channel integration - Facebook Integration.)
**Bước 2:** Click nút Cài đặt tại chính page (đã đăng ký) mà bạn muốn thiết lập\
(**Step 2:** Click the Settings button on the page (already registered) that you want to set up.)
Trang sẽ chuyển hướng đến trang thiết lập cho Fanpage\
(The page will be redirected to the setup page for the Fanpage.)
Thiết lập cho Fanpage gồm có các mục sau:\
(The setup for the FanPage includes the following sections:)
|
Danh sách nhóm sẽ chịu trách nhiệm hỗ trợ khách hàng
bình luận facebook…
(A list of groups responsible for customer support
Facebook comments…)
|
|
User hỗ trợ
(user Support)
|
Danh sách nhân viên chịu trách nhiệm tương tác với khách hàng như Nhận chat facebook, Nhận bình luận
(A list of employees responsible for interacting with customers, such as receiving Facebook chats, receiving comments.)
|
|
Mặc định phân công session của khách hàng cũ đã có nhân viên phụ trách
(By default, the session of existing customers will be assigned to the employee already responsible.)
|
Khi bật tính năng này, thì session tự động phân công cho nhân viên phụ trách trước đó của session, không cần check các điều kiện phân công khác. Nếu người phụ trách ss cũ không có trong danh sách nhân viên được phân công, thì ss này sẽ thành chưa chỉ định
(When this feature is enabled, the session will be automatically assigned to the employee who was previously responsible for the session, without the need to check other assignment conditions. If the previous responsible person is not in the list of assigned employees, the session will be marked as "not assigned.")
|
|
Tự động
phân phối
(Automatic distribution)
|
Khi bật tính năng tự động phân phối, các bình luận/tin nhắn từ khách hàng gửi vào Page sẽ được phân phối cho nhân viên hỗ trợ một cách tự động theo quy tắc được chọn ở Chế độ phân công (được cấu hình ở dưới)
(When the automatic distribution feature is enabled, comments/messages from customers sent to the Page will be automatically distributed to support staff according to the rules selected in the Assignment Mode (configured below).)
|
|
Ưu tiên gán cho người phụ trách của khách hàng liên quan
(Priority will be given to assigning to the person responsible for the related customer.)
|
Khi bật tính năng này, hệ thống sẽ tự động phân phối session cho người phụ trách của khách hàng nhắn tin vào (phụ trách lead/contact). Nếu người phụ trách không thỏa điều kiện phân phối session, hệ thống tự động phân phối theo quy luật phân công
(When this feature is enabled, the system will automatically assign the session to the person responsible for the customer who sent the message (responsible for the lead/contact). If the responsible person does not meet the session distribution criteria, the system will automatically distribute the session according to the assignment rules.)
|
|
Chế độ phân công
(Assignment Mode)
|
Có 2 chế độ phân công
Tuần tự: Phân phối phiếu yêu cầu lần lượt theo thứ tự các nhân viên trong nhóm và xoay vòng.
Ngẫu nhiên: Phân phối phiếu yêu cầu một cách ngẫu nhiên cho các nhân viên trong nhóm.
(There are 2 assignment modes:
Sequential: Distributes the request tickets in order to the employees in the group and rotates.
Random: Distributes the request tickets randomly to the employees in the group.)
|
|
Áp dụng cho
(Apply for)
|
Chỉ nhân viên online: Chỉ phân công session mới vào cho nhân viên đang online CRM
Tất cả nhân viên: Phân công mới cho tất cả nhân viên theo chế độ phân công
(Only online employees: Only assigns new sessions to employees who are currently online in the CRM.
All employees: Assigns new sessions to all employees according to the selected assignment mode.)
|
|
Phân công theo rule tùy chọn
(Assign according to custom rules.)
|
Cho phép tạo Rule phân công theo từ khóa theo nội dung tin nhắn/ bình luận của Khách hàng
(Allows creating an assignment rule based on keywords in the customer's message/comment content.)
|
|
Chuyển phụ trách khách hàng khi phân công
(Transfer customer responsibility when assigning.)
|
Khi bật tính năng này,nhân viên phụ trách của Khách hàng sẽ chuyển theo nhân viên được phân công session chat
(When this feature is enabled, the customer’s responsible employee will be transferred to the employee assigned to the chat session.)
|
|
Quyền xem và tương tác với session
(Permission to view and interact with the session)
|
Cho phép các user được xem/thao tác nội dung session của nhau
(Allows users to view/interact with each other's session content.)
|
|
Tag:
Cấu hình gắn tag cho khách hàng khi có khách hàng tạo mới.
(Tag: Configure to assign a tag to the customer when a new customer is created.)
|
Thẻ được gắn cho khách hàng mới với mục đích phân biệt, nhóm các khách hàng có tính chất giống nhau để tiện cho việc thao tác sau này
(The tag is assigned to new customers to differentiate and group customers with similar characteristics, making it easier for future operations.)
|
|
Nguồn KH tiềm năng:
Cấu hình nguồn Lead cho khách hàng khi có Lead được tạo mới.
(Lead Source: Configure the lead source for the customer when a new lead is created.)
|
Nguồn tạo ra khách hàng, việc này cũng nhằm mục đích phân biệt và nhóm các khách hàng có tính chất giống nhau.
(The source that generates the customer, which also aims to differentiate and group customers with similar characteristics.)
|
|
Trả lời bình luận bằng bình luận
(Reply to comments with comments.)
|
Cho phép Cấu hình trả lời bình luận bằng bình luận hoặc bằng tin nhắn
(Allows configuring to reply to comments with either a comment or a message.)
|
# 2.1 Thêm hỗ trợ (Adding Support)
**Bước 1.** Đi đến trang Cài đặt Fanpage - mục **Hỗ trợ** (theo hướng dẫn ở trên)\
\&#xNAN;*(**Step 1:** Go to the Fanpage Settings page - **Support** section (as per the instructions above).)*
**Bước 2.** Chọn hoặc tìm kiếm Nhóm hỗ trợ để thêm vào danh sách hỗ trợ\
\&#xNAN;*(**Step 2:** Select or search for a Support group to add to support list)*
**Bước 3**. Chọn hoặc tìm kiếm User hỗ trợ để thêm vào danh sách User hỗ trợ\
\&#xNAN;*(**Step 3:** Select or search for a Support User to add to the support user list.)*
Nếu muốn xóa user ra khỏi danh sách hỗ trợ, hãy click nút **X**\
\&#xNAN;*(If you want to remove a user from the support list, click the **X** button.)*
Tick hoặc bỏ tick để tùy chỉnh nhận chat Facebook, nhận bình luận Facebook cho mỗi nhân viên hỗ trợ\
\&#xNAN;*(Tick or untick to customize receiving Facebook chats or Facebook comments for each support user.)*
# 2.2. Cấu hình phân công (Assignment Configuration)
**Bước 1.** Đi đến trang Cài đặt Fanpage - mục **Chế độ phân công** (theo hướng dẫn ở trên)\
\&#xNAN;*(**Step 1:** Go to the **Fanpage Settings page - Assignment Configuration** section (as per the instructions above).)*
**Bước 2.** Bật tính năng **Tự động phân phối** \
\&#xNAN;*(**Step 2:** Enable the **Automatic***** Assign *****feature.**)*
**Bước 3:** Tick vào Chế độ phân công mong muốn : **Tuần tự** hoặc **Ngẫu nhiên**\
\&#xNAN;*(**Step 3:** Tick the desired Assignment Mode: **Round robin** or **Random**)*
* **Tuần tự:** Các tin nhắn và bình luận của Fanpage sẽ được tự động phân phối tuần tự cho các nhân viên trong danh sách user hỗ trợ.\
\&#xNAN;*(**Round robin:** Messages and comments from the Fanpage will be automatically distributed in sequence to the support users in the list.)*
* **Ngẫu nhiên:** Các tin nhắn và bình luận của Fanpage sẽ được tự động phân phối ngẫu nhiên cho các nhân viên trong danh sách user hỗ trợ.\
\&#xNAN;*(**Random:** Messages and comments from the Fanpage will be automatically distributed randomly to the support users in the list.)*
**Bước 4.** Tùy chọn áp dụng cho nhân viên\
\&#xNAN;*(**Step 4**: Options apply to employees.)*
* **Chỉ nhân viên online:** Chỉ áp dụng phân công cho nhân viên đang online\
\&#xNAN;*(**Only users online**: Applies the assignment only to employees who are currently online.)*
* **Tất cả nhân viên:** Áp dụng phân công cho tất cả nhân viên dù đang offline\
\&#xNAN;*(**All users**: Applies the assignment to all employees, even those who are offline.)*
**Bước 5.** Click **Lưu**\
\&#xNAN;*( **Step 5**: Click **Save**)*
# 2.3. Cấu hình tương tác (Interaction Configuration)
**Bước 1.** Đi đến trang Cài đặt **Fanpage** - mục **Thêm tương tác** (theo hướng dẫn ở trên)\
\&#xNAN;*(**Step 1:** Go to the **Fanpage Settings** page - **Interaction** section (as per the instructions above).)*
**Bước 2:** Thiết lập Quyền xem và tương tác với session:\
\&#xNAN;*(**Step 2:** Set up Permissions to view and interact with the session:)*
Tick hoặc bỏ tick để tùy chỉnh cấp quyền xem/thao tác cho các nhân viên hỗ trợ\
\&#xNAN;*(Tick or untick to customize the permission levels for viewing/ interacting with sessions for support employees.)*
**Bước 3**. Chọn thẻ , thẻ được chọn sẽ gắn tự động vào các khách hàng mới từ Fanpage này\
\&#xNAN;*(**Step 3:** Select a tag. The selected tag will be automatically assigned to new customers from this Fanpage.)*
**Bước 4.** Chọn nguồn , các khách hàng mới từ page này sẽ có nguồn là nguồn đã chọn\
\&#xNAN;***(Step 4:** Select a source. New customers from this page will have the selected source.)*
**Bước 5:** Thiết lập Trả lời bình luận bằng bình luận\
\&#xNAN;*(**Step 5**: Set up Reply to comments with comments.)*
**Bước 6.** Click **Lưu**\
(**Step 6:** Click **Save**)
# 3. Quản lý tin nhắn (Message Management)
Khi có một khách hàng nhắn tin vào trang, tin nhắn sẽ được đưa về Omni - Facebook \
Số lượng tin nhắn/comment chưa đọc sẽ được hiển thị ở trên menu.\
\&#xNAN;*(When a customer sends a message to the page, the message will be directed to Omni - Facebook. The number of unread messages/comments will be displayed on the menu.)*


Để quản lý tin nhắn và hỗ trợ khách hàng nhanh nhất, nhân viên cần làm các bước sau:
*(To manage messages and support customers as quickly as possible, employees need to follow these steps:)*
Bước 1: Mở trang Omni
*(Step 1: Open the Omni page.)*
Bước 2: Click vào tab Facebook
*(Step 2: Click on the Facebook tab.)*
Bước 3: Click tab Inbox, bạn sẽ thấy tin nhắn vừa nhận từ khách hàng Facebook
*(Step 3: Click the Inbox tab, and you will see the message received from the Facebook customer.)*


Tại đây bạn có thể nhìn thấy người được phân công hỗ trợ bằng cách rê chuột vào avatar nhỏ trên tin nhắn (xem hình).
*(Here, you can see the assigned support person by hovering over the small avatar on the message (see image).)*

Quyền xem các session được thiết lập ở mục Tương tác.
*(Permissions to view sessions are set in the Interaction section.)*
Bước 4: Click vào tin nhắn để chat hỗ trợ
*(Step 4: Click on the message to start chatting and provide support.)*
# 3.1 Hướng dẫn quản lý chat với khách hàng Facebook
Khi có một khách hàng nhắn tin vào trang, tin nhắn sẽ được đưa về Omni - Facebook
Số lượng tin nhắn/comment chưa đọc sẽ được hiển thị ở trên menu
Để quản lý tin nhắn và hỗ trợ khách hàng nhanh nhất, nhân viên cần làm các bước sau:
Bước 1: Mở trang Quản lý hội thoại ⇒ tin nhắn đa kênh
Bước 2: Click vào tab Facebook bạn sẽ thấy tin nhắn vừa nhận từ khách hàng Facebook
Tại đây bạn có thể nhìn thấy người được phân công hỗ trợ bằng cách rê chuột vào avatar nhỏ trên tin nhắn (xem hình).
Đối với Owner và những admin có trong đội hỗ trợ, có thể nhìn thấy hết tất cả các tin nhắn
Đối với nhân viên có trong đội hỗ trợ, chỉ có thể nhìn thấy các tin nhắn chưa được phân công và những tin nhắn được phân công cho chính nhân viên đó
Bước 4: Click vào tin nhắn để chat hỗ trợ
# 3.2 Gửi tin nhắn (Sending Message)
**Bước 1:** Nhập nội dung tin nhắn vào ô chat box\
(**Step 1:** Enter the message content into the chat box.)
**Bước 2:** Nhấn Enter để gửi tin \
(**Step 2:** Press Enter to send the message.)
Hoặc chọn Danh sách mẫu tin nhắn- chọn từ mẫu tin nhắn và nhấn enter để gửi\
(Or select from the Message Template List - choose a template and press Enter to send.)
# 3.3 Xem lịch sử hội thoại (Viewing Conversation History)
**Bước 1:** Mở một session chat: nhắn tin/ bình luận\
(**Step 1:** Open a chat session: send a message/comment.)
**Bước 2:** Click vào icon Lịch sử hội thoại\
(**Step 2**: Click on the Conversation History icon.)
Lịch sử phân công:\
(Assignment History:)
* Gồm Loại phân công: tự động/thủ công\
(Includes Assignment Type: automatic/manual.)
* Nhân viên phân công, Nhân viên được phân công\
(Assigned Employee, Employee Assigned.)
* Thời gian phân công\
(Assignment Time.)
Lịch sử cập nhật nhãn: Tên nhân viên cập nhật, thời gian cập nhật, Tên Nhãn…\
(Label Update History: Employee name who updated, update time, Label name…)
# 4. Quản lý comment (Comment Management)
Khi có một khách hàng bình luận ở 1 bài viết trên trang, bình luận đó sẽ được đưa về Omni - Facebook\
(When a customer comments on a post on the page, the comment will be directed to Omni - Facebook.)
Để quản lý bình luận và hỗ trợ khách hàng nhanh nhất, nhân viên cần làm các bước sau:\
(To manage comments and support customers as quickly as possible, employees need to follow these steps:)
**Bước 1:** Mở trang Hội thoại đa kênh\
(**Step 1:** Open the Omnichannel Conversations page.)
**Bước 2:** Click vào tab Facebook \
(**Step 2:** Click on the Facebook tab.)
**Bước 3:** Chọn **Lọc**, tích vào **Bình luận**, bạn sẽ thấy các bình luận vừa nhận từ khách hàng Facebook\
(**Step 3:** Select **Filter** – tick the **Comments** option, and you'll see the recent comments received from Facebook customers.)
==>
==>
Tại đây bạn có thể nhìn thấy người được phân công hỗ trợ bằng cách rê chuột vào avatar nhỏ trên bình luận (xem hình).\
(Here, you can see the assigned support person by hovering over the small avatar on the comment (see image).)
Đối với Owner và những admin có trong đội hỗ trợ, có thể nhìn thấy hết tất cả các bình luận\
(For the Owner and admins in the support team, they can view all comments.)
Đối với nhân viên có trong đội hỗ trợ, chỉ có thể nhìn thấy các bình luận chưa được phân công và những bình luận được phân công cho chính nhân viên đó.\
(For employees in the support team, they can only see comments that have not been assigned yet and comments that have been assigned to them.)
Hoặc nhân viên cũng có thể nhìn thấy các bình luận phân công cho các nhân viên khác nếu được cấp quyền Tương tác ở mục 2.3\
(Alternatively, employees can also see comments assigned to other employees if they are granted Interaction permissions in section 2.3.)
**Bước 4:** Click vào bình luận để bình luận hỗ trợ hoặc nhắn tin riêng cho khách hàng\
(**Step 4:** Click on the comment to comment for support or message the customer)
* Nhắn tin riêng cho khách hàng:\
(Message the customer)
# 4.1 Bình luận chăm sóc khách hàng (Customer Support Commenting)
**Bước 1:** Tại bình luận của khách hàng (Xem hướng dẫn ở [đây ](/tai-lieu-antbuddy-huong-dan-su-dung-antbuddy-docs-user-guide/quan-tri-khach-hang-antcrm-antcrm-customer-management/chat-da-kenh-conversation/facebook-fanpage/4.-quan-ly-comment-comment-management)), Nhập nội dung bình luận\
(**Step 1:** Go to the customer's comment (see instructions [here](/tai-lieu-antbuddy-huong-dan-su-dung-antbuddy-docs-user-guide/quan-tri-khach-hang-antcrm-antcrm-customer-management/chat-da-kenh-conversation/facebook-fanpage/4.-quan-ly-comment-comment-management)) and enter the comment content.)
**Bước 2:** Nhấn Enter để gửi bình luận\
(**Step 2:** Press Enter to submit the comment.)
Hoặc sử dụng mẫu tin nhắn đã tạo sẵn, nhập "/ " để hiển thị mẫu tin nhắn\
(Or input '/' to display the message template that was created before.)
Lựa chọn tin nhắn mỗi nhấn enter, tin nhắn sẽ hiển thị dưới dạng bình luận trên facebook\
(Choose a template and press Enter to post it as a Facebook comment)
Bình luận sẽ được reply cho khách hàng trên fanpage\
(The comment will be replied to the customer on the fanpage)
# 4.2 Cách ẩn bình luận (Hiding comments)
Có thể ẩn bình luận của nhân viên hoặc ẩn bình luận của khách hàng\
Để ẩn bình luận của khách hàng bấm vào icon 
(You can hide comments from employees or hide comments from customers.\
To hide a customer's comment, click on the icon .)
Đối với các bình luận của nhân viên gửi ra thì ở đầu mỗi bình luận của nhân viên có nút tùy chọn “...”, click vào
⇒Click Ẩn Bình luận
(For comments made by employees, there is an options button “...” at the beginning of each employee’s comment. Click on it
⇒ Click Hide Comment.)
# 4.3 Chỉnh sửa bình luận (Editing comments)
**Bước 1**: ở đầu mỗi bình luận có nút tùy chọn “...”, click vào\
(**Step 1**: At the beginning of each comment, there is an options button “...”, click on it.)
**Bước 2:** Click Chỉnh sửa\
(**Step 2:** Click Edit comment)
**Bước 3:** chỉnh sửa nội dung bình luận của bạn trên popup chỉnh sửa\
(**Step 3:** Edit the content of your comment in the edit popup.)
**Bước 4:** Click "**Cập nhật**"\
(**Step 4**: Click **Update**)
**Lưu ý**: Chỉ chỉnh sửa được bình luận của chính mình.\
(**Note**: You can only edit your own comments.)
Hiển thị thông báo thành công và bình luận được cập nhật\
(A success message is displayed, and the comment is updated.)
Bình luận đã được chỉnh sửa trên fanpage\
(The comment has been edited on the fanpage.)
# 4.4 Xóa bình luận (Deleting comments)
**Bước 1**: ở đầu mỗi bình luận có nút tùy chọn “...”, click vào\
(**Step 1**: At the beginning of each comment, there is an options button “...”, click on it.)
**Bước 2:** Click Xóa bình luận\
(**Step 2:** Click Delete comment)
**Bước 3:** Click Đồng ý trên popup xác nhận xóa\
(**Step 3**: Click 'Agree' on the confirmation popup to delete.)
Hiển thị thông báo thành công, bình luận đã bị xóa\
(A success message is displayed, and the comment has been deleted.)
Bình luận trước khi bị xóa\
(The comment before being deleted.)
Bình luận không còn hiển thị trên fanpage\
(The comment has been removed from the fanpage)
# 4.5 Hướng dẫn thêm tính năng Xóa và Ẩn bình luận facebook cho member
Tính năng này giúp Owner phân quyền cho member được phép Xóa hoặc Ẩn bình luận facebook trong Omni.
Bước 1: Vào Thiết lập ->Thiết lập hội thoại đa kênh -> Tích hợp kênh tin nhắn -> chọn Tích hợp Facebook
Bước 2: Chọn Page, vào cài đặt
Bước 3: Chọn tab Nhân viên hỗ trợ, Tick vào ô Ẩn bình luận/Xóa bình luận cho member
Bước 4: Lưu
# 4.6 Thích/Bỏ thích bình luận (Liking/Unliking Comments)
**Bước 1**. Trên mỗi bình luận có icon like\
(**Step 1.** Each comment has a like icon.)
**Bước 2:** Click để like bình luận (Click lần nữa để unlike) \
(**Step 2**: Click to like the comment (Click again to unlike).)
Icon sẽ thay đổi sau khi đã thích bình luận\
(The icon will change after the comment is liked.)
# 5. Quản lý bài Post (Post Management)
**Bước 1:** Mở trang Hội thoại đa kênh\
(**Step 1:** Open the Omnichannel Conversations page.)
**Bước 2:** Click vào tab Facebook \
(**Step 2:** Click on the Facebook tab.)
**Bước 3:** Chọn **Lọc**, tích vào **Bài viết**, bạn sẽ thấy các bình luận vừa nhận từ khách hàng Facebook\
(**Step 3:** Select **Filter** – tick the **Post** option, and you'll see the recent comments received from Facebook customers.)
**Bước 4:** Click tab Post, bạn sẽ thấy các bài post trên trang\
\&#xNAN;*(**Step 4:** Click on tab post, you will see all the post in page)*
## 5.1. Hướng dẫn Xem thêm bình luận
### *(Guide to see more comments)*
Tại tab Post, click 1 bài post để xem chi tiết\
(*At tab post, click a post to see the detail)*
Chọn xem thêm câu trả lời để hiển thị thêm bình luận\
(Select 'See more answers' to display more comments.)
### 5.2. Hướng dẫn trả lời bình luận
### *(Guide to answer the comment)*
**Bước 1:** Tại tab Post, click 1 bài post để xem chi tiết\
\&#xNAN;*(**Step 1**: At tab post, click a post to see the detail)*
**Bước 2**: click **Trả lời** ở dưới bình luận\
\&#xNAN;*(**Step 2**: Click R**eply** in the below comment)*
**Bước 3:** Lúc này sẽ hiện ra 1 thanh nhập nội dung trả lời ở dưới bình luận đó, nhập nội dung trả lời\
\&#xNAN;*(**Step 3:** At this point, a text input bar will appear below the comment. Enter your reply in the text field.)*
**Bước 4.** Nhấn Enter để gửi trả lời bình luận\
\&#xNAN;*(**Step 4:** Press Enter to submit the reply to the comment.)*
Bình luận đã được hiển thị trên fanpage\
(The comment has been displayed on the fanpage.)
## 5.3. Hướng dẫn xem bài viết,bình luận trên facebook
### *(Guide to Viewing Posts and Comments on Facebook)*
**Bước 1:** Mở trang Hội thoại đa kênh\
(**Step 1:** Open the Omnichannel Conversations page.)
**Bước 2:** Click vào tab Facebook \
(**Step 2:** Click on the Facebook tab.)
**Bước 3:** Chọn **Lọc**, tích vào **Bài viết**, bạn sẽ thấy các bình luận vừa nhận từ khách hàng Facebook\
(**Step 3:** Select **Filter** – tick the **Post** option, and you'll see the recent comments received from Facebook customers.)
**Bước 4:** Click tab Post, bạn sẽ thấy các bài post trên trang\
\&#xNAN;*(**Step 4:** Click on tab post, you will see all the post in page)*
**Bước 5**: click icon Xem bài viết (như hình)\
\&#xNAN;*(**Step 5**: Click the 'View Post' icon (as shown in the image))*
Để xem bình luận trên Facebook, click icon ở dưới mỗi bình luận (xem hình)\
\&#xNAN;*(To view comments on Facebook, click the icon below each comment (see image))*
Để like bình luận, click **Thích** ở dưới bình luận\
\&#xNAN;*(To like a comment, click Like below the comment )*
# 6. Thay đổi người phụ trách session (Changing the Session Owner)
**Bước 1**. Vào xem 1 tin nhắn/comment bất kỳ\
(**Step 1.** View any message/comment.)
**Bước 2**: Phía dưới tên của khách hàng có dòng hiển thị tên của người đang phụ trách\
(**Step 2**: Below the customer's name, the assigned staff member’s name appears.)
**Bước 3**: click vào nút chỉnh sửa bên cạnh để đổi người phân công\
(**Step 3**: Click the edit button next to it to change the assigned person.)
Chọn Nhóm và Người chịu trách nhiệm và click Phụ trách
(Select the Group and Responsible Person, then click Assign.)
Có thể Ghi chú thêm nội dung để NV phụ trách mới có thể nắm thêm thông tin của session được phân công
(You can add a note with additional information to help the new responsible person understand the details of the assigned session.)
Phía người được phân công phụ trách sẽ nhận được popup thông báo phân công
(The person assigned to the session will receive a popup notification of the assignment)
Click Xem hội thoại ngay để mở session được phân công, click Để sau để ở lại phiên làm việc hiện tại
(Click 'View Conversation Now' to open the assigned session, or click 'Later' to stay in the current session.)
# 7. Thêm user hỗ trợ (Adding support user)
Tính năng này được dùng khi user hiện tại cần sự giúp đỡ từ một nhân viên khác để hỗ trợ khách hàng, chỉ cần mời nhân viên vào session, nhân viên đó sẽ có thể phụ giúp cho nhân viên phụ trách chính của session.
(This feature is used when the current user needs assistance from another employee to support a customer. Simply invite the employee into the session, and they will be able to assist the primary responsible employee of the session.)
**Bước 1.** Vào xem 1 tin nhắn/bình luận bất kỳ\
(**Step 1:** Open any message/comment.)
**Bước 2:** Click vào icon thêm Hỗ trợ\
(**Step 2:** Click on the 'Add Support' icon.)
**Bước 3:** Chọn hoặc tìm kiếm tên để thêm vào hỗ trợ\
(**Step 3:** Select or search for a name to add for support.)
Có thể thêm 1 hoặc nhiều nhân viên hỗ trợ\
(You can add one or multiple support staff.)
Click X để xóa nhân viên hỗ trợ ra khỏi danh sách\
(Click X to remove the support staff from the list.)
**Bước 4**: Click **Lưu**\
(**Step 4**: Click **Save**)
Tại màn hình nhân viên được thêm vào hỗ trợ sẽ hiện popup thông báo\
(On the screen, the added support staff will receive a popup notification.)
Click Hỗ trợ ngay để mở session cần hỗ trợ, click Để sau để ở lại phiên làm việc hiện tại.\
(Click 'Support Now' to open the session that needs support, or click 'Later' to stay in the current session.)
Đối với các session là Hỗ trợ, nhân viên có thể nhận biết được bằng dòng chữ Hỗ trợ ở ngay session đó\
(For support sessions, employees can identify them by the word 'Support' displayed in the session.)
# 8. Gắn nhãn session (Tagging session)
Tính năng này cho phép gắn 1/nhiều nhãn cho 1 session chat để phân loại các session theo Nhãn. Có 2 cách gắn nhãn cho session:
*(This feature allows you to tag one or multiple labels to a chat session in order to categorize the sessions by labels. There are 2 ways to tag labels for a session:)*
**Cách 1:** Bấm vào icon nhãn \
\&#xNAN;*(**Method 1:** Click on label icon**)*
**Bước 1**. Vào xem 1 tin nhắn/bình luận bất kỳ\
\&#xNAN;*(**Step 1:** Open any message/comment.)*
**Bước 2**: Click vào icon Tags\
\&#xNAN;*(**Step 2**: Click on icon tags)*
**Bước 3**: Chọn các Nhãn từ danh sách có sẵn\
\&#xNAN;*(**Step 3**: Select labels from the available list.)*
**Cách 2**: Chọn nhãn từ danh sách nhãn nằm trên ô chatbox\
\&#xNAN;*(**Method 2**: Select a label from the list of labels on the chatbox)*
Click một lần để gắn nhãn, Click 2 lần để bỏ gắn nhãn\
(Single click to label, double click to unlabel.)
Nhãn sau khi được cập nhật thành công sẽ nằm ở danh sách các session - ngay dưới tên session\
\&#xNAN;*(Once the label is successfully updated, it will appear in the session list, just below the session name.)*
# 9. Gửi hình ảnh (Sending images)
**Bước 1**. Tại thanh chat, click icon \
\&#xNAN;*(**Step 1**: In the chat bar, click the icon.* *)*
**Bước 2**. Chọn hình ảnh cần gửi \
\&#xNAN;*(**Step 2**: Choose the picture to send)*
**Bước 3**. Click Open\
\&#xNAN;*(**Step 3**: Click open)*
Hình ảnh sẽ được gửi đi \
\&#xNAN;*(The image will be sent.)*
Đây là ảnh nhận được từ khách hàng\
\&#xNAN;*(This is the image received from the customer.)*
Để xem toàn bộ ảnh, click vào ảnh\
\&#xNAN;*(To view the full image, click on the image.)*
# 10. Đánh dấu Xong (Marking done)
Tính năng này dùng để đóng và chuyển các session đã được hỗ trợ vào bộ lọc Xong.\
Qua đó ta thông kê được số lượng session đã được hỗ trợ, thời gian hỗ trợ …\
\&#xNAN;*(This feature is used to close and move sessions that have been supported into the 'Done' filter.*\
*This allows for tracking the number of sessions supported, support time, and other statistics.)*
**Bước 1:** Mở vào session của 1 tin nhắn/ bình luận\
\&#xNAN;*(**Step 1:** Open the session of a message/comment.)*
**Bước 2**: Hỗ trợ khách hàng: Trả lời tin nhắn, bình luận, đính kèm file , gắn nhãn,...\
\&#xNAN;*(**Step 2**: Assist the customer: Reply to messages, comments, attach files, add labels, etc.)*
**Bước 3**: Click vào Icon  Đánh dấu đã xong\
\&#xNAN;*(**Step 3:** Click on the Mark as Done*  *icon.)*
Ta có thể tìm lại các tin nhắn đã đóng ở bộ lọc XONG. Sẽ có thông tin đầy đủ về: Nhân viên đóng và thời gian đóng
*(You can find the closed messages in the DONE filter. It will show complete information about the employee who closed it and the closure time.)*
Có thể chủ động Chuyển đến hộp thư- mở lại session chat này để tiếp tục chat với khách hàng\
\&#xNAN;*(You can proactively move to the inbox to reopen this chat session and continue chatting with the customer.)*
Trường hợp nếu Khách hàng nhắn tin lại thì session cũng sẽ được mở lại và chuyển tới bộ lọc Chính\
\&#xNAN;*(If the customer sends a message again, the session will be reopened and moved to the Main filter.)*
# 11. Thêm mẫu tin nhắn (Adding message template)
**Bước** 1: Trên thanh menu trái, click **Thiết lập**\
\&#xNAN;*(**Step 1**: On the left menu bar, click on **Settings**.)*
**Bước 2**: Click **Thiết lập hội thoại đa kênh**\
\&#xNAN;*(**Step 2**: Click on Omnichannel **Conversation Settings**.)*
**Bước 3**: Mở phần **Mẫu tin nhắn Omni** \
\&#xNAN;*(**Step 3**:Open the Omni Message Templates section.)*
Tại trang Mẫu tin nhắn Hội thoại, bạn có thể thêm, sửa hoặc xóa tin nhắn. Dưới đây là hướng dẫn cụ thể\
\&#xNAN;*(On the Conversation Message Templates page, you can add, edit, or delete messages. Below is a detailed guide.)*
## 11.1.1. Hướng dẫn thêm mẫu tin nhắn
*(Guide to Adding a Message Template)*
**Bước 1**: Nhập thông tin mẫu tin nhắn mới\
\&#xNAN;*(**Step 1**: Enter information for the new message template.)*
* **Tiêu đề**: Bắt buộc\
\&#xNAN;*(**Title**: Require.)*
* **Nội dung**: phần tin nhắn sẽ hiển thị khi gửi cho khách hàng\
\&#xNAN;*(**Content**: The message that will be displayed when sent to the customer.)*
* **Nhãn**: chọn hoặc tìm kiếm nhãn để thêm vào mẫu tin nhắn (không bắt buộc)\
\&#xNAN;*(**Label**: Select or search for a label to add to the message template (optional).)*
* **Trang**: Chọn trang áp dụng mẫu tin nhắn: Mặc định sẽ áp dụng Tất cả trang\
\&#xNAN;*(**Page**: Select the page to apply the message template to: By default, it will apply to All Pages.)*
* Chọn file đính kèm (không bắt buộc)\
\&#xNAN;*(Select an attachment (optional).)*
**Bước 2**: Nhấn **Lưu**\
\&#xNAN;*(**Step 2**: Click **Save**.)*
Hiển thị thông báo thành công và mẫu tin nhắn đã được tạo\
(A success message is displayed, and the message template has been created.)
# 11.1. Thêm sửa xóa templates (Add/Edit/Delete templates)
Bước 1: Trên thanh menu trái, click **Thiết lập**
*(Step 1: On the left menu bar, click on Settings.)*
Bước 2: Click **Thiết lập hội thoại đa kênh**
*(Step 2: Click on Multi-channel Conversation Settings.)*
Bước 3: Mở phần **Mẫu tin nhắn Omni**
*(Step 3:Open the Omni Message Templates section.)*
Tại trang Mẫu tin nhắn Hội thoại, bạn có thể thêm, sửa hoặc xóa tin nhắn. Dưới đây là hướng dẫn cụ thể
*(On the Conversation Message Templates page, you can add, edit, or delete messages. Below is a detailed guide.)*
11.1.1. Hướng dẫn thêm mẫu tin nhắn
*(Guide to Adding a Message Template)*


Bước 1: Nhập thông tin mẫu tin nhắn mới
*(Step 1: Enter information for the new message template.)*
* Tiêu đề: Không bắt buộc
(Title: Optional.)
* Nội dung: phần tin nhắn sẽ hiển thị khi gửi cho khách hàng
(Content: The message that will be displayed when sent to the customer.)
* Nhãn: chọn hoặc tìm kiếm nhãn để thêm vào mẫu tin nhắn (không bắt buộc)
*(Label: Select or search for a label to add to the message template (optional).)*
* Trang: Chọn trang áp dụng mẫu tin nhắn: Mặc định sẽ áp dụng Tất cả trang
*(Page: Select the page to apply the message template to: By default, it will apply to All Pages.)*
* Chọn file đính kèm(không bắt buộc)
*(Select an attachment (optional).)*
Bước 2: Nhấn **Lưu**
*(Step 2: Click Save.)*
11.1.2. Hướng dẫn chỉnh sửa mẫu tin nhắn
*(Guide to Editing a Message Template)*
Bước 1: Click nút Edit ở mẫu tin nhắn cần sửa
*(Step 1: Click the Edit button on the message template you want to edit.)*


Bước 2: Chỉnh sửa nội dung hoặc các thành phần khác
*(Step 2: Edit the content or other components.)*


3: Click **Lưu**
*(Step 3: Click save)*
11.1.3. Hướng dẫn xóa mẫu tin nhắn
*(Guide to Deleting a Message Template)*
Bước 1: click nút xóa ở mẫu tin nhắn cần xóa
*(Step 1: Click the delete button on the message template you want to delete.)*


Bước 2: click nút Xóa ở popup xác nhận
*(Step 2: Click the Delete button on the confirmation popup.)*


# 11.2. Sử dụng mẫu tin nhắn (Using message template)
Bước 1: tại thanh chat, Click vào biểu tượng , các mẫu tin nhắn sẽ hiện ra
*(**Step 1:** In the chat bar, click on the icon* *, and the message templates will appear.)*


Bước 2: click vào dòng mẫu tin nhắn cần dùng để chọn
*(Step 2: Click on the message template line you want to use to select it.)*


Bước 3: Tin nhắn sau khi được chọn sẽ nằm ở khung chat, nhấn Enter để gửi
*(Step 3: The selected message will appear in the chat box; press Enter to send.)*

Mẫu tin nhắn sau khi được gửi:
*(Sent message template:)*


Có thể lọc nhanh danh sách tin nhắn mẫu theo nội dung hoặc theo Danh mục
*(You can quickly filter the list of message templates by content or by category.)*


# 12. Thiết lập thời gian đóng session (Setting Up Session Timeout)
Tính năng này cho phép hệ thống kiểm tra và đóng session tự động sau thời gian thiết lập kể từ tin nhắn cuối cùng của nhân viên.\
\&#xNAN;*(This feature allows the system to automatically check and close the session after the set time, starting from the last message sent by the employee.)*
**Bước 1**: Trên thanh menu trái, click **Thiết lập**\
\&#xNAN;*(**Step 1**: On the left menu bar, click **Settings**.)*
**Bước 2**: Click nút **Hội thoại đa kênh**\
\&#xNAN;*(**Step 2**: Click the **Omni-channel Conversations** button.)*
**Bước 3**: Mở phần **Thiết lập khác**\
\&#xNAN;*(**Step 3**: Open the Other Settings section.)*
**Bước 4:** Nhập thời gian mong muốn, tin nhắn kết thúc session và bật kích hoạt tính năng\
\&#xNAN;*(**Step 4:** Enter the desired time, the session end message, and enable the feature.)*
Ví dụ : với setting 30 phút, một session đang được hỗ trợ với tin nhắn cuối là tin nhắn của nhân viên và trong vòng 30 phút session này không có thêm tin nhắn nữa thì session đó sẽ được đóng tự động và gửi kèm lời chào kết thúc session\
\&#xNAN;*(For example: With a 30-minute setting, if a session is being supported with the last message sent by the employee, and no further messages are received within 30 minutes, the session will automatically close and send a farewell message to end the session.)*
**Bước 5.** Kéo trang thiết lập xuống dưới cùng và Click **Lưu**\
\&#xNAN;*(**Step 5**: Scroll down to the bottom of the settings page and click Save.)*
# 13. Cấu hình thời gian chờ (Configuring the Timeout)
Hướng dẫn cấu hình thời gian chờ thay đổi người phụ trách khi chưa trả lời session: (Guide to Configuring the Timeout for Changing the Assignee When There Is No Response to the Session:)
Sau khoảng thời gian thiết lập, nếu agent được assign không trả lời thì session tự động assign cho agent khác theo quy luật phân công\
\&#xNAN;*(After the set timeout period, if the assigned agent does not respond, the session will automatically be reassigned to another agent according to the assignment rules.)*
**Bước 1:** Vào **Setting**\
\&#xNAN;*(**Step 1:** Go to **setting**)*
**Bước 2:** Chọn **Omni**\
\&#xNAN;*(**Step 2**: Select **omni**)*
**Bước 3:** Chọn **Thiết lập khác**\
\&#xNAN;*(**Step 3**: Select **Other Settings**.)*
**Bước 4**: Nhập Thời gian chờ tối đa của session mong muốn (phút)\
\&#xNAN;*(**Step 4**: Enter the desired maximum session timeout (in minutes).)*
**Bước 5**: Kích hoạt\
\&#xNAN;*(**Step 5**: Enable the feature.)*
**Bước 5.** Kéo trang thiết lập xuống dưới cùng và Click **Lưu**\
\&#xNAN;*(**Step 5**: Scroll down to the bottom of the settings page and click **Save**.)*
# 14. Thiết lập tự động trả lời và gửi tin nhắn (Setting Up Auto-Reply and Sending Messages)
Tính năng này cho phép người dùng thiết lập tính năng tự động trả lời bình luận trên fanpage, cho phép gửi tin nhắn tự động theo mẫu tạo sẵn. Để thiết lập tính năng, người dùng làm theo các bước sau:\
(This feature allows users to set up automatic replies to comments on their Facebook fanpage and send automatic messages based on pre-created templates. To set up this feature, follow these steps:)
**Bước 1:** Vào Thiết lập -> Thiết lâp hội thoại đa kênh-> Tích hợp kênh tin nhắn -> chọn Tích hợp của Facebook\
(**Step 1**: Go to Settings -> Omni Conversation -> Messaging channel integration ->select Integrate of Facebook )
**Bước 2**: Chọn fanpage muốn thiết lập -> Cài Đặt\
(**Step 2**: Select the fanpage you want to set up -> Settings)
**Bước 3**: Vào Tương tác và bật tính năng tự động phản hồi bình luận\
(**Step 3:** Go to Interactions and enable the Reply to comments with comments feature.)
Sau khi bật tính năng sẽ xuất hiện 2 loại cấu hình:\
(After enabling the feature, two types of configurations will appear:)
* Cấu hình trả lời bình luận bằng bình luận: Bot trả lời bình luận khi khách hàng bình luận vào fanpage\
(Comment Reply by Comment Configuration: The bot will reply to a customer's comment when they comment on the fanpage.)
* Cấu hình trả lời bình luận bằng tin nhắn: Bot tự động nhắn tin với khách hàng khi họ bình luận vào fanpage\
(Comment Reply by Message: The bot automatically sends a message to the customer when they comment on the fanpage.)
1\. Cấu hình trả lời bình luận bằng bình luận: Có 2 lựa chọn cấu hình\
(Comment Reply by Comment: There are two configuration options:)
1.1. Tất cả bài post: Tại đây chúng ta có 2 cách để thiết lập bình luận trả lời bình luận của khách hàng\
(1.1. All Posts: Here, you can set up the bot to reply to customer comments in two ways:)
1.1.1: Nội dung bất kì: Khi khách hàng nhập nội dung bất kì, thì hệ thống tự động trả lời lại bình luận của khách hàng\
(1.1.1. Any content: When a customer enters any content, the system will automatically reply to their comment.)
1.1.2: Nội dung chứa từ khóa: Khi khách hàng bình luận nội dung chứa các từ khóa được thiết lập, thì hệ thống tự động trả lời lại bình luận của khách hàng.\
(Content containing keywords: When a customer comments with content containing the predefined keywords, the system will automatically reply to their comment.)
Lúc này người dùng có thể lựa chọn thêm cài đặt cho từ khóa bằng cách bấm nút Cài đặt, sẽ có 3 thiết lập cho từ khóa được hiển thị.\
(At this point, users can choose additional settings for the keywords by clicking the Settings button. Three configuration options for the keywords will be displayed.)
Bạn có thể chọn các chế độ khác nhau cho từ khóa bình luận bao gồm:\
(You can choose different modes for the comment keywords, including:)
\+ Chính xác \[a b c]: khách hàng cần gõ chính xác 100% từ khóa được cài đặt bot sẽ ghi nhận và trả lời theo nội dung đã cài đặt. Chế độ này không phân biệt chữ hoa, chữ thường, có phân biệt có dấu hay không dấu.\
(Exact \[a b c]: The customer needs to type the keyword exactly as configured for the bot to recognize and reply based on the pre-set content. This mode does not distinguish between uppercase and lowercase letters, and it does not differentiate between accented and non-accented characters.)
\+ Cụm từ (chứa \[a b c]): khách hàng gõ nội dung chứa từ khóa được cài đặt bot sẽ ghi nhận là từ khóa và trả lời theo nội dung đã cài đặt. Chế độ này không phân biệt chữ hoa, chữ thường, có dấu hay không dấu.\
(Phrase (contains \[a b c]): When the customer types content containing the configured keyword, the bot will recognize it as a keyword and reply based on the pre-set content. This mode does not distinguish between uppercase and lowercase letters, and it does not differentiate between accented and non-accented characters.)
\+ Rộng (chứa \[a] hoặc \[b] hoặc \[c]): khách hàng gõ nội dung chứa 1 trong các phần tử của từ khóa bot sẽ ghi nhận là từ khóa và trả lời theo nội dung đã cài đặt. Chế độ này không phân biệt chữ hoa, chữ thường, có dấu hay không dấu.\
(Broad (contains \[a] or \[b] or \[c]): When the customer types content containing any of the elements from the keywords, the bot will recognize it as a keyword and reply based on the pre-set content. This mode does not distinguish between uppercase and lowercase letters, and it does not differentiate between accented and non-accented characters.)
Ví dụ:\
(Example:)
Từ khóa cài đặt: inbox mình nhé\
(Configured keyword: inbox me)
\> Chế độ chính xác: inbox mình nhé\
(Exact Mode: inbox me)
\> Chế độ cụm từ: bạn ơi inbox mình nhé bạn (chứa inbox mình nhé)\
(Phrase Mode: "Hey, inbox me please" (contains "inbox me"))
\> Chế độ rộng: shop em check inbox em với ạ (chứa inbox)\
(Broad Mode: "Shop, please check your inbox" (contains "inbox"))
1.2. Theo từng post: Áp dụng mỗi post là 1 câu trả lời bình luận khác nhau\
(Per Post: Apply a different reply to comments for each individual post.)
**Bước 1:** Vào Quản lý hội thoại -> Tin nhắn đa kênh -> Facebook -> chọn vào Bộ lọc\
(**Step 1:** Go to Omni Conversations -> Conversations -> Facebook -> Select Advanced filter.)
**Bước 2:** Vào bộ lọc để lọc Bài viết\
(**Step 2:** Go to the filter to filter the posts.)
**Bước 3:** Nhấp vào bài viết cần thiết lập\
(**Step 3:** Click on the post you want to set up.)
**Bước 4:** Nhấn vào \
(**Step 4:** Click on Settings  .)
**Bước 5**: Lúc này giao diện sẽ xuất hiện popup với các thiết lập tương tự như cấu hình cho tất cả bài viết\
(**Step 5**: A popup will appear with settings similar to the configuration for all posts.)
2\. Cấu hình trả lời bình luận bằng tin nhắn: Có 2 lựa chọn cấu hình
(Comment Reply by Message Configuration: There are 2 configuration options:)
2.1 Tất cả bài post: Tại đây chúng ta có 2 cách để thiết lập trả lời bình luận bằng tin nhắn
(All Posts: Here, you can set up two ways to reply to comments via message:)
2.1.1: Nội dung bất kì: Khi khách hàng nhập nội dung bất kì, thì hệ thống tự động trả lời lại bình luận của khách hàng bằng tin nhắn được thiết lập
( Any Content: When the customer enters any content, the system will automatically reply to their comment with a pre-configured message.)
2.1.2: Nội dung chứa từ khóa: Khi khách hàng bình luận nội dung chứa các từ khóa được thiết lập, thì hệ thống tự động trả lời lại bình luận của khách hàng
( Content containing keywords: When a customer comments with content containing the predefined keywords, the system will automatically reply to their comment with the pre-configured message.)
Thiết lập cài đặt cho từ khóa tương tự như ở phần trả lời bình luận bằng bình luận
(The keyword settings are configured similarly to the Comment Reply by Comment section.)
2.2. Theo từng post: Áp dụng mỗi post là 1 mẫu tin nhắn khác nhau
(Per Post: Apply a different message template for each post.)
Bước 1: Vào Omni -> Facebook
(Step 1: Go to Omni -> Facebook)
Bước 2: Vào bộ lọc để lọc Bài viết
(Step 2: Go to the filter to filter the posts.)
Bước 3: Nhấp vào bài viết cần thiết lập
(Step 3: Click on the post you want to set up.)
Bước 4: Nhấn vào 
(Step 4: Click on Settings .)
Bước 5: Lúc này giao diện sẽ xuất hiện popup với các thiết lập tương tự như cấu hình cho tất cả bài viết
(Step 5: A popup will appear with settings similar to the configuration for all posts.)
# 15. Thiết lập thời hạn phản hồi và cảnh báo (Setting Up Response Time and Pre-Expiration Warnings)
Tính năng này cho phép:
(This feature allows you to:)
* Thiết lập thời hạn phản hồi cho session Omni (1). Ví dụ thiết lập 30 phút, thì sau 30 phút nhân viên không phản hồi, session được xem là quá hạn phản hồi\
(Set a response deadline for Omni sessions (1). For example, if you set it to 30 minutes, the session will be considered overdue if the employee does not respond within 30 minutes.)
* Thiết lập cảnh báo trước khi hết thời hạn phản hồi (2). Ví dụ thiết lập 5 phút, thì trước khi hết thời hạn phản hồi ở (1) 5 phút, nhân viên phụ trách sẽ nhận được thông báo cảnh báo session sắp hết hạn\
(Set a pre-expiration warning (2). For example, if you set it to 5 minutes, the assigned employee will receive a warning notification 5 minutes before the response deadline expires.)
### 1. Để thực hiện thiết lập người dùng làm theo các bước sau: (To set this up, follow these steps:)
**Bước 1:** Vào Thiết lập -> Thiết lập hội thoại đa kênh -> Thiết lập khác\
(**Step 1:** Go to Settings -> Omni -> Other Settings)
**Bước 2:** Vào Cấu hình phiên hội thoại -> **Cấu hình thời hạn phản hồi**\
(**Step 2**: Go to Config session -> **Config time to reply session**)
**Bước 3**: Nhập thời gian cho Thời hạn phản hồi session và Cảnh báo trước khi hết hạn\
(**Step 3**: Enter the time for the Session Response Deadline and Pre-Expiration Warning)
**Bước 4**: Chọn Kích Hoạt\
(**Step 4:** Select Activate)
**Bước 5:** Kéo xuống dưới cùng và ấn Lưu\
(**Step 5:** Scroll to bottom and click Save)
### 2. Giao diện hiển thị trên hệ thống (Display Interface on the System)
Khi session quá thời hạn thiết lập ở (1), sẽ hiển thị giao diện quá hạn \
(When the session exceeds the time limit set in (1), an expired interface will be displayed.")
Khi session tới hạn thiết lập ở (2), sẽ hiển thị giao diện sắp quá hạn: thời gian của session sẽ tô đỏ
(When the session reaches the time limit set in (2), an interface indicating it is about to expire will be displayed: the session time will be highlighted in red.)
3/ Lưu ý:
(Notes:)
* Session chỉ bắt đầu đếm thời gian quá hạn sau khi được phân công cho nhân viên
(The session will only start counting the expiration time after it has been assigned to an employee.)
* Trong khoảng thời gian chưa quá hạn, khi nhân viên phản hồi cho session, thì session sẽ mất thông báo quá hạn
(Within the time frame before expiration, when the employee responds to the session, the expiration notification will be removed.)
* Có bộ lọc tin Quá Hạn cho session chưa xong
(There is a filter for 'Expired' messages for sessions that are not yet completed.)
# 16. Các thao tác với khách hàng (Customer operations)
Xem hướng dẫn các thao tác với khách hàng như chỉnh sửa thông tin khách hàng, thêm ticket, nhiệm vụ liên quan [tại đây](https://docs.google.com/document/d/15uPmi4DaFvESSU9Vn9E1IJWrPB3fENf7BAuQ3UqsfJM/edit#heading=h.8vie7jtm29xs)
(View the guide for customer operations such as editing customer information, adding tickets, and related tasks [here](https://docs.google.com/document/d/15uPmi4DaFvESSU9Vn9E1IJWrPB3fENf7BAuQ3UqsfJM/edit?usp=sharing).)
# 17. Đánh dấu chưa đọc (Marking unread)
**Bước 1:** Tại hộp thư thoại, di chuyển chuột vào đoạn chat, icon  sẽ hiển thị \
(**Step 1:** In the voicemail box, hover over the chat, and the icon  will appear.)
**Bước 2:** Click chuột vào icon  để đánh dấu chưa đọc đoạn chat\
(Click the icon  to mark the chat as unread.)
# 18. Thiết lập Danh mục Chat (Setting up Omnichannel chat Categories)
Tính năng này cho phép người dùng thiết lập danh mục Cha\
(This feature allows user to set up Omnichannel chat Categories)
**Bước 1:** Trên thanh menu trái, click Thiết lập\
(**Step 1:** On the left menu bar, click Settings.)
**Bước 2**: Click nút Chat đa kênh\
(**Step 2:** Click the Omni-channel Conversations button.)
**Bước 3:** Mở phần danh mục Chat\
(**Step 3:** Open the Omnichannel chat Categories.)
**Bước 4:** Chọn thêm danh mục\
(**Step 4:** Select Add Category)
**Bước 5:** Cập nhật tên danh mục\
(**Step 5:** Update category name)
**Bước 6:** Xóa tên danh mục \
(**Step 6:** Delete category name)
# 19. Cấu hình hiển thị (Configuring layout)
Tính năng này cho phép người dùng thiết lập cấu hình hiển thị\
(This feature allows user to set up configuring layout)
**Bước 1:** Trên thanh menu trái, click Thiết lập\
(**Step 1:** On the left menu bar, click Settings.)
**Bước 2:** Click nút Hội thoại đa kênh\
(**Step 2**: Click the Omni-channel Conversations button.)
**Bước 3**: Mở phần thiết lập khác\
(**Step 3:** Open the other settings session.)
**Bước 4:** Chọn cấu hình hiển thị\
(**Step 4:** Select Config layout)
**Bước 5:** Tại giao diện cấu hình hiển thị, có thể bật/tắt kích hoạt tính năng\
(**Step 5:** At config layout interface, can enable or disable the feature.)
**Bước 6:** Chọn giao diện\
(**Step 6**: Select interface)
Để chọn giao diện, vào **Thiết lập -> Giao diện -> Hội thoại đa kênh**\
To select the interface, go to **Settings -> Layout -> Conversations**
Có 3 cấu hình để lựa chọn:\
(There are 3 interfaces to choose:)
* Mặc định\
(Default)
* Hợp nhất\
(Unify)
* Hiệu năng\
(Performance)
# 20.Tính năng phân công chat được tạo ra khi trả lời từ bình luận cho chính người bấm trả lời
Tính năng này cho phép hệ thống tự phân công lại chat được tạo ra khi trả lời tin nhắn từ bình luận cho người thực hiện trả lời
**Bước 1:** Vào Thiết lập
(Go to Settings)
**Bước 2:** Thiết lập chat đa kênh
(Go to Omni Conversations)
**Bước 3:** Thiết lập khác\
(Go to Other settings)
**Bước 4:** Bật tính năng “Phân công chat tin nhắn tạo từ bình luận cho người trả lời”
(Active Assign session created by user replied message from comment)

# Zalo OA
# 1. Tích hợp Zalo OA (Zalo OA integration)
Bước 1: Chọn Thiết lập -> Thiết lập cha đa kênh -> Tích hợp Zalo OA\
(Step 1: Select settings -> Set Omnichannel chat -> Zalo OA Integrations)
Có 2 cách để lựa chọn bot zalo để tích hợp:
(There are two ways to select a Zalo bot for integration:)
Cách 1: Sử dụng bot Zalo của chính người dùng. Xem [hướng dẫn tạo Bot Zalo tại đây](https://huongdan.antbuddy.com/kb/antcrm-huong-dan-tao-ung-dung-zalo-bot)
(Method 1: Use the user's own Zalo bot. See [the guide to creating a Zalo bot here.](https://huongdan.antbuddy.com/kb/antcrm-huong-dan-tao-ung-dung-zalo-bot))
Nhập ID ứng dụng và Khóa bí mật của ứng dụng sau đó chọn Cập nhật ứng dụng Zalo
(Enter the Application ID and Secret Key of the app, then select Update Zalo Application.)
Tiếp theo người dùng chọn nút tích hợp 
(Next, the user selects the integration button )
Sau khi đăng nhập zalo thành công, người dùng sẽ được chuyển đến Popup chọn OA và cấp quyền quản lý OA, chọn cho phép.
(After successfully logging into Zalo, the user will be redirected to a popup to select the OA and grant management permissions for the OA, then choose Allow.)\
Cách 2: Người dùng sử dụng Bot Zalo của Antbuddy.
(Method 2: The user uses Antbuddy's Zalo Bot)
Người dùng chọn nút tích hợp  và thao tác chọn OA, cấp quyền quản lí như cách 1
(The user selects the integration button  and proceeds to select the OA and grant management permissions as in Method 1.)
# 2. Thiết lập trang (Setting page)
Bước 1: Đi đến trang thiết lập Omni - Zalo OA
(Step 1: Go to Settings -> Omni conversations -> Zalo OA integrations)
Bước 2: Click nút Cài đặt tại chính page (đã đăng ký) mà bạn muốn thiết lập
(Step 2: Click on Settings at the page (registered) you want to set up)
Bước 3: Trang sẽ chuyển hướng đến trang thiết lập cho Fanpage
(Step 3: The page will redirect to the setup page for the Fan page.)
Thiết lập cho Fanpage gồm có các mục sau:
(Setup for Fan Page includes the following items:)
|
Danh sách nhân viên chịu trách nhiệm tương tác với khách hàng như bình luận, nhắn tin hỗ trợ…
(List of employees responsible for interacting with customers such as comments, support messages, etc..)
|
|
Tự động
phân phối
(Auto assign)
|
Khi bật tính năng tự động phân phối, các bình luận/tin nhắn từ khách hàng gửi vào Page sẽ được phân phối cho nhân viên hỗ trợ một cách tự động theo quy tắc Assignment Rule (được cấu hình ở dưới)
(When the auto-distribution feature is enabled, comments/messages from customers sent to the Page will be distributed to support staff automatically according to the Assignment Rule (configured below).)
|
|
Chế độ phân công
(Assignment mode)
|
Có 2 chế độ phân công
Tuần tự: Phân phối phiếu yêu cầu lần lượt theo thứ tự các nhân viên trong nhóm và xoay vòng.
Ngẫu nhiên: Phân phối phiếu yêu cầu một cách ngẫu nhiên cho các nhân viên trong nhóm.
(There are
Round robin: Distribute requests respectively in order to employees in the group and rotate.
Random: Distribute tickets randomly to employees in the group.)
|
|
Đối tượng áp dụng
(Apply for)
|
Chọn loại dữ liệu sẽ được áp dụng thiết lập phân công tự động này, có 3 loại dữ liệu là Tickets, Contacts, Accounts. Nghĩa là khi có khách hàng gửi email vào hệ thống, hệ thống sẽ tự động tạo ticket và phân công tự động theo thiết lập, đồng thời thêm thông tin khách hàng đó vào hệ thống và phân công cho nhân viên phụ trách.
(Choose the type of data that will apply this automatic assignment setting. There are 3 types of data: Tickets, Contacts, Accounts. This means that when a customer sends an email to the system, the system will automatically create a ticket and assign it automatically according to the settings, and add that customer information to the system and assign it to the staff in charge.)
|
| Tag |
Thẻ được gắn cho khách hàng mới với mục đích phân biệt, nhóm các khách hàng có tính chất giống nhau để tiện cho việc thao tác sau này
(Tags are assigned to new customers for the purpose of distinguishing and grouping customers with similar characteristics for ease of future operations.)
|
|
Nguồn Lead
(Lead source)
|
Nguồn tạo ra khách hàng, việc này cũng nhằm mục đích phân biệt và nhóm các khách hàng có tính chất giống nhau.
(The source of creating customers, this also serves the purpose of distinguishing and grouping customers with similar characteristics.)
|
# 2.1. Thêm User hỗ trợ (Add user support)
Bước 1. Đi đến trang thiết lập Fanpage - mục User hỗ trợ (theo hướng dẫn ở trên)
*(Step 1. Go to Fan Page setting page - **User support** section (according to the instructions above))*
Bước 2. Chọn hoặc tìm kiếm user để thêm vào danh sách user hỗ trợ
*(Step 2. Choose or search user to add user support list)*


Nếu muốn xóa user ra khỏi danh sách hỗ trợ, hãy click nút **X**
***(**If you want to delete user from the support list, click on **X)***

Bước 2. Tick hoặc bỏ tick để tùy chỉnh nhận chat Zalo cho mỗi nhân viên hỗ trợ
*(Step 2. Tick or uncheck to customize receiving Zalo chat for each support employee)*


# 2.2. Tính năng phân phối tự động và Assignment Mode (Auto assign feature and Assignment Mode)
Bước 1. Đi đến trang thiết lập Fanpage - mục User hỗ trợ
*(Step 1. Go to Fan Page setting page - **Config assignment** section)*
Bước 2. Bật tính năng tự động phân phối
*(Step 2. Turn on Auto assign feature)*


Bước 3: Tick vào tùy chọn phân công mong muốn: Tuần tự hoặc Ngẫu nhiên
*(Step 3: Tick the desired assignment option : **Round robin** or **Random)***
Tuần tự: Các tin nhắn và bình luận của Fanpage sẽ được tự động phân phối tuần tự cho các nhân viên trong danh sách user hỗ trợ.
*(**Round robin**: Fanpage messages and comments will be automatically distributed sequentially to employees in the support user list.)*
Ngẫu nhiên: Các tin nhắn và bình luận của Fanpage sẽ được tự động phân phối ngẫu nhiên cho các nhân viên trong danh sách user hỗ trợ.
*(**Random**: Fanpage messages and comments will be automatically distributed randomly to employees in the support user list.)*
Bước 4. Tùy chọn áp dụng cho nhân viên
*(Step 4. Options apply to employees)*
* **Chỉ nhân viên online** : Chỉ áp dụng phân công cho nhân viên đang online
*(**Only users online** : Only applies to employees who are online)*
* **Tất cả nhân viên**: Áp dụng phân công cho tất cả nhân viên dù đang offline
*(**All users**: Apply assignments to all employees even if they are offline)*


Bước 5: Click lưu
*(Step 5: Click save)*
# 2.3. Cấu hình gắn thẻ cho khách hàng mới (Configure tagging for new customers)
Bước 1. Đi đến trang thiết lập Fanpage - mục **Tags**
*(Step 1. Go to Fan Page setting page - Tags section)*
Bước 2. Chọn thẻ , thẻ được chọn sẽ gắn tự động vào các khách hàng mới từ Fanpage này
*(Step 2. Choose tag , the chosen tag will be automatically attached to new customers from this Fanpage)*


# 2.4. Cấu hình Nguồn Lead (Configure lead source)
Bước 1. Đi đến trang thiết lập Fanpage - mục **Nguồn Lead**
*(Step 1. Go to Fan Page setting page - Lead sources section)*
Bước 2. Chọn nguồn , các khách hàng mới từ page này sẽ có nguồn là nguồn đã chọn
*(Step 2. Choose source, the new customers from this page will have the source as the chosen source)*


Bước 3: Click lưu
*(Step 3: Click save)*
# 3. Quản lý tin nhắn (Message Management)
Khi có một khách hàng nhắn tin vào trang, tin nhắn sẽ được đưa về Omni - Zalo OA. Số lượng tin nhắn chưa đọc sẽ được hiển thị ở trên menu.
*(When a customer sends a message to the page, the message will be directed to Omni - Zalo. The number of unread messages will be displayed on the menu.)*


Để quản lý tin nhắn và hỗ trợ khách hàng nhanh nhất, nhân viên cần làm các bước sau:
*(To manage messages and support customers as quickly as possible, employees need to follow these steps:)*
Bước 1: Mở trang Omni
*(Step 1: Open the Omni page.)*
Bước 2: Click vào tab Zalo OA
*(Step 2: Click on the Zalo OA tab.)*
Bước 3: Click tab Inbox, bạn sẽ thấy tin nhắn vừa nhận từ khách hàng Zalo OA
*(Step 3: Click the Inbox tab, and you will see the message received from the Zalo OA customer.)*
Tại đây bạn có thể nhìn thấy người được phân công hỗ trợ bằng cách rê chuột vào avatar nhỏ trên tin nhắn (xem hình).
*(Here, you can see the assigned support person by hovering over the small avatar on the message (see image).)*

Bước 4: Click vào tin nhắn để chat hỗ trợ
*(Step 4: Click on the message to start chatting and provide support.)*
# 3.1. Gửi tin nhắn(Sending message)
Bước 1: Nhập nội dung tin nhắn vào ô chatbox
*(Step 1: Enter the message content into the chatbox.)*
Bước 2: Nhấn Enter để gửi tin
*(Step 2: Press Enter to send the message.)*


Hoặc chọn Danh sách mẫu tin nhắn- chọn từ mẫu tin nhắn và nhấn enter để gửi
*(Or select from the Message Template List - choose a template and press Enter to send.)*


# 3.2. Xem lịch sử hội thoại (Viewing Conversation History)
Bước 1: Mở một session chat: nhắn tin
*(Step 1: Open a chat session: send a message)*
Bước 2: Click vào icon Lịch sử hội thoại
*(Step 2: Click on the Conversation History*  *icon.)*


Lịch sử phân công:
*(Assignment History:)*
* Gồm Loại phân công: tự động/thủ công
*(Includes Assignment Type: automatic/manual.)*
* Nhân viên phân công, Nhân viên được phân công
*(Assigned Employee, Employee Assigned.)*
* Thời gian phân công
*(Assignment Time.)*
Lịch sử cập nhật nhãn: Tên nhân viên cập nhật, thời gian cập nhật, Tên Nhãn…
*(Label Update History: Employee name who updated, update time, Label name…)*

# 4. Thay đổi người phụ trách cho session (Changing the Session Owner)
Bước 1. Vào xem 1 tin nhắn bất kỳ
*(Step 1. View any message)*
Bước 2: Phía dưới tên của khách hàng có dòng “Phụ trách Nguyễn Thị Ny Na”
*(Step 2: Below the customer's name, there is a line that says 'In charge:* Nguyen Thi Ny Na*.)*
Bước 3: click vào nút chỉnh sửa bên cạnh để đổi người phân công
*(Step 3: Click the edit button next to it to change the assigned person.)*


Chọn Nhóm và Người chịu trách nhiệm và click **Phụ trách**
**(Có thể Ghi chú thêm nội dung để NV phụ trách mới có thể nắm thêm thông tin của session được phân công)**
*(Select the Group and Responsible Person, then click Assign.*
*(You can add a note with additional information to help the new responsible person understand the details of the assigned session.))*


Phía người được phân công phụ trách sẽ nhận được popup thông báo phân công như hình:
*(The person assigned to the session will receive a popup notification of the assignment, as shown in the image:)*


Click **Xem hội thoại ngay** để mở session được phân công, click **Để sau** để ở lại phiên làm việc hiện tại
*(Click 'View Conversation Now' to open the assigned session, or click 'Later' to stay in the current session.)*
# 5. Thêm user hỗ trợ (Adding support user)
Tính năng này được dùng khi user hiện tại cần sự giúp đỡ từ một nhân viên khác để hỗ trợ khách hàng, chỉ cần mời nhân viên vào session, nhân viên đó sẽ có thể phụ giúp cho nhân viên phụ trách chính của session.
*(This feature is used when the current user needs assistance from another employee to support a customer. Simply invite the employee into the session, and they will be able to assist the primary responsible employee of the session.)*
Bước 1. Vào xem 1 tin nhắn bất kỳ
*(Step 1: Open any message.)*
Bước 2: Click vào icon thêm **Hỗ trợ**
*(Step 2: Click on the 'Add Support' icon.)*


Bước 3: Chọn hoặc tìm kiếm tên để thêm vào hỗ trợ
*(Step 3: Select or search for a name to add for support.)*


Có thể thêm 1 hoặc nhiều nhân viên hỗ trợ
*(You can add one or multiple support staff.)*
Click **X** để xóa nhân viên hỗ trợ ra khỏi danh sách
*(Click **X** to remove the support staff from the list.)*


Bước 4: Click Lưu
*(Step 4: Click Save)*


Tại màn hình nhân viên được thêm vào hỗ trợ sẽ hiện popup thông báo
*(On the screen, the added support staff will receive a popup notification.)*


Click **Hỗ trợ ngay** để mở session cần hỗ trợ, click **Để sau** để ở lại phiên làm việc hiện tại.
*(Click 'Support Now' to open the session that needs support, or click 'Later' to stay in the current session.)*
Đối với các session là Hỗ trợ, nhân viên có thể nhận biết được bằng dòng chữ **Hỗ trợ** ở ngay session đó
*(For support sessions, employees can identify them by the word 'Support' displayed in the session.)*


---
[Next Page](/llms-full.txt/1)


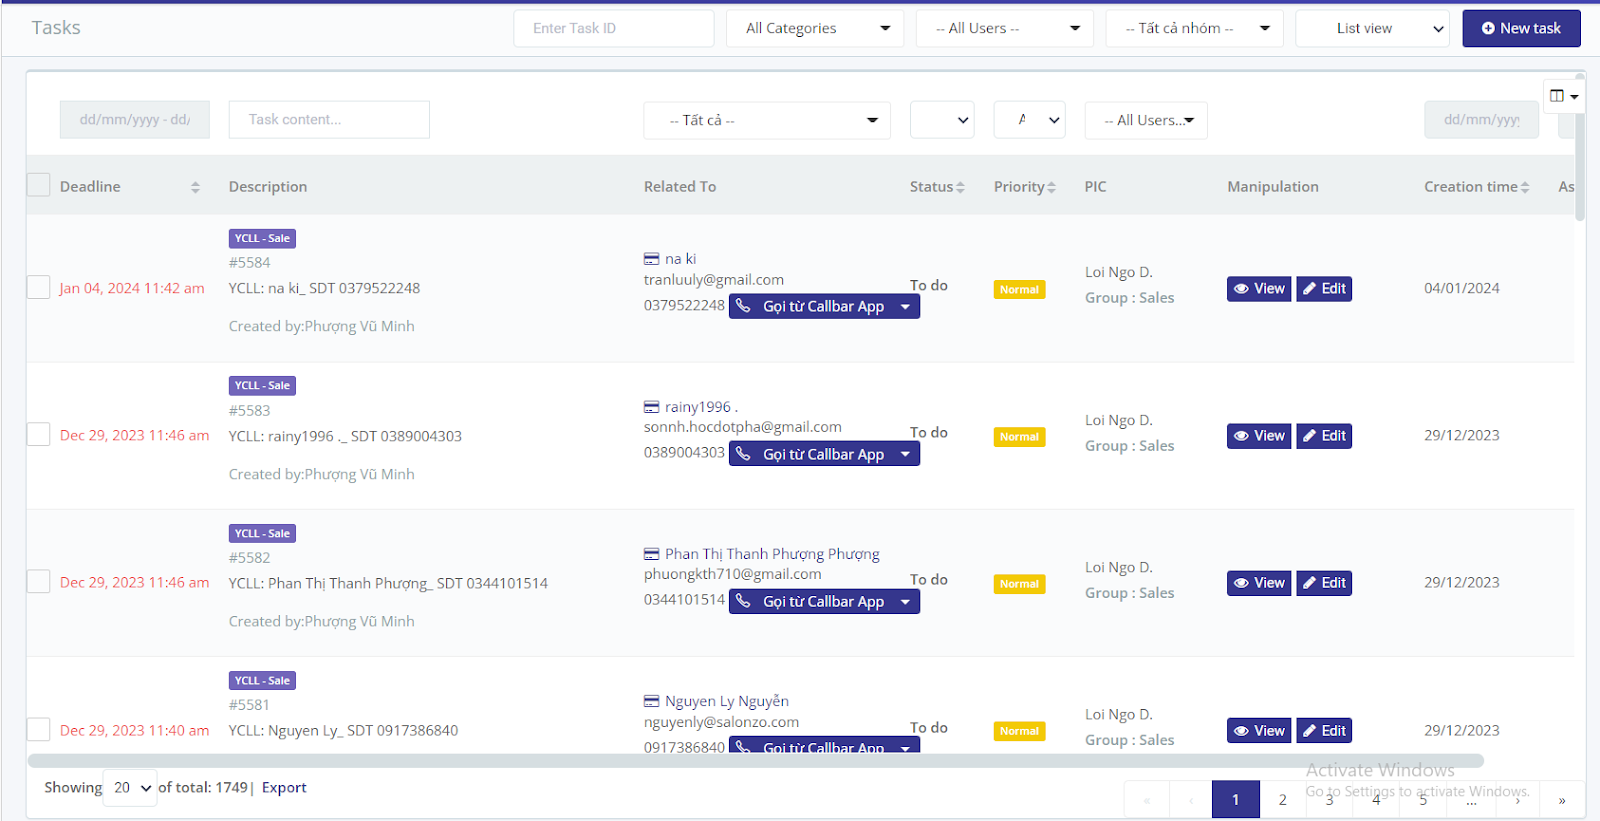
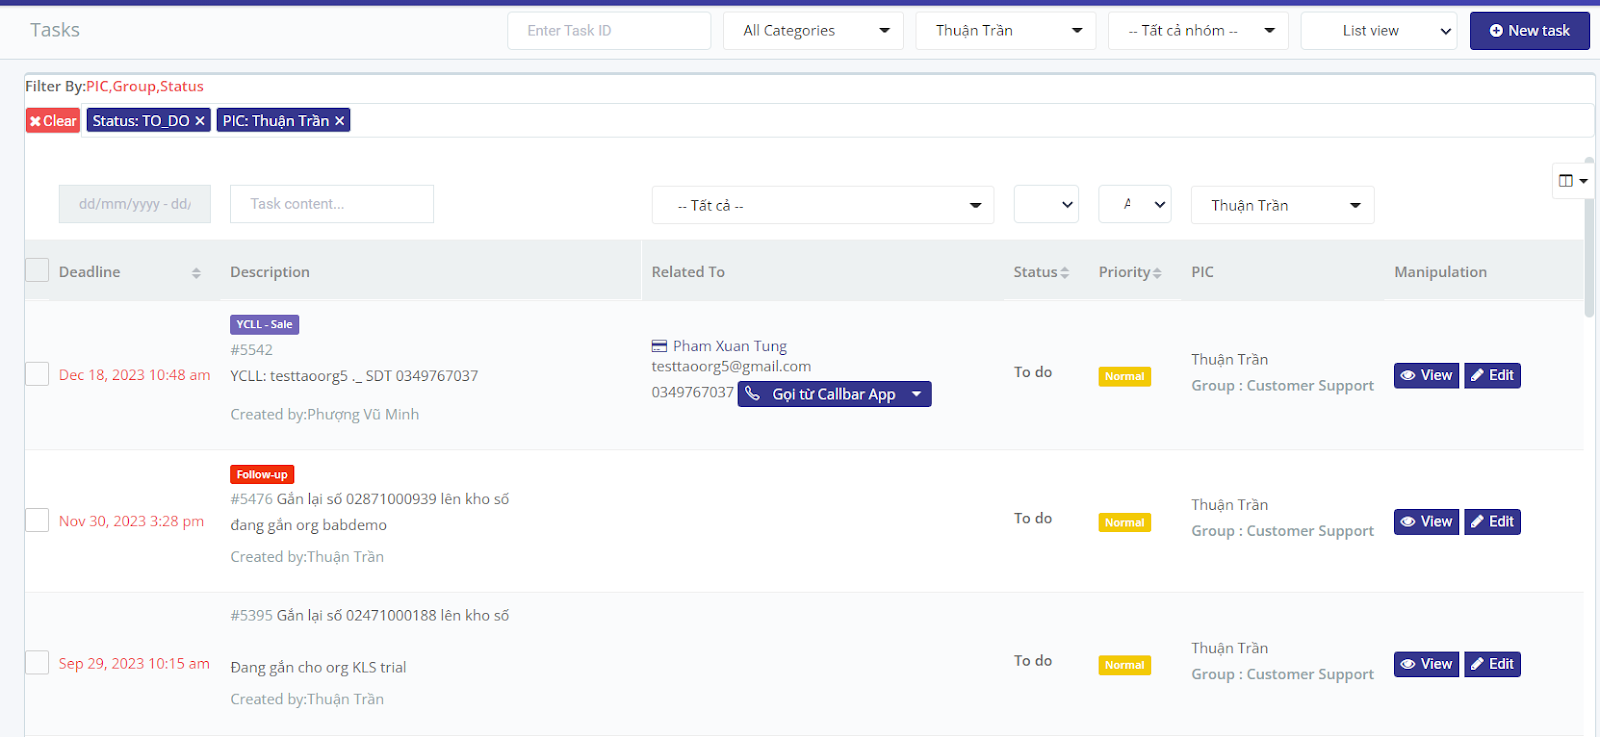

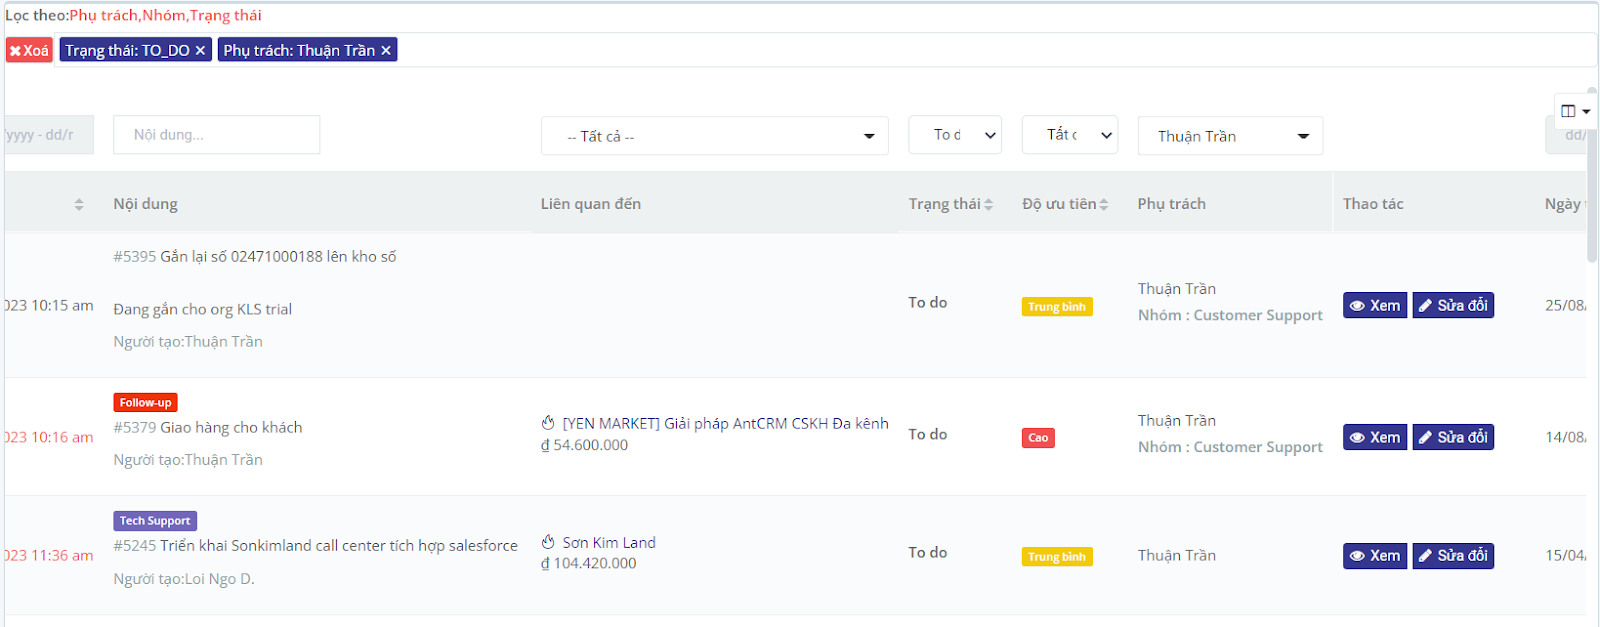

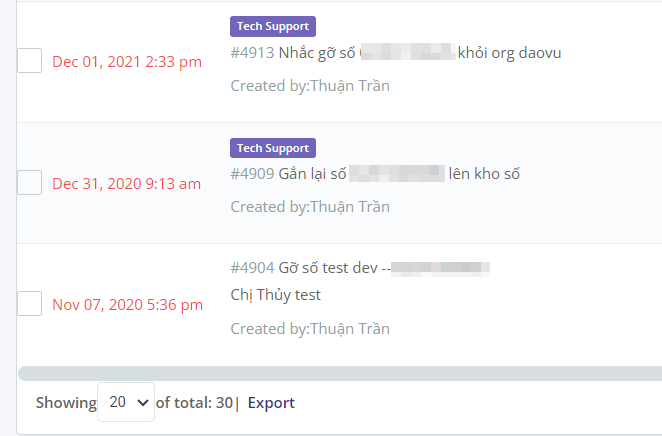

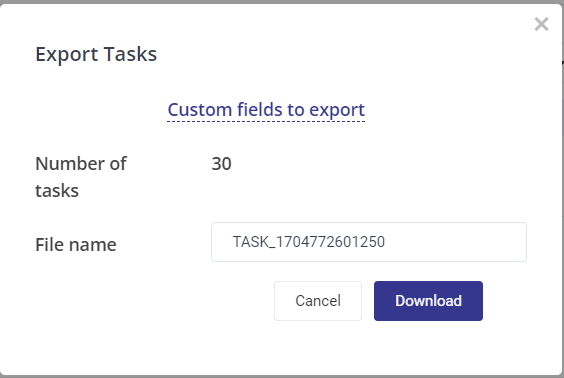


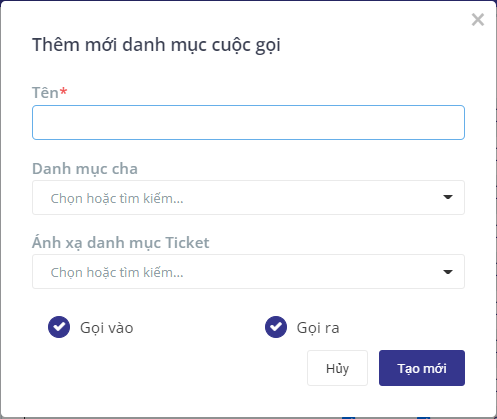
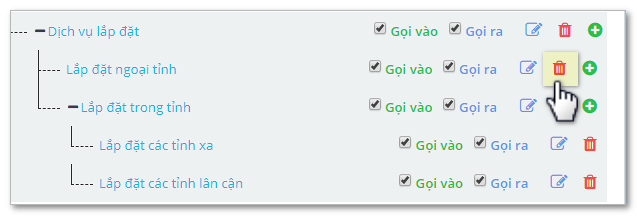


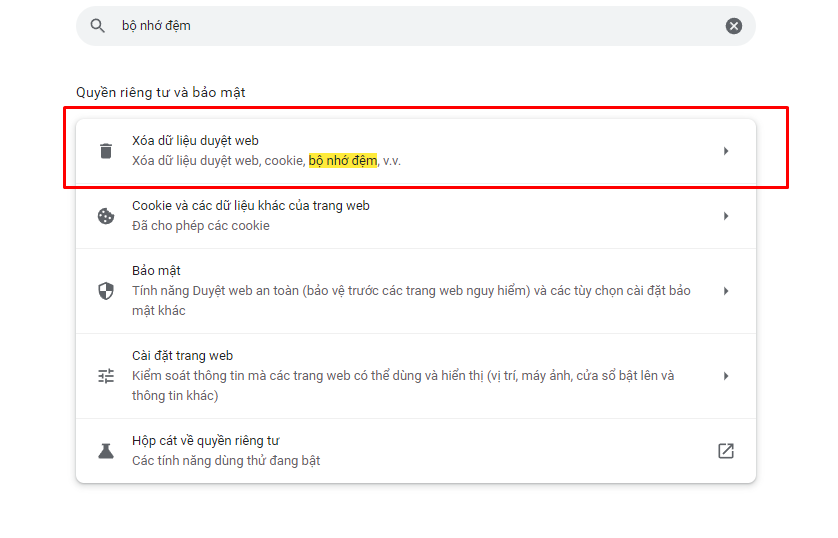
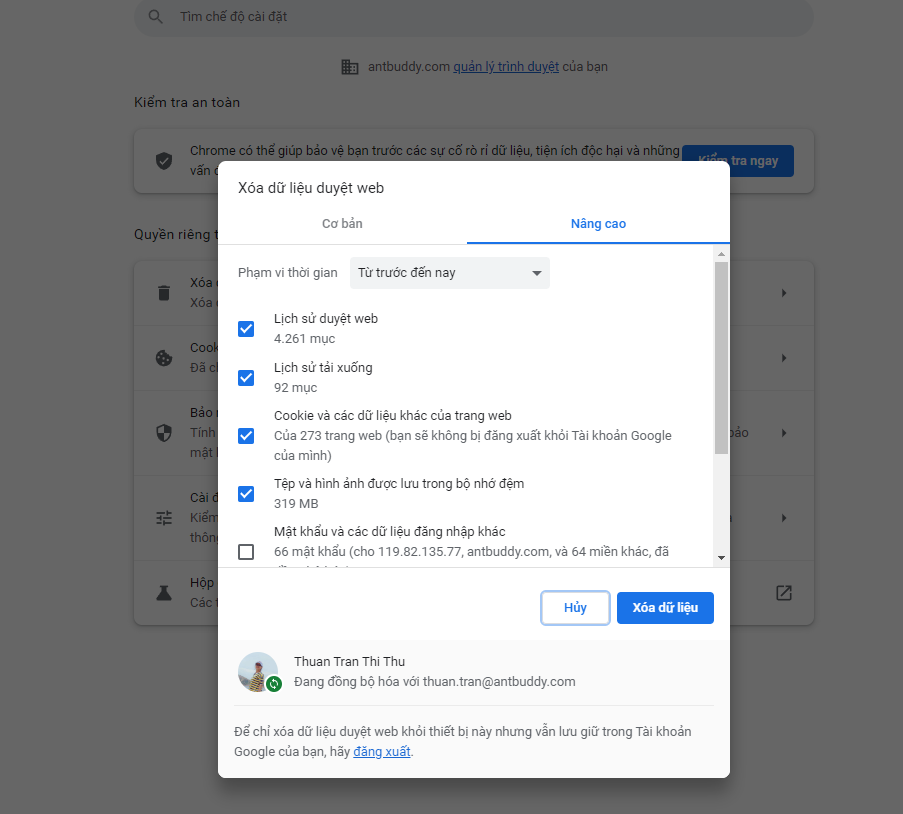
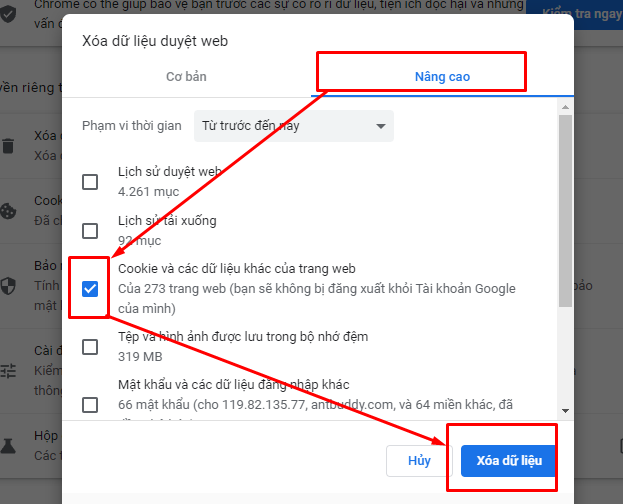

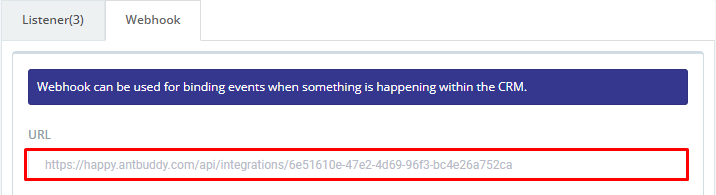


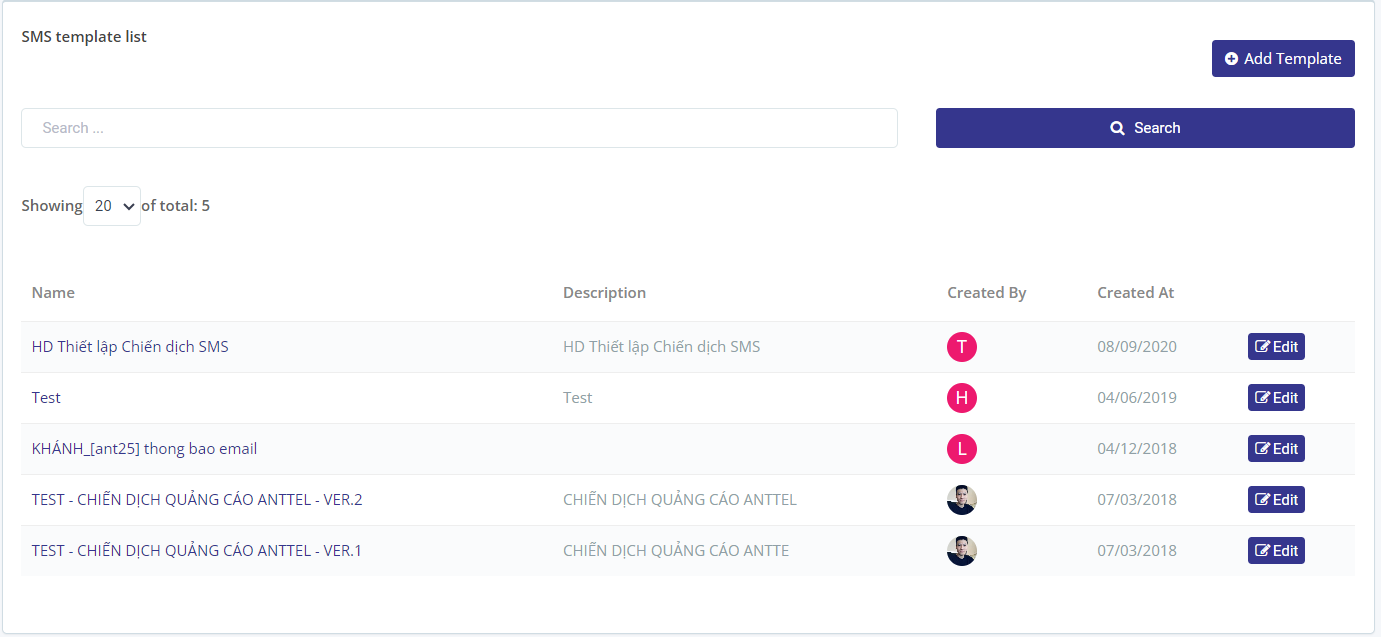

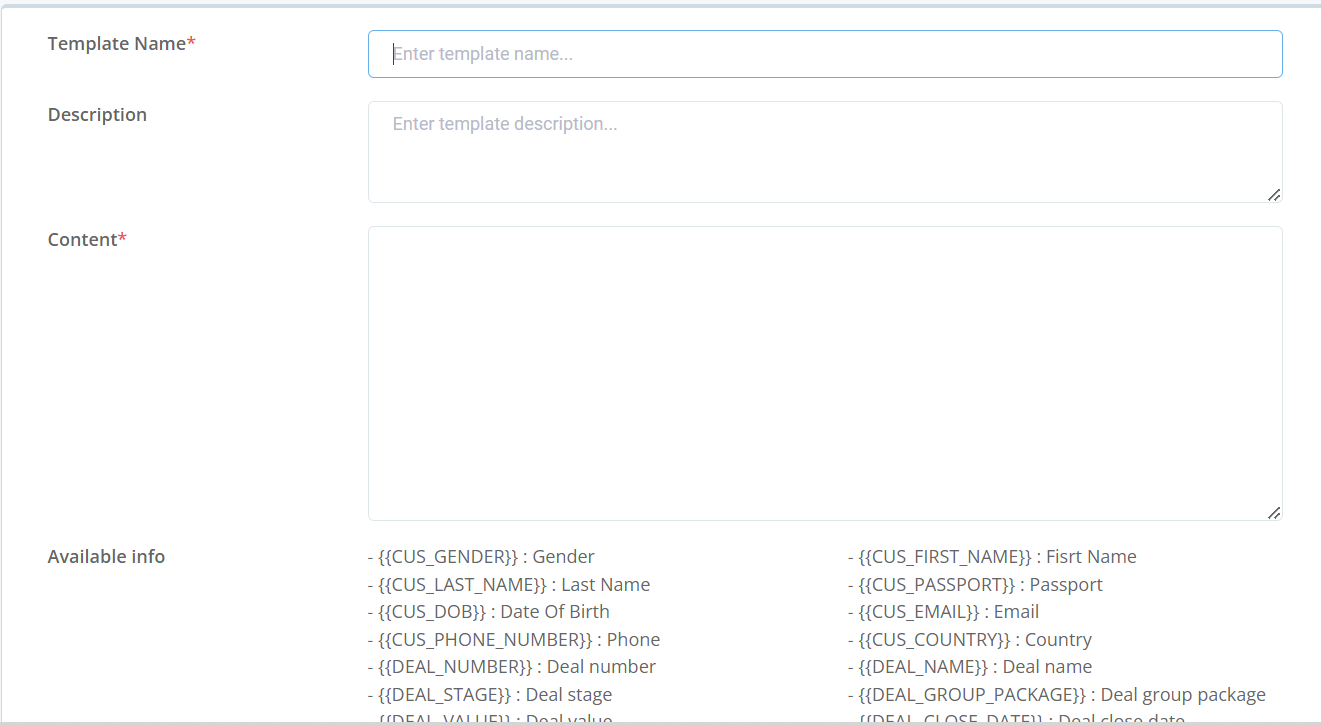
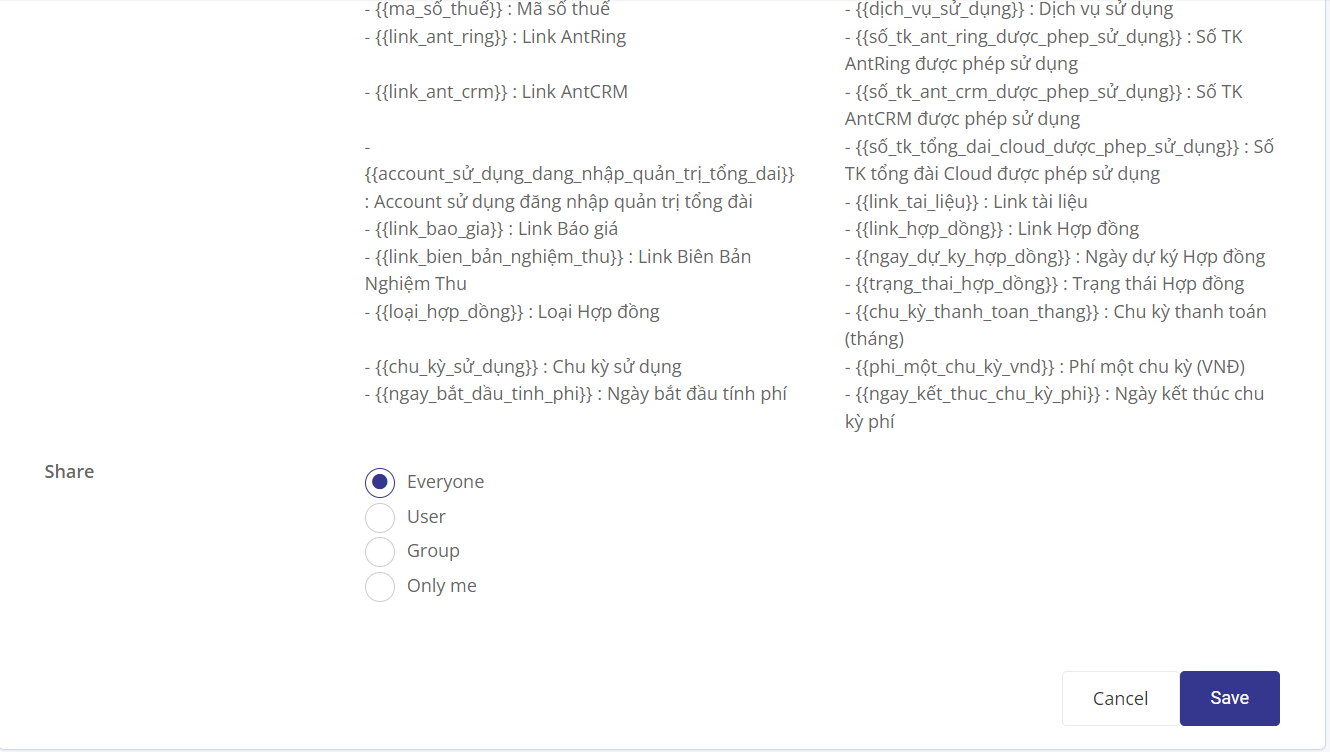
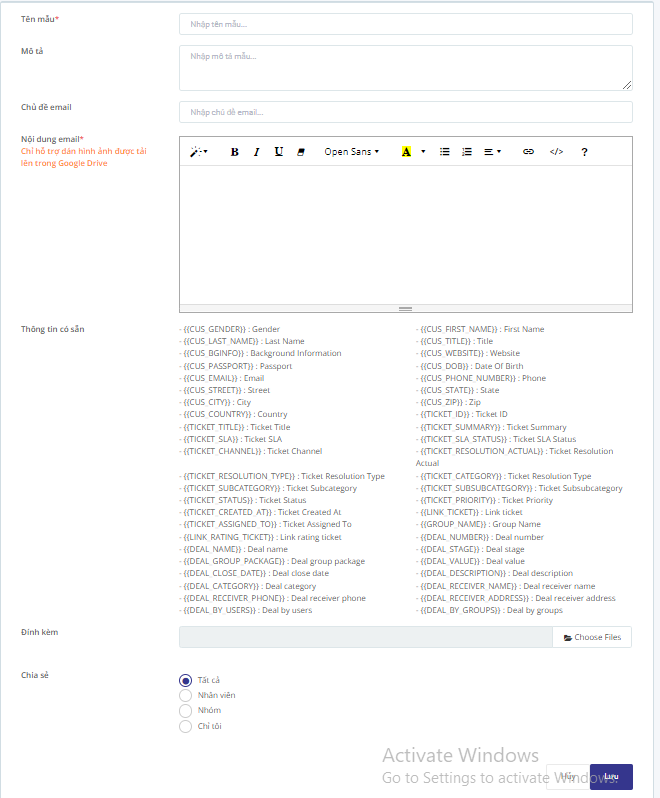
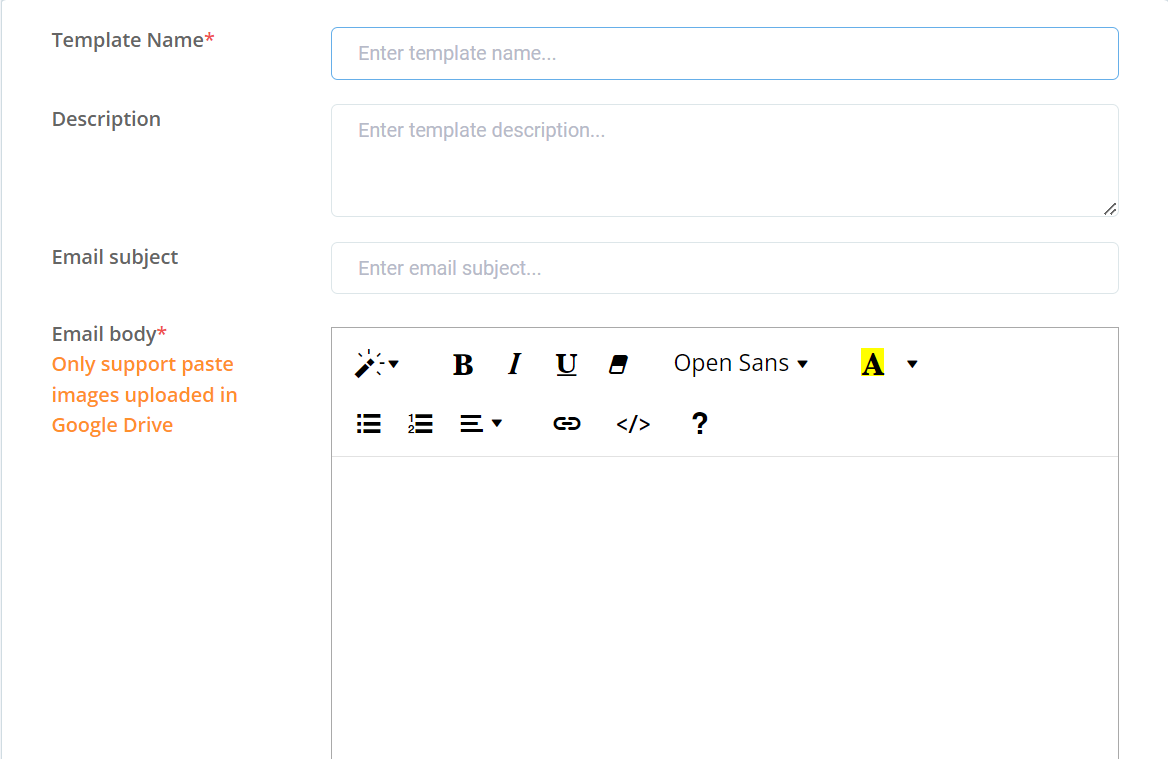
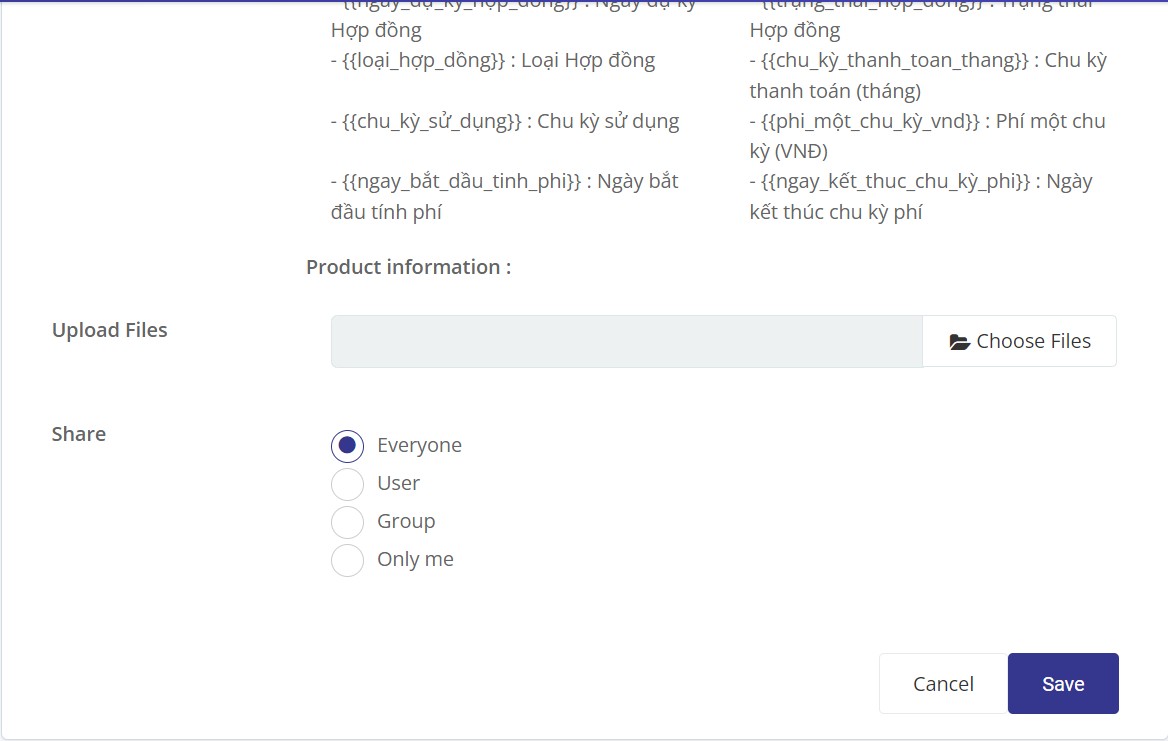


 : Online,
  : Offline,
  : Busy)


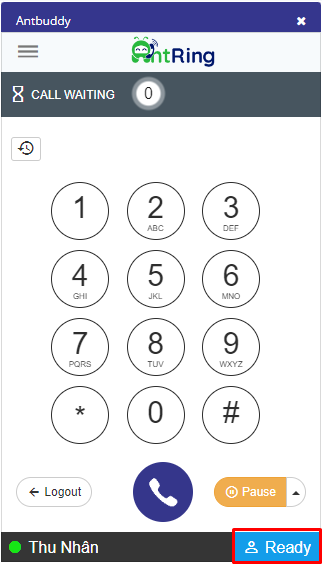 **(2) Thoát Queue:** thực hiện đăng xuất khỏi hàng đợi để không nhận cuộc gọi nữa (thực hiện ở cuối ca làm việc, trước khi thoát ứng dụng) bằng cách bấm vào nút \
\&#xNAN;**((2)Exit Queue:** log out the queue in order not to receive call (made when at the end of work shift, before exiting the application) by pressing button .
**Lưu ý:** cần đợi hệ thống phát thông báo qua loa (tai nghe) và chuyển trạng thái Queue của Agent thành ; nếu hết ca làm việc, nhân viên không thoát queue thì cuộc gọi đến sẽ bị nhỡ.\
(**Note**: Need to wait for the system which broadcasts the notification through the speaker (headphone) and change the queue status of Agent to ; if the work shift ends, the staff does not exit the queue so the incoming call will be missed.)
**(2) Thoát Queue:** thực hiện đăng xuất khỏi hàng đợi để không nhận cuộc gọi nữa (thực hiện ở cuối ca làm việc, trước khi thoát ứng dụng) bằng cách bấm vào nút \
\&#xNAN;**((2)Exit Queue:** log out the queue in order not to receive call (made when at the end of work shift, before exiting the application) by pressing button .
**Lưu ý:** cần đợi hệ thống phát thông báo qua loa (tai nghe) và chuyển trạng thái Queue của Agent thành ; nếu hết ca làm việc, nhân viên không thoát queue thì cuộc gọi đến sẽ bị nhỡ.\
(**Note**: Need to wait for the system which broadcasts the notification through the speaker (headphone) and change the queue status of Agent to ; if the work shift ends, the staff does not exit the queue so the incoming call will be missed.) và xóa bằng cách nhấn nút
  \
(Step 4: After successfully adding the reminder configuration, it will appear on the screen as shown below. Users can make modifications by pressing
\
(Step 4: After successfully adding the reminder configuration, it will appear on the screen as shown below. Users can make modifications by pressing button and delete by pressing
  button)
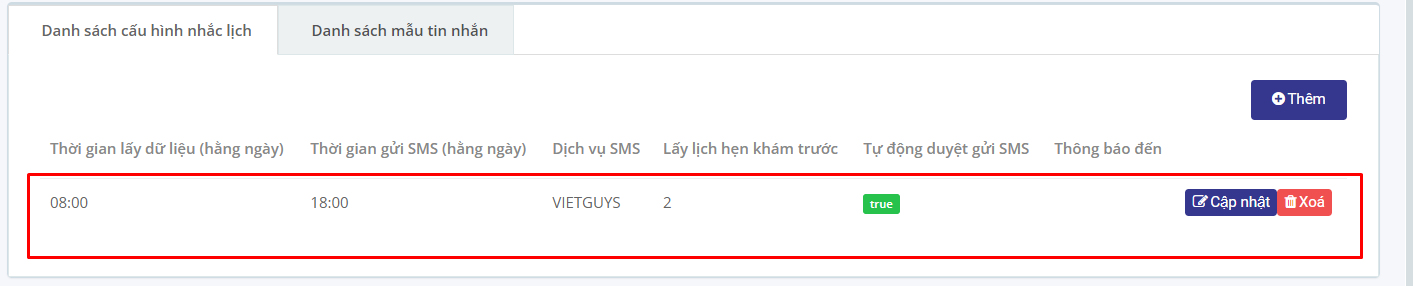

 \
(Step 2: Enter the necessary information in the Appointment Scheduling form, then press
\
(Step 2: Enter the necessary information in the Appointment Scheduling form, then press button)

 button and delete by pressing
  button)